Hands-On Review
Creality Ender 5 S1
When any conversation of starter or affordable 3D printers comes up, it’s a safe bet that Creality will be mentioned. The Creality Ender models are so popular that several companies sell clones of them. Ender printers are so loved because they theoretically offer the most bang for your buck, being equipped with the most desired features like high-temp extruders, auto leveling probes, and magnetic build plates. You’ll be hard pressed to find a 3D printer with all the same features for less money, and it certainly won’t come with the massive community of users that comes with a Creality printer. But is the hype worth it?
I got my hands on an Ender 5 S1 to find out. This cube-frame printer boasts more than just extra rigidity as it’s fitted with a 300°C dual-gear direct drive “Sprite” extruder, a filament runout sensor, and a CR Touch auto leveling probe. It also has a 4.3” touchscreen, power loss recovery, a magnetic bed, and the ability to print at 250mm/s. That’s a lot to test so let’s get to it.

![]()
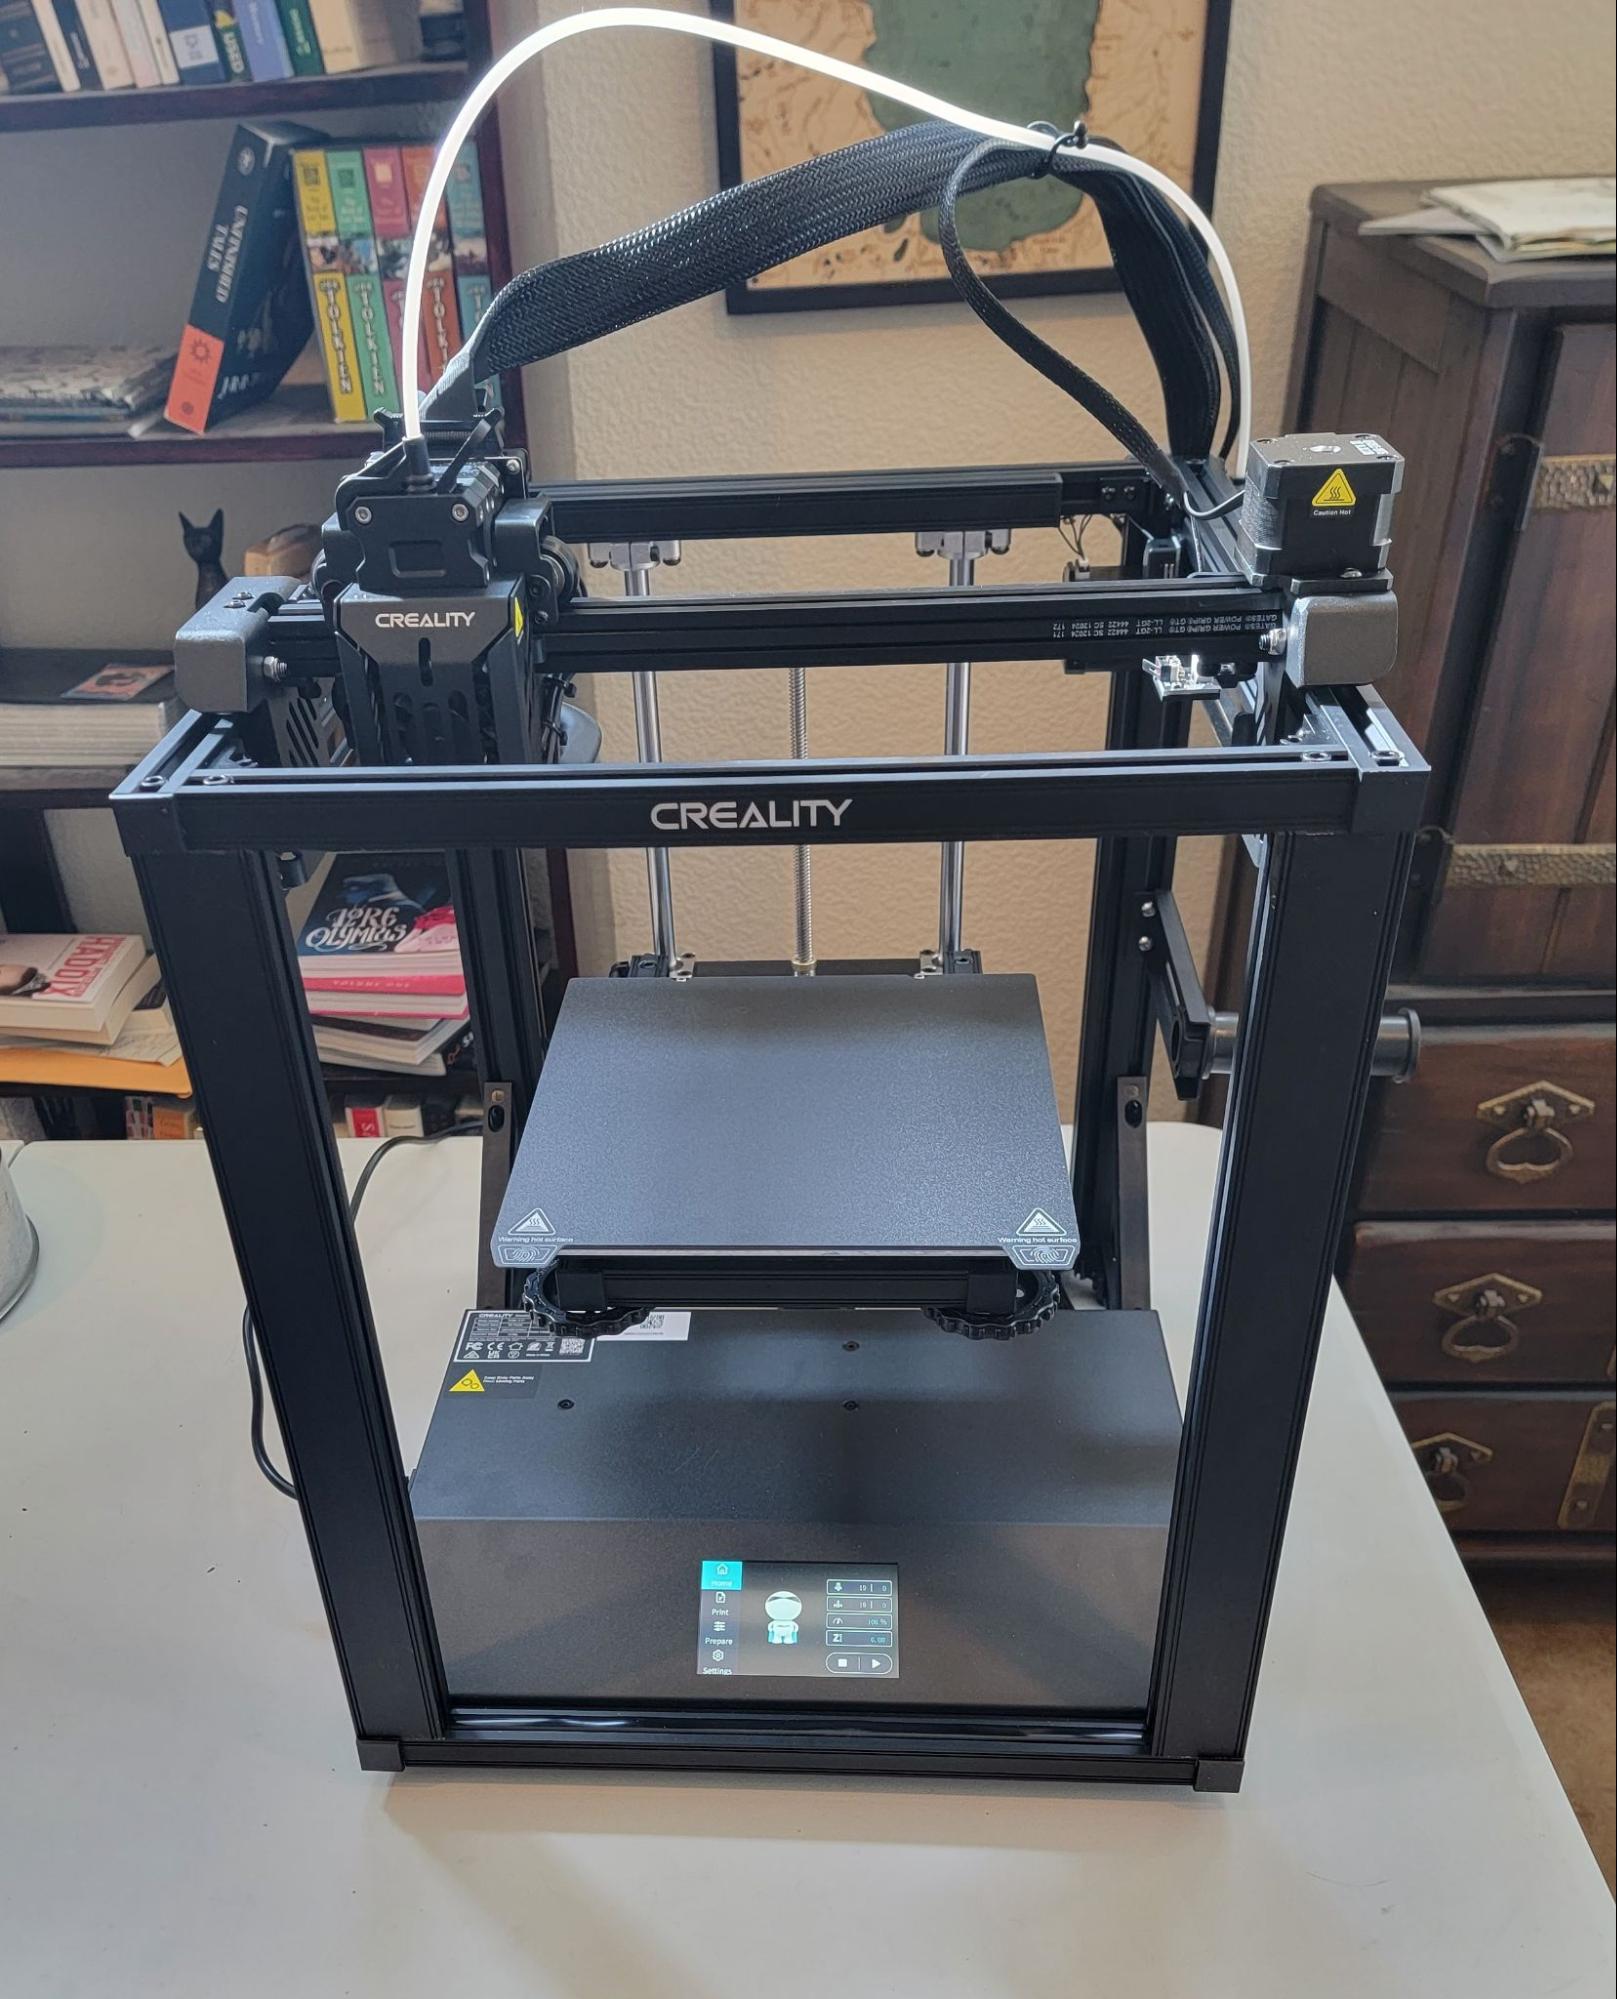
Shipping the printer partly assembled greatly reduces the cost, and it goes together in about an hour so it’s a worthwhile tradeoff. The instructions are clear, and there are also videos to guide the process. The cube frame certainly makes for a sturdy printer.
I don’t normally print the test files that come with the printer but this one had a bunny so I was curious. I tried printing without manually leveling to see how the auto leveling would handle it, and it started printing a full millimeter away from the bed. After manually leveling, it printed fine.
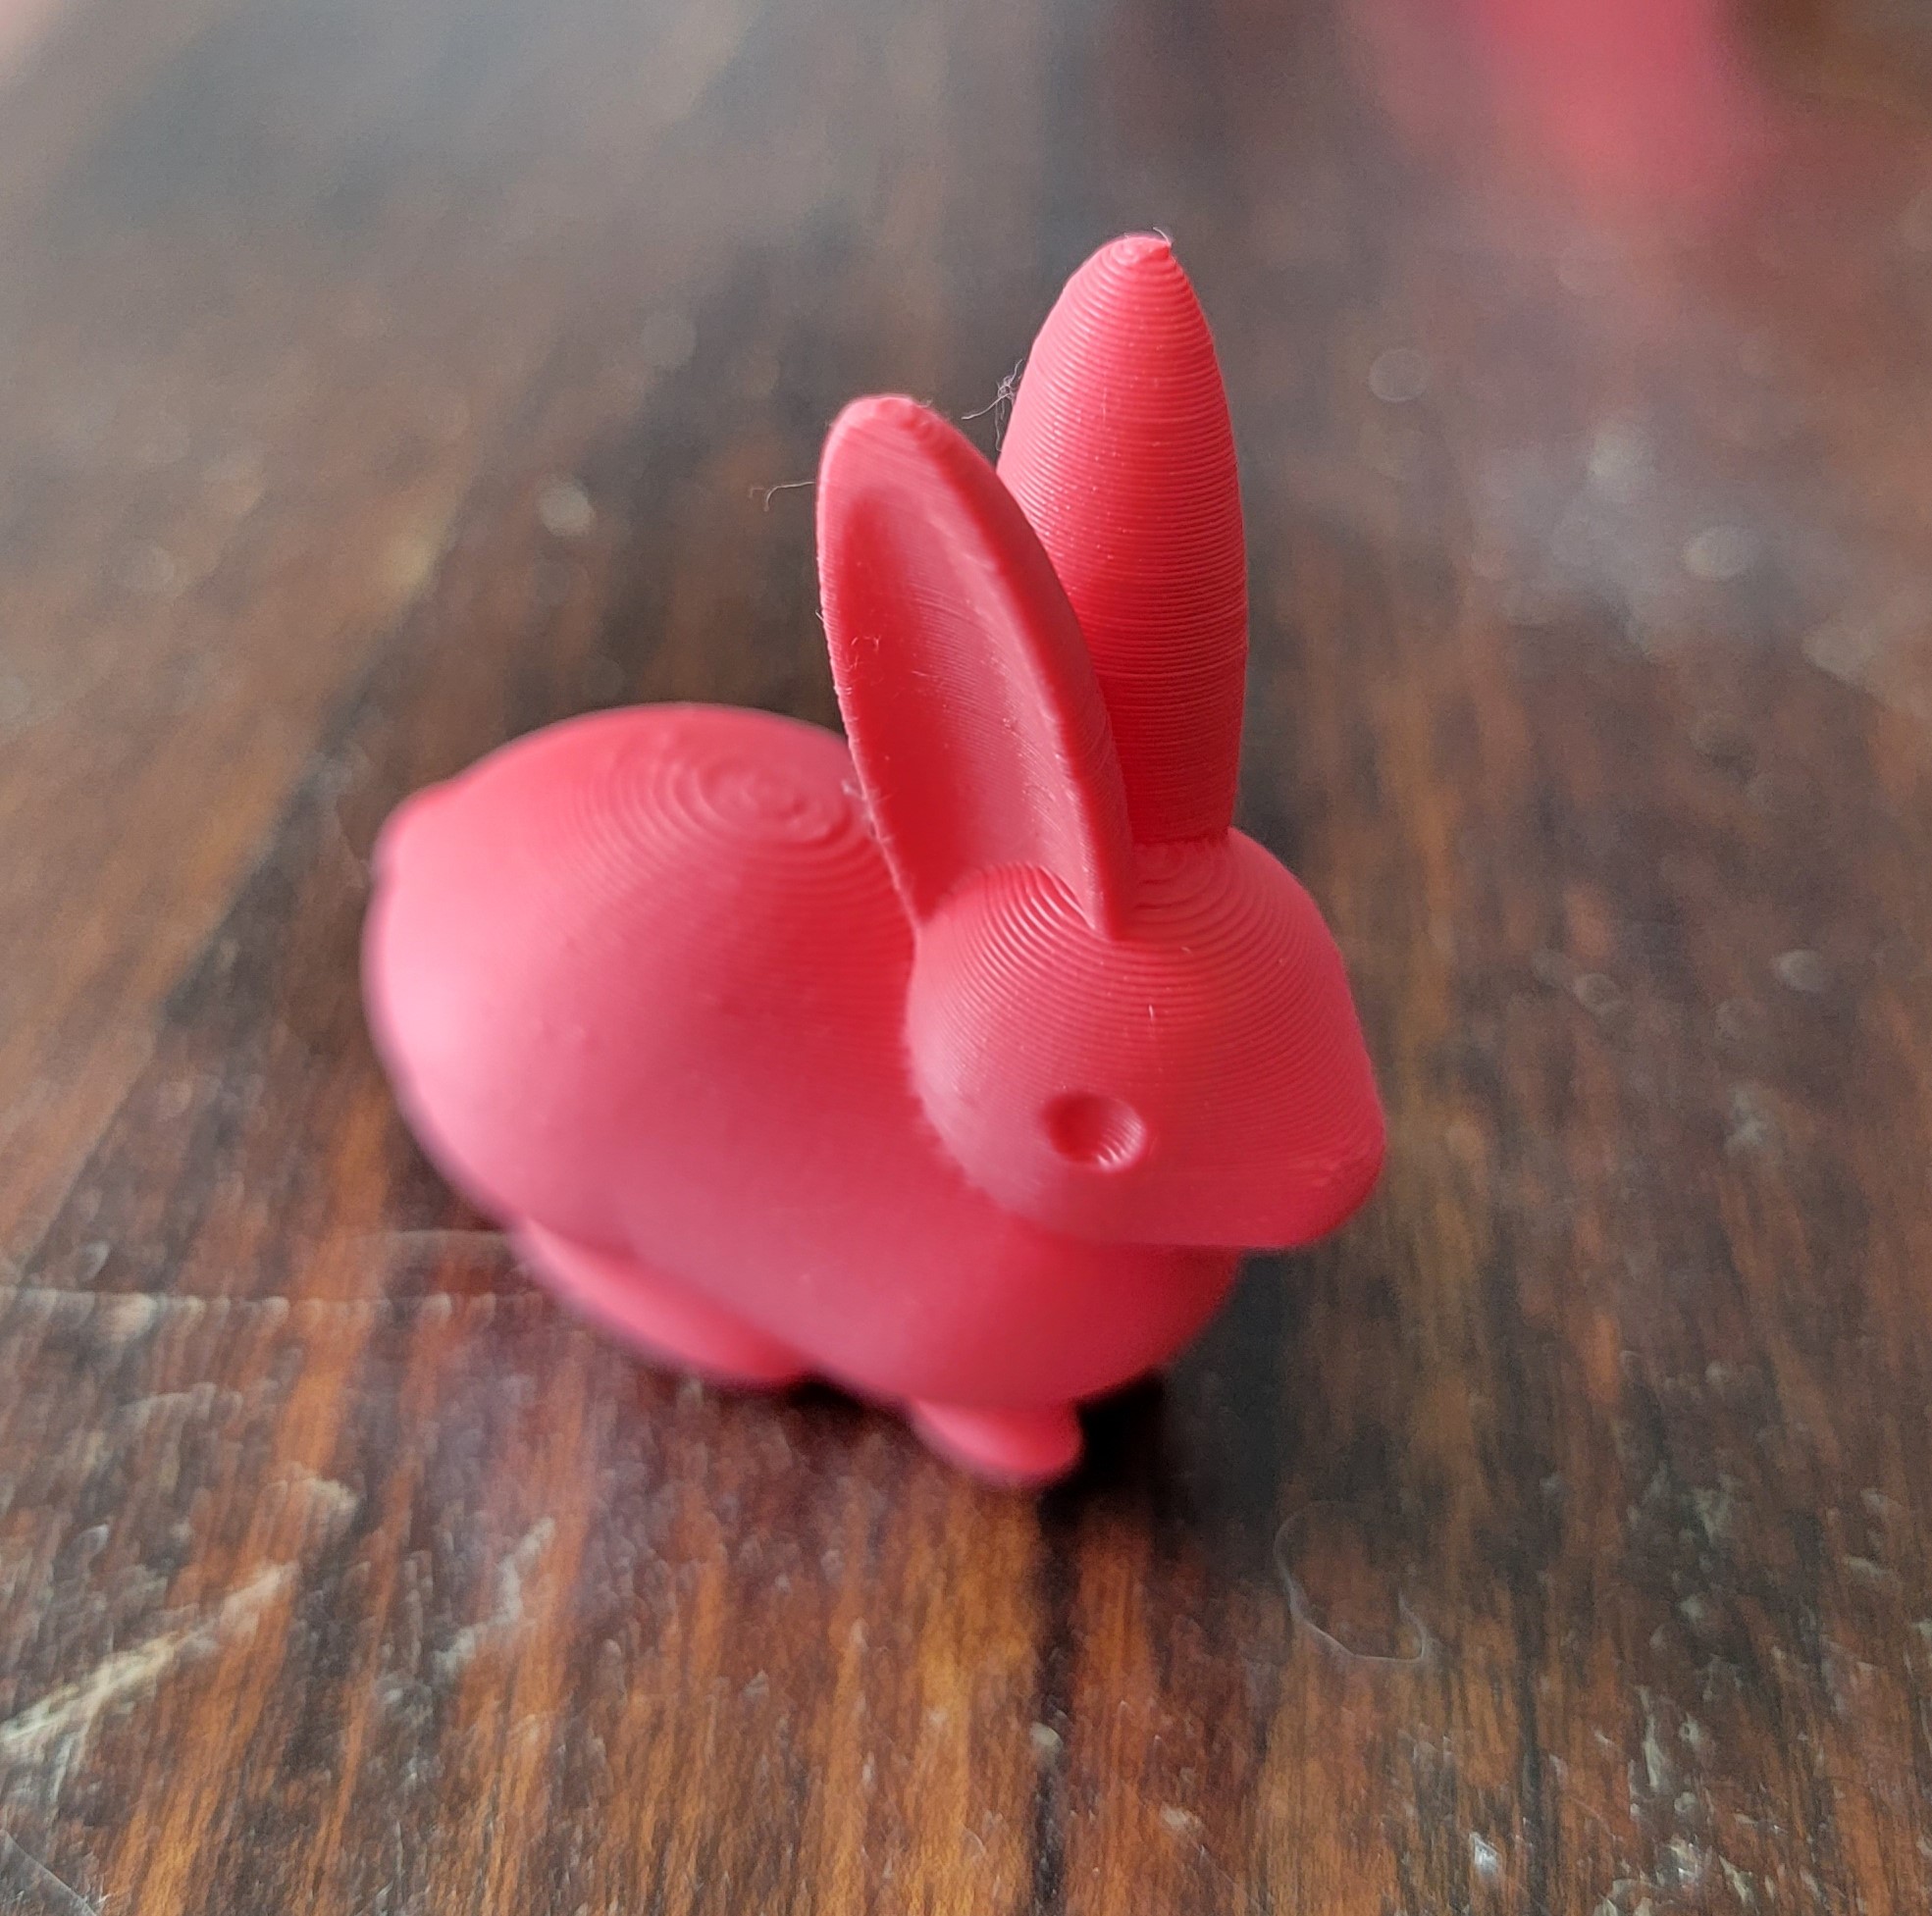
It’s a great print. Adorable. Okay, bear with me for a brief rant. If I’ve already leveled the bed, why do I need auto leveling? This isn’t something I hold against Creality because I’ve had almost entirely negative experiences with auto leveling systems across various printers. The best first layers print on a leveled surface, which is easy to achieve manually on pretty much every printer, and having the printer probe a level bed before every print is just a waste of time. I removed the probing from the starting gcode for the rest of the review, and I’ll take this opportunity to ask that we, the 3D printing community, stop requiring printer manufacturers to include auto leveling. It’s not necessary and it just makes the printers cost more and have more parts that can break. Rant over. Let’s move on to the first actual print, Benchy!

That’s a quality print. The only real imperfection is a tiny one on the arch; the rest of the overhangs are good. The top surfaces are solid and the small features came out well. The default print speed on the Ender 5 S1 is 120mm/s, which makes this print all the more impressive because it took significantly less time to print than most Benchies.
The Creality Slicer appears to be a version of Cura, and after printing a couple objects, I tried regular Cura and liked the quality more so I stuck with that for the review. As a reminder, in an effort to minimize plastic waste, I try to print objects that I can use or give to loved ones. To test moving parts, I print this handy Machine Canister.
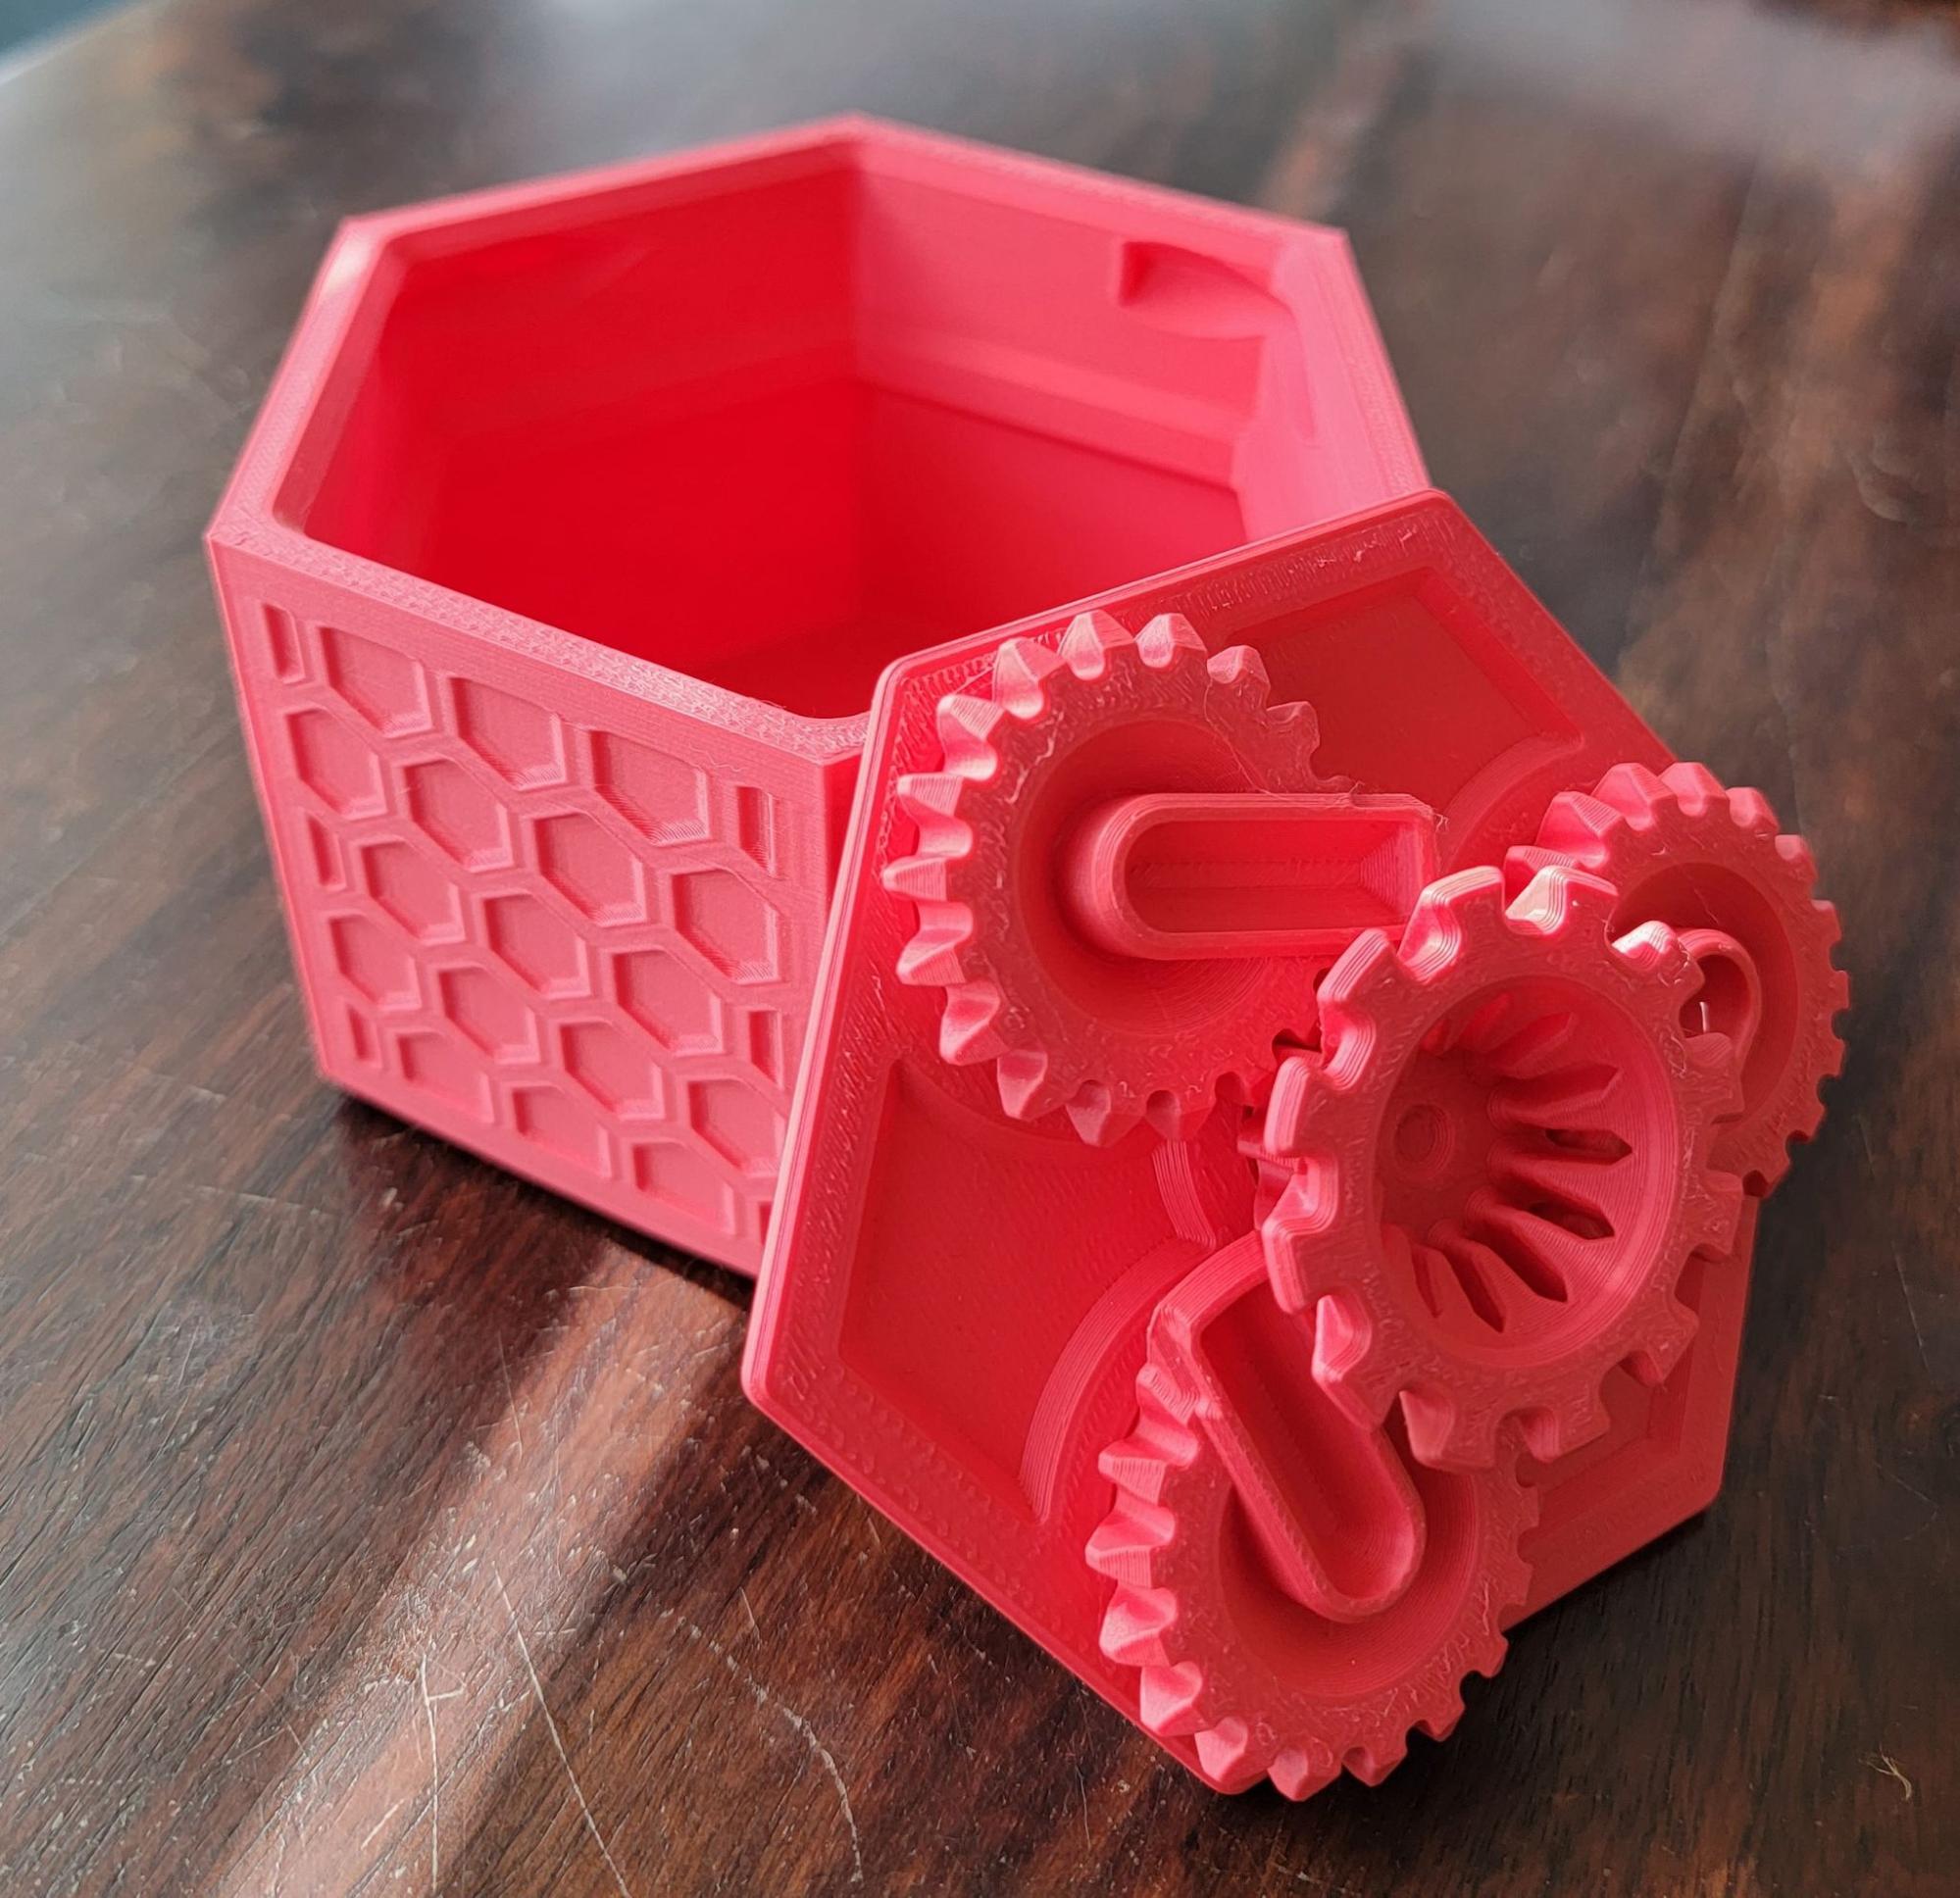
These prints came out looking clean and working well. The lid was printed at the standard 120mm/s and the gears turn smoothly. The canister was printed at 250mm/s and you can’t tell by looking at it because the inside is completely smooth and the outer design is crisp. Combined, these parts took a little over five hours to complete. Very impressive. The extruder is designed to handle a variety of materials so that’s what I tried next. I needed a simple door block so I printed it in ASA.
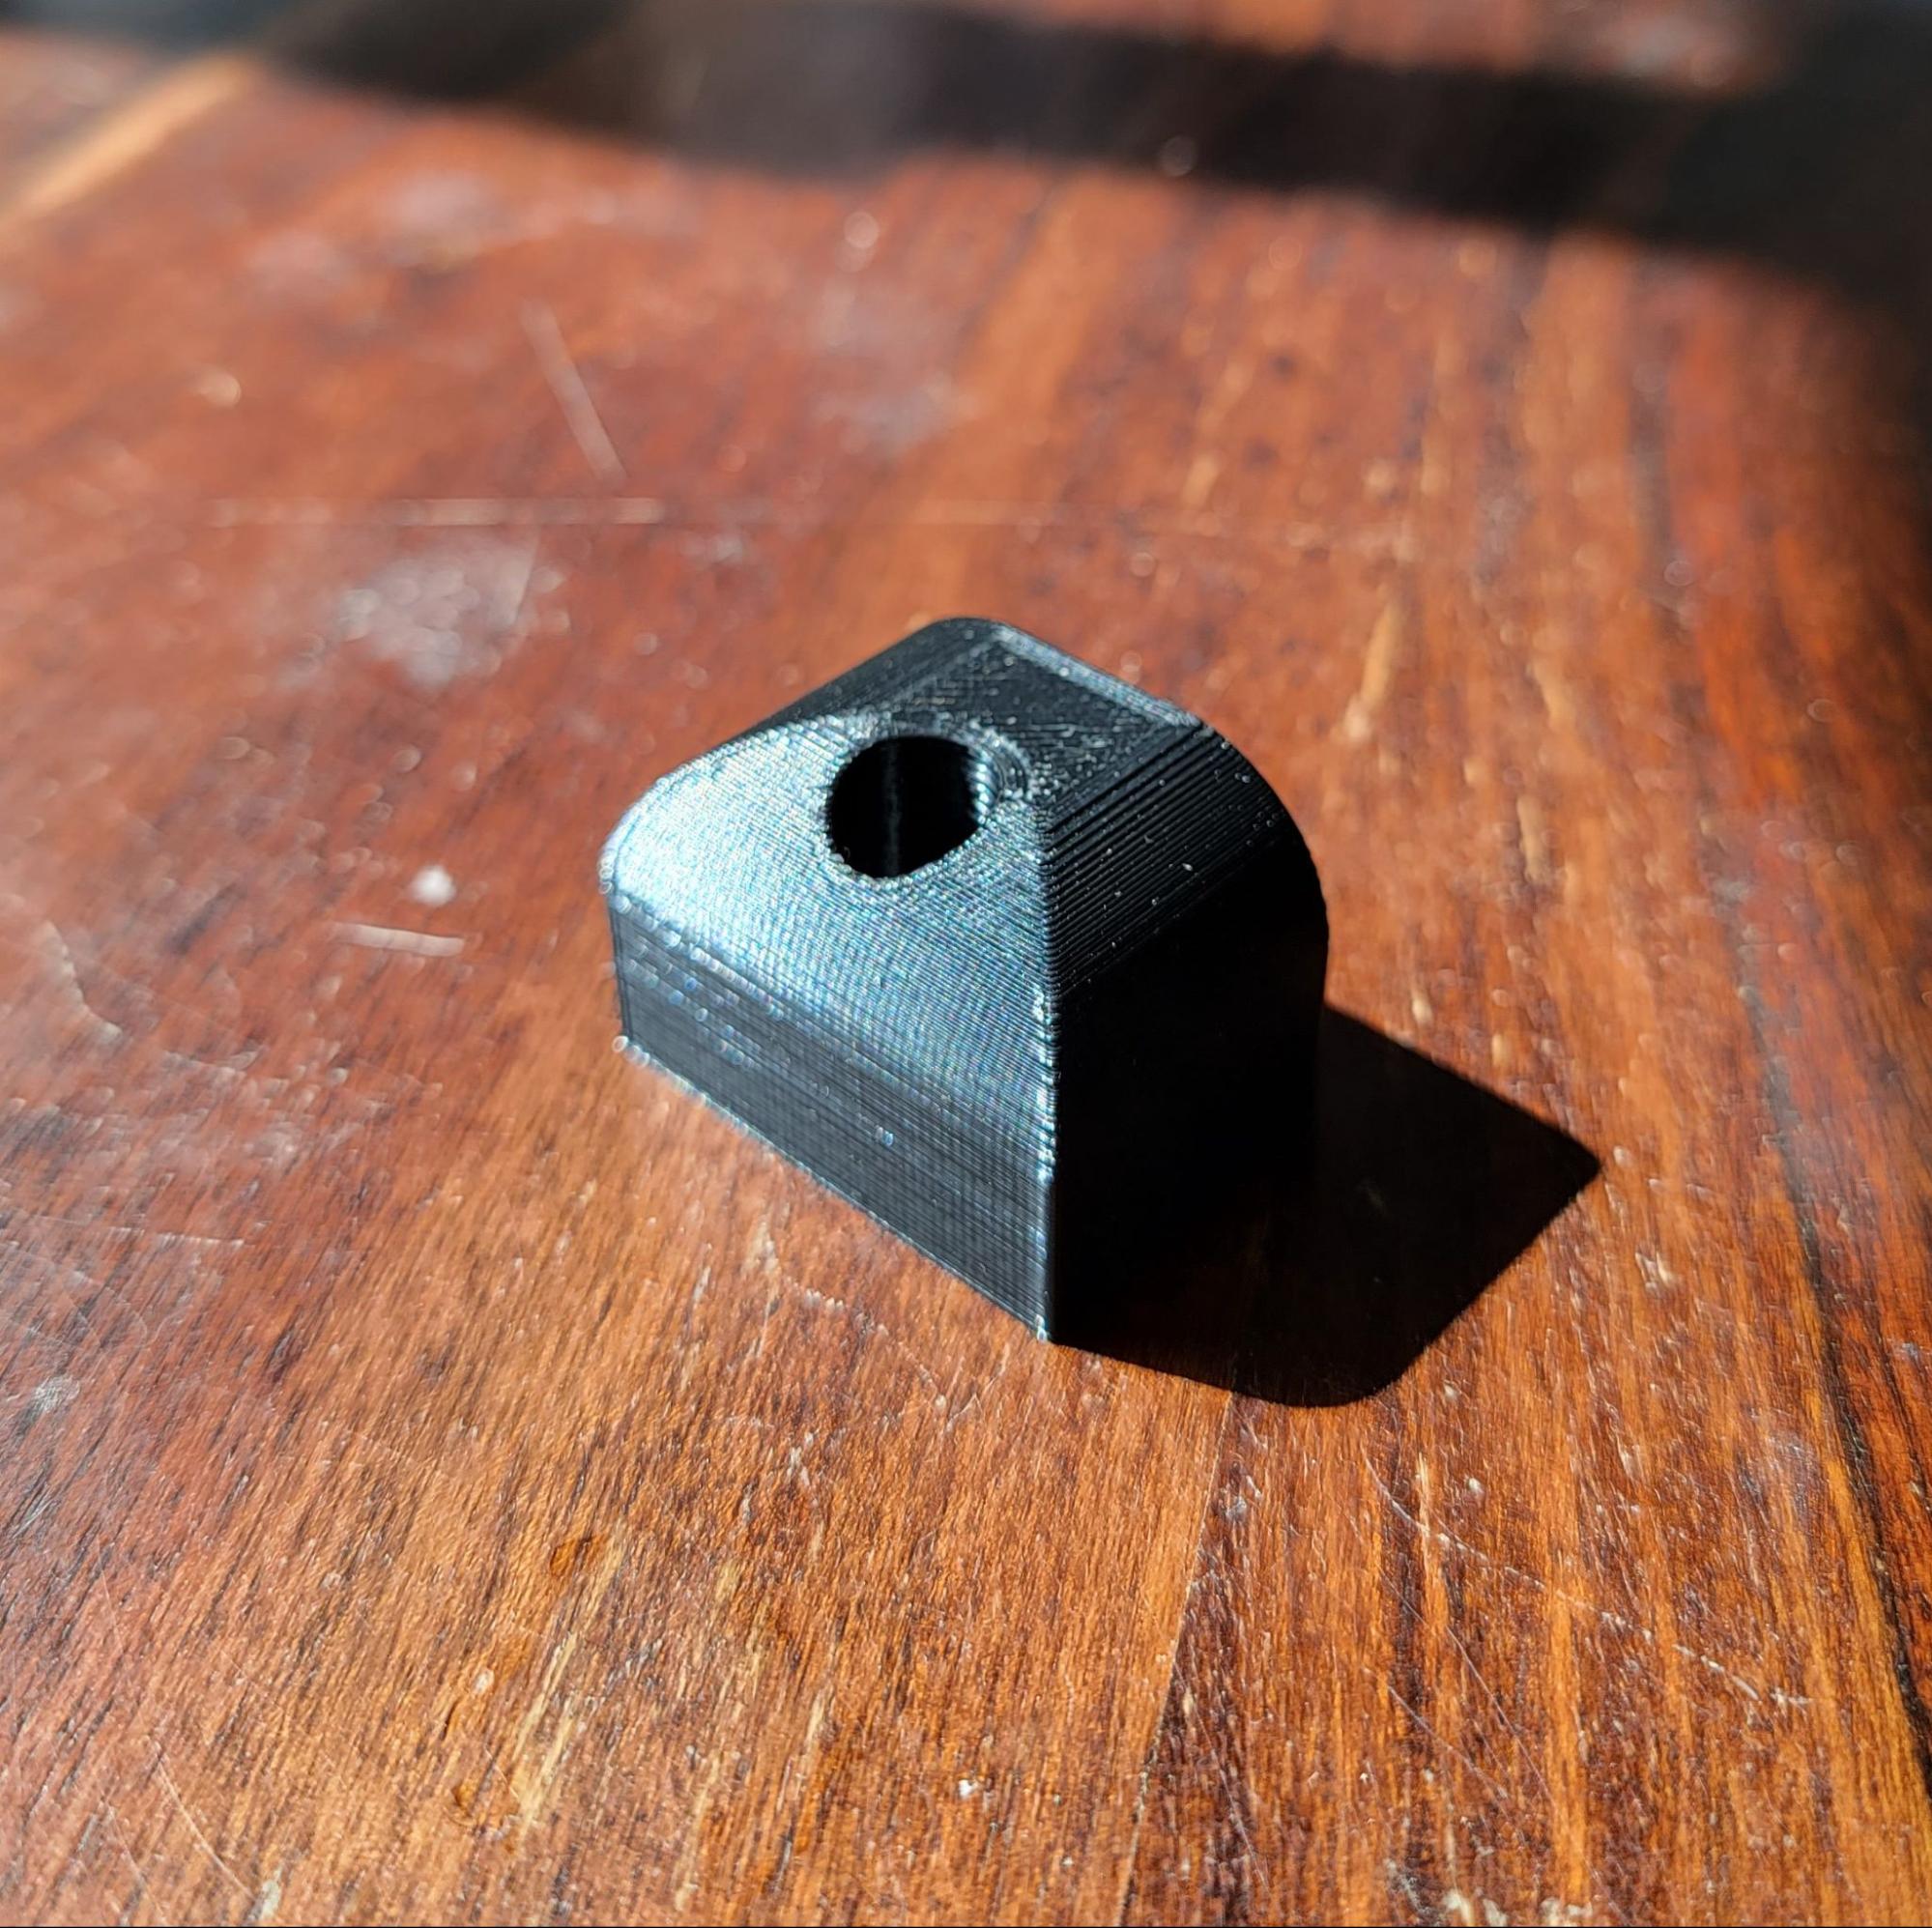
It came out good, though it warped slightly off the bed because it’s about 68° in my library currently and the printer is open. I tried printing the same part in ABS and experienced more warping and a lot of delamination, so it can print these materials but they’ll do much better with the optional acrylic enclosure. It’s under $60 so it’s definitely worth the money. Time to try PETG with Pom Pom Purin!

The PETG printed cleanly with smooth walls and no warping. Since I needed a different color for the face and hat, I went with some PLA infused with coffee waste, and it also printed with no issues. TPU is one of the more finicky materials to print with, but the “Sprite” extruder’s 80N of force is supposed to help with that. I printed this Tree Coaster to find out.
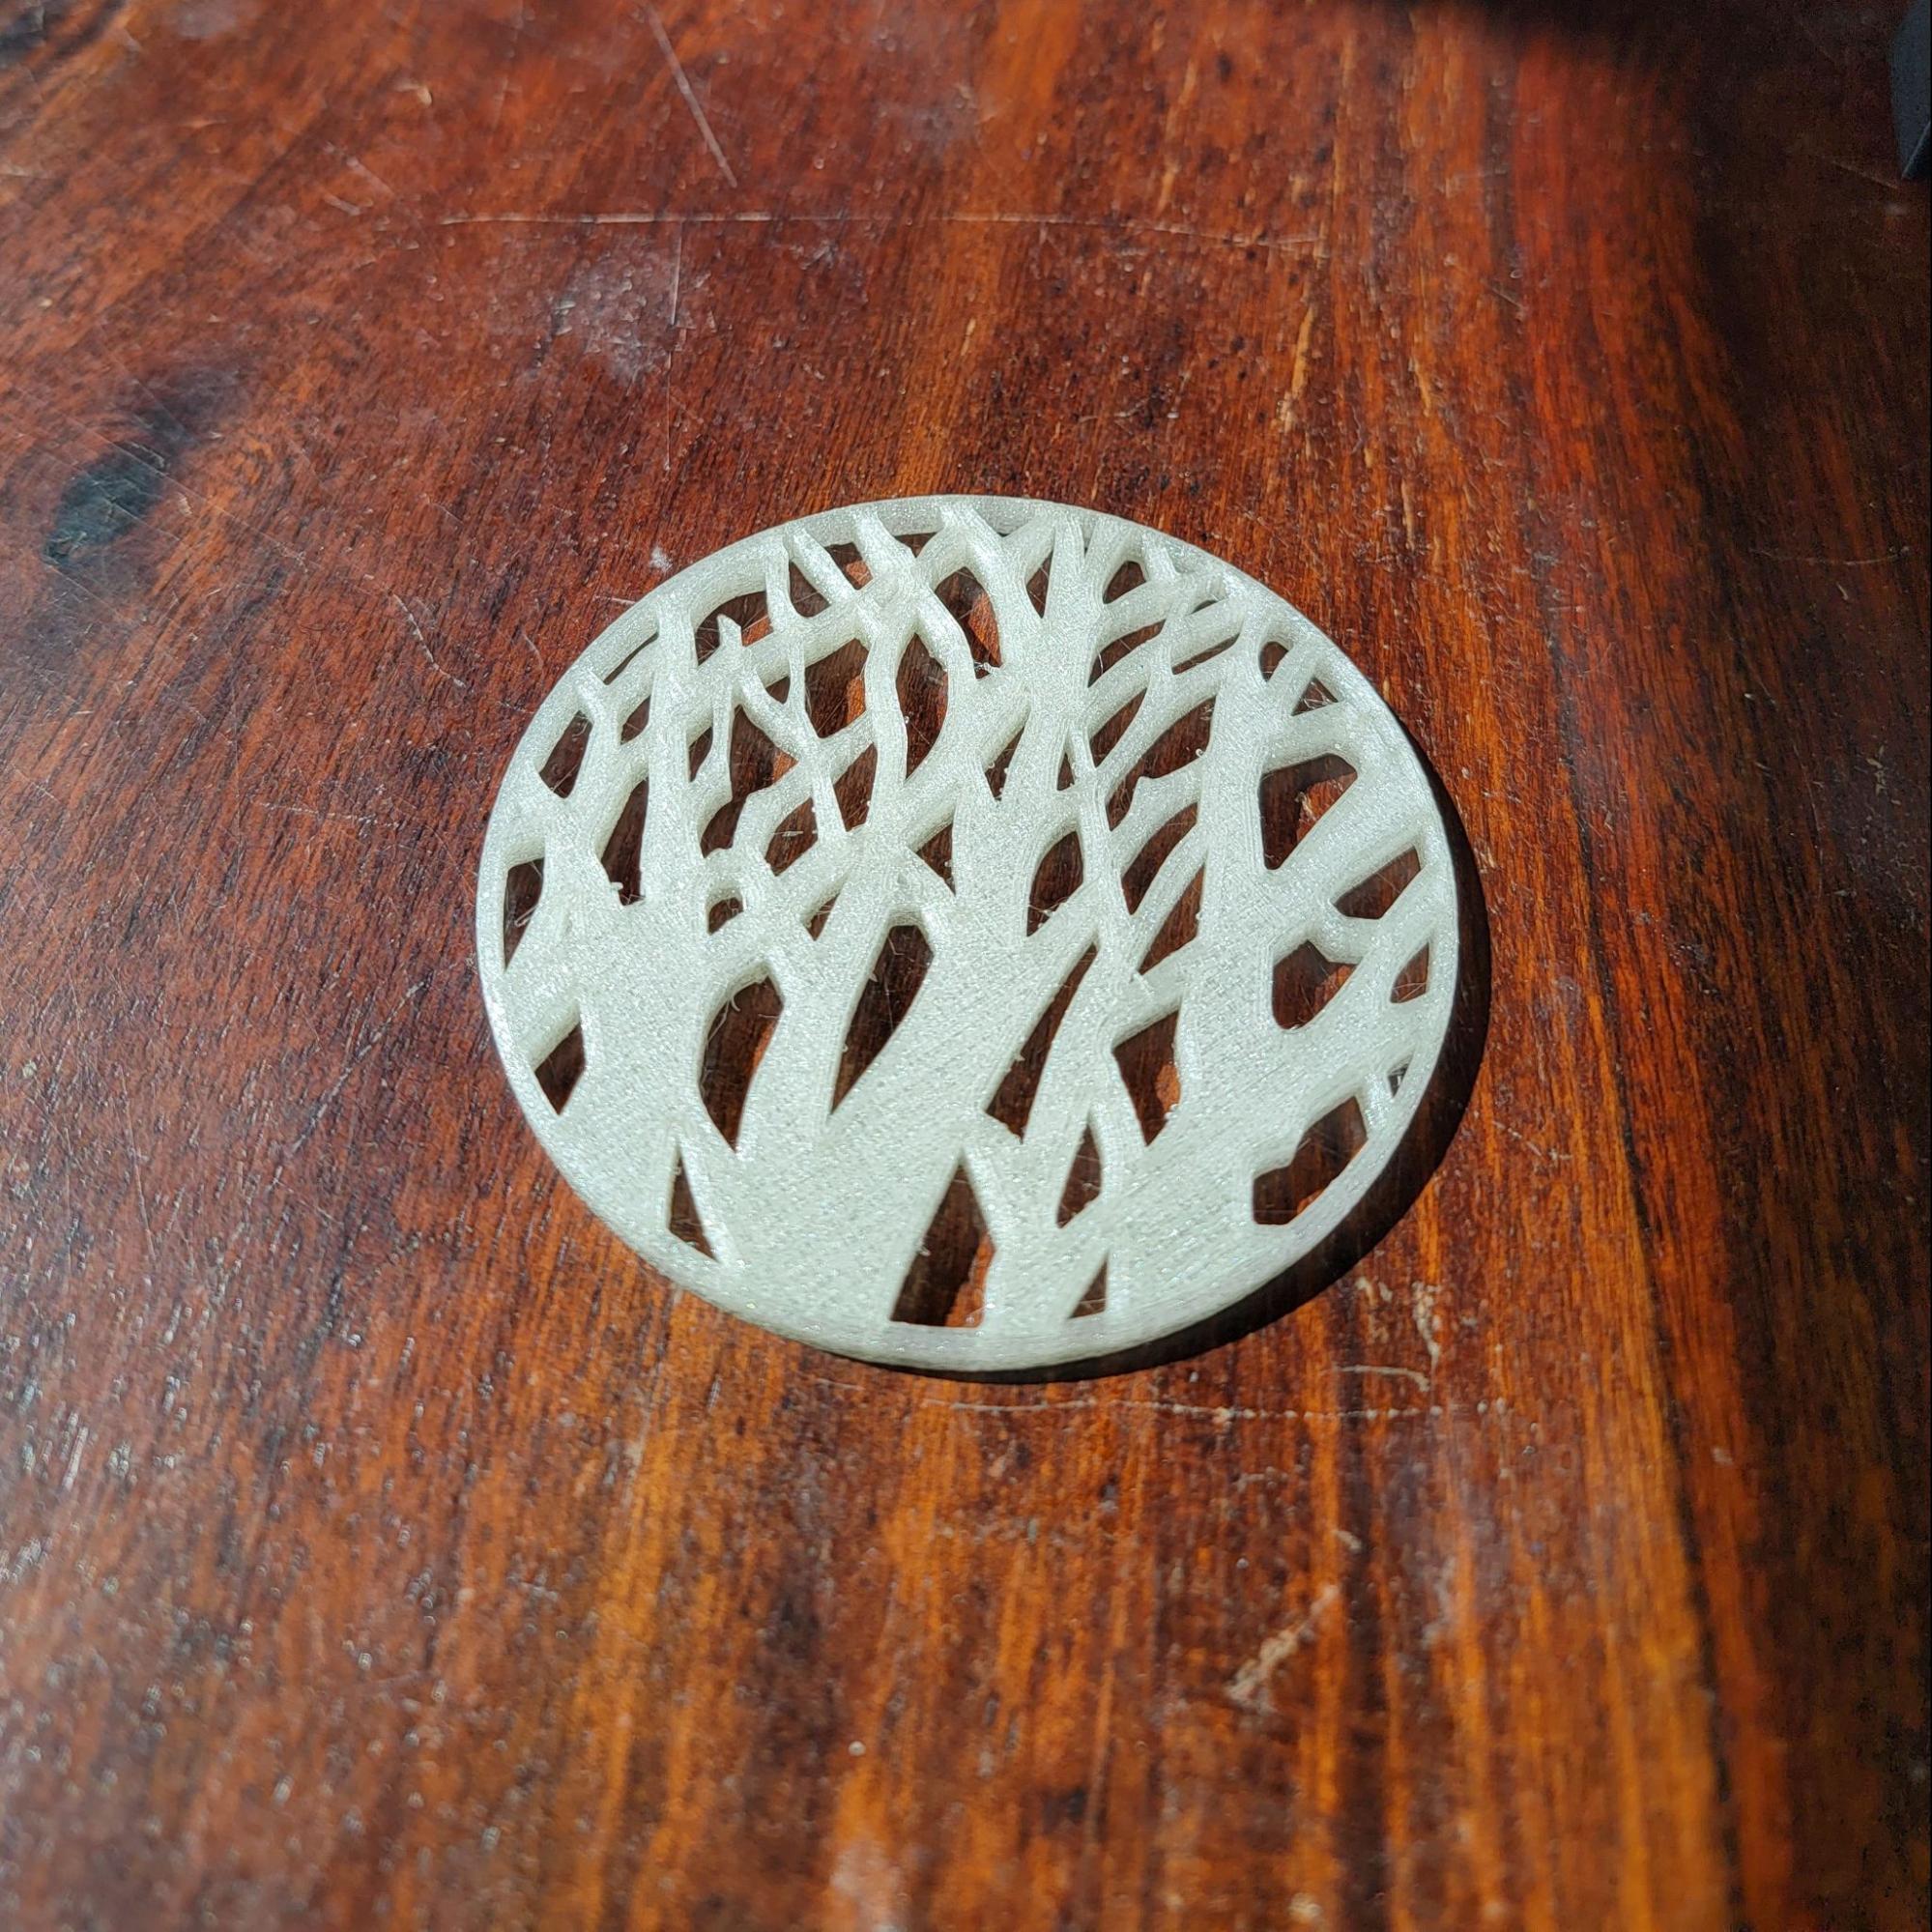
No problem! There was some minor stringing but that’s no big deal. TPU is one of the most functional 3D printing materials due to its flexibility and toughness, so being able to handle it is important. Quality is also important though, so let’s see how it does with 0.1mm layers on this Legend of Zelda Pen Holder.
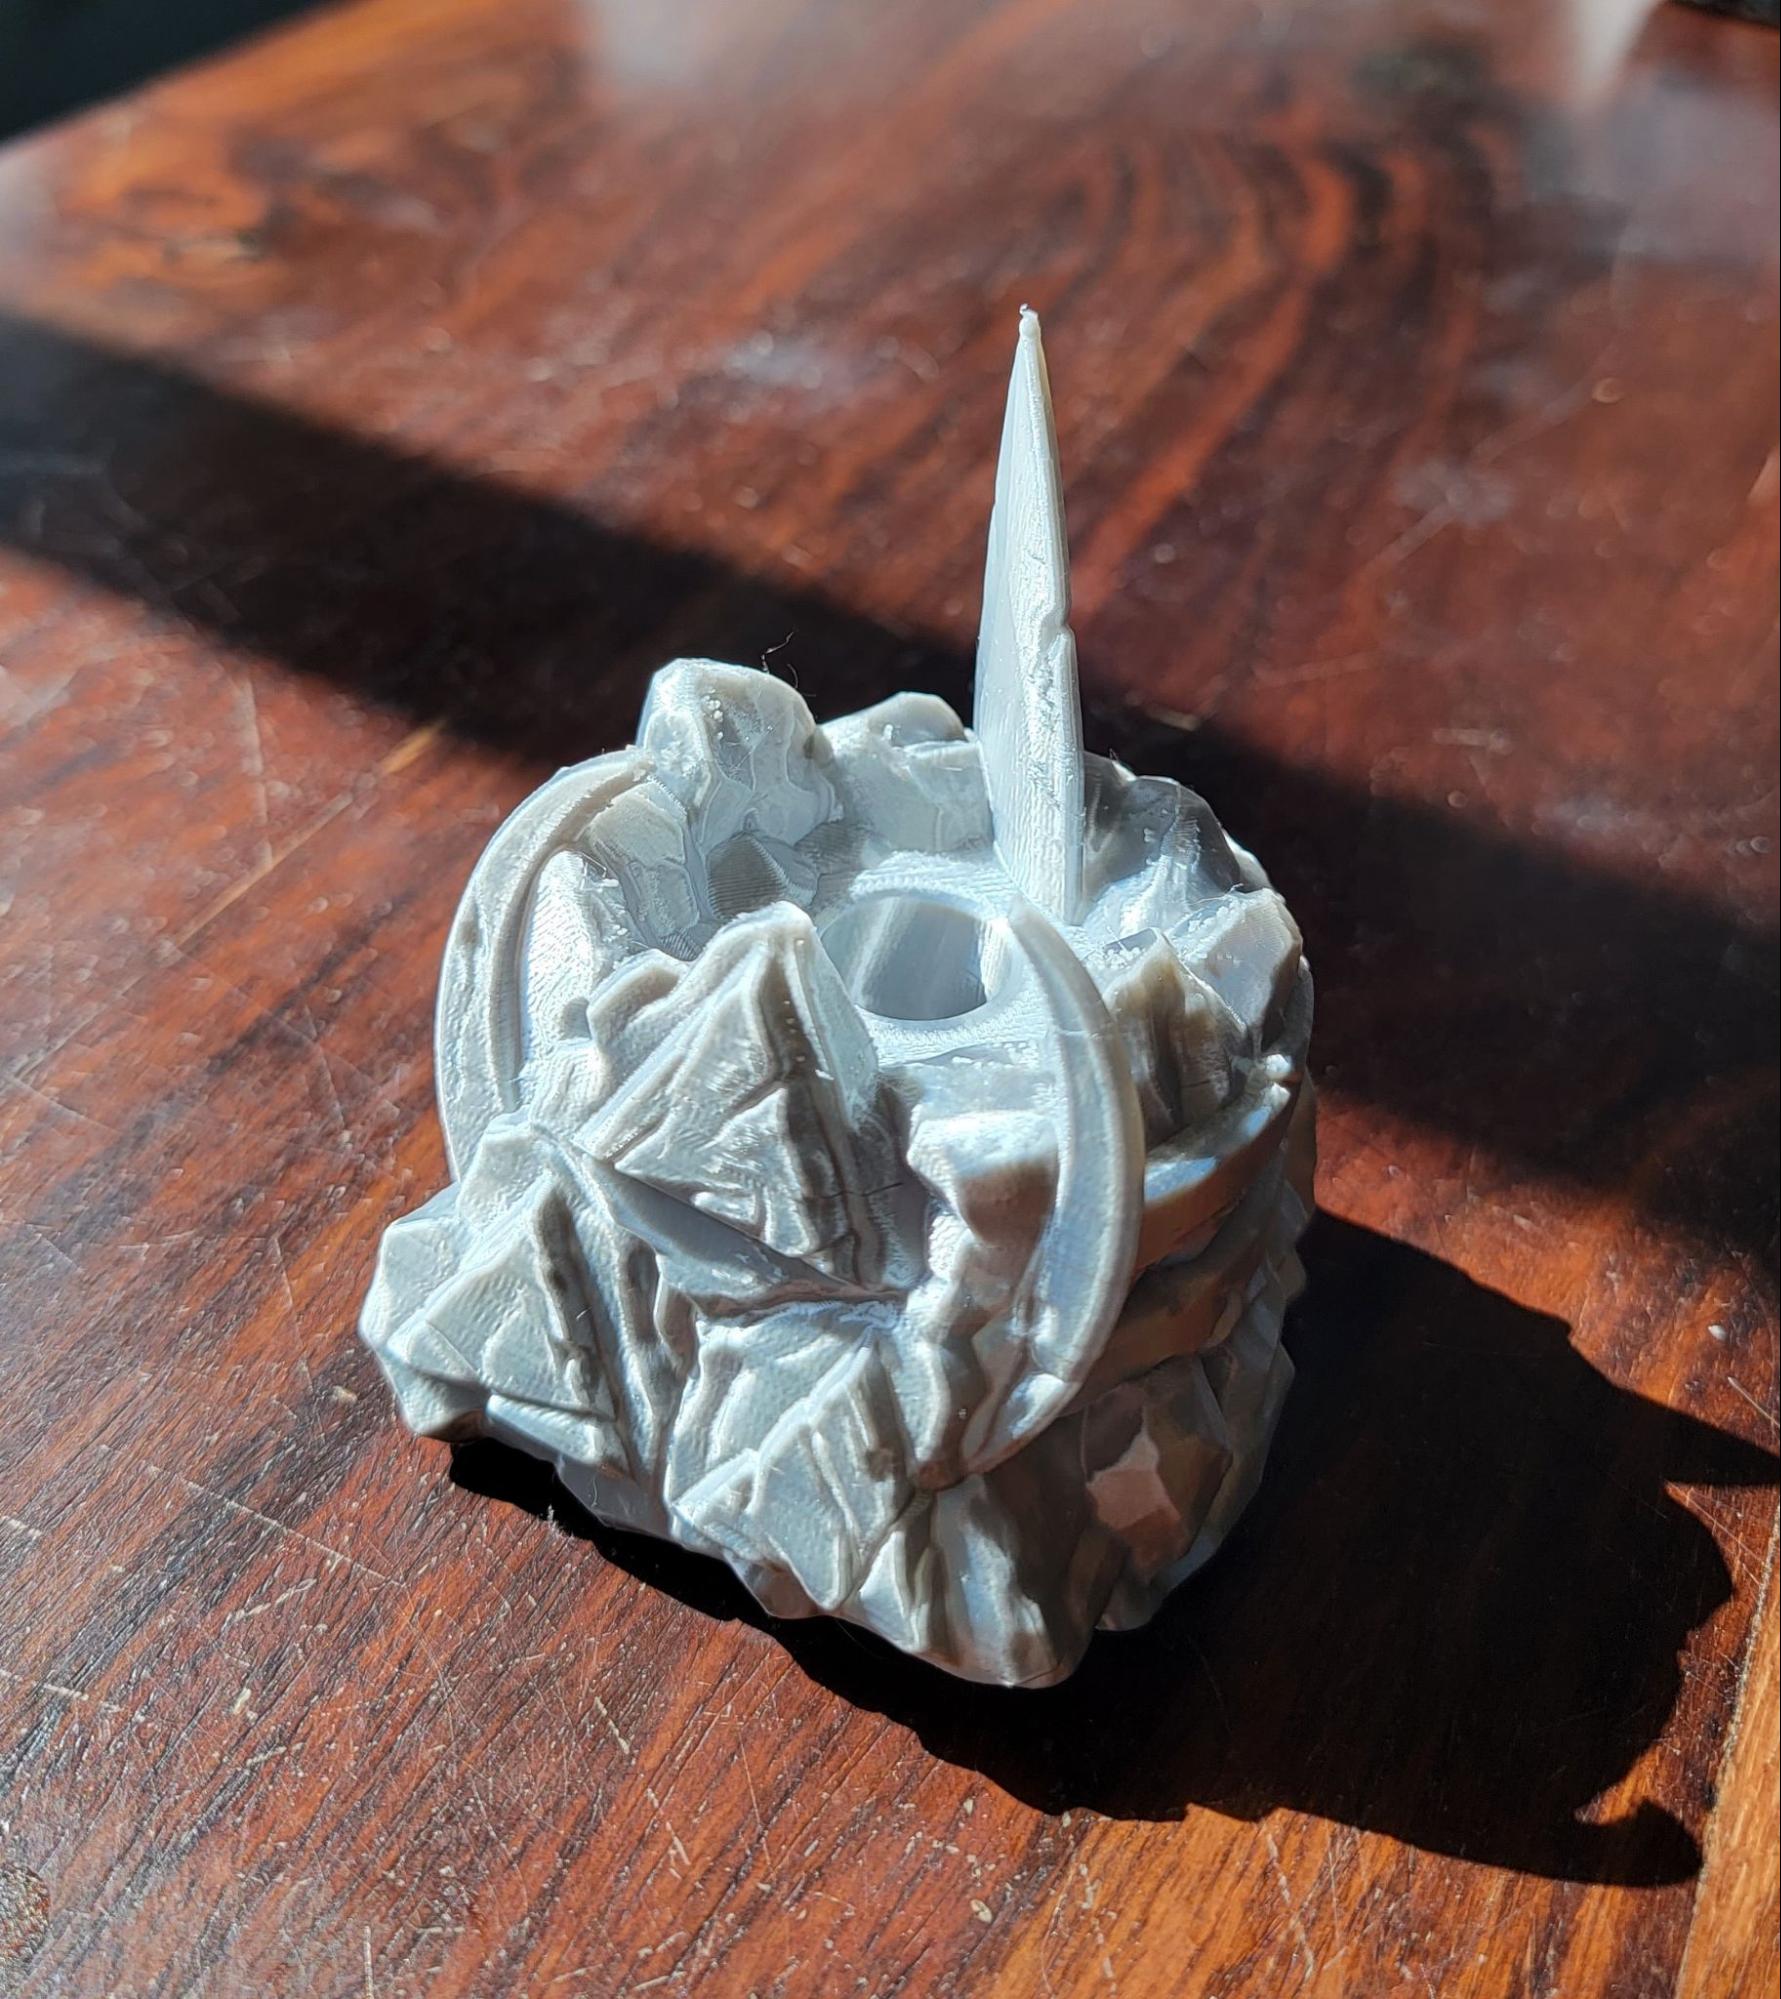
I used silk PLA here so it’s extra shiny. The details and textures came out beautifully, so I’m pleased with the printer’s ability to churn out high-res prints. There are a few dots from some stringing but that would be resolved by increasing the retraction a bit. Finally, a height test with this flowy Julia Vase – Heatwave.

Beautiful. It’s about 250mm tall and took just over 11 hours to print with 0.3mm layers, and it could be done faster by increasing the speed of the out perimeters. With dual 12mm Z-axis rods, I had little doubt the Ender 5 S1 would ace the height test, but it’s good to confirm. No Z wobble here.
Conclusion
To sum it all up, the Creality Ender 5 S1 is a very capable printer and I’ve enjoyed working with it. Loading and unloading materials is easy, and it can handle a wide range of materials with its 300°C dual-gear extruder. I tested both the filament runout sensor and the power loss recovery features and they both worked as intended, saving what would otherwise have been failed prints. The printer is blazingly fast and yet rather quiet. Its large touchscreen is responsive and the UI is intuitive, and I love how easy it is to adjust the Z offset. One gripe with the UI is that there’s no model preview when selecting a file to print, and it also doesn’t show the entire file name, so if two files have long names that start the same, they can’t be differentiated on the touchscreen. It’s a small issue, but long file names that start the same are fairly common in 3D printing due to iterations and variations. Besides that, it was all smooth sailing. If you’re looking for a sturdy, versatile 3D printer that’s easy to use, the Ender 5 S1 is a solid choice.