Hands-On Review
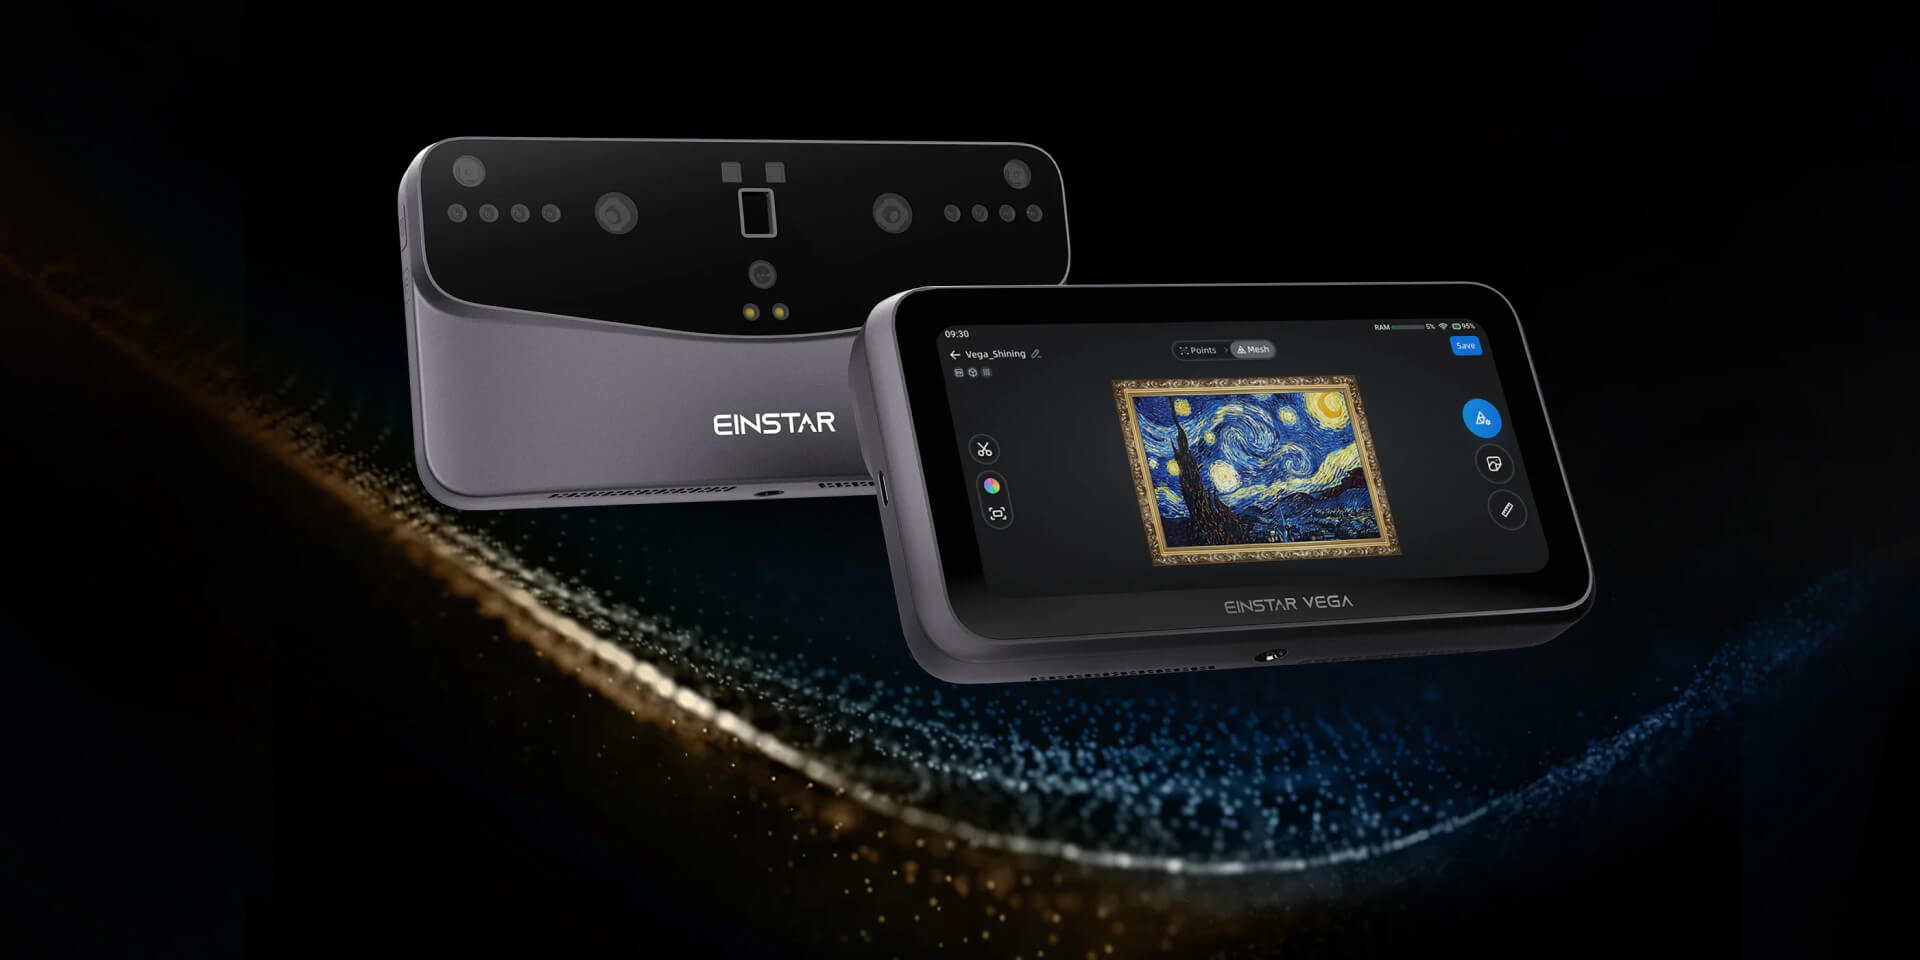
Einstar VEGA Wireless 3D Scanner
Last year was a pretty great year for those looking to purchase a consumer or prosumer grade 3D scanner, with multiple options hitting the market to cater to all hobbyist budgets.
One such scanner was the Einstar VEGA, which is an attractive feature-packed wireless device, allowing you to scan a range of differently sized items, both indoors, and outdoors.
We recently got hold of an Einstar VEGA for review, so in this article, we will be putting the VEGA through its paces, and see what it has to offer.
Specifications
Before we get into the main review, let’s take a look at the specs of the Einstar VEGA.
The VEGA features two different types of scanning technologies in one unit. These are VCSEL (Vertical-Cavity Surface-Emitting Laser – for long range scanning in any environment) and MEMS (for short range scanning of highly detailed objects).
As the name suggests, it is wireless, meaning it can wirelessly scan, transfer data (to the cloud), and even project onto a second screen (a smart TV is needed), all over your WiFi network.
In terms of physical hardware, it is a lightweight unit, weighing in at 535g, with a comfortable and ergonomic shape, made even more ergonomic by its detachable silicone grip.
All of the operations are done with its 6.4 Inch 2K AMOLED touchscreen display and its intuitive, clutter-free GUI. Such operations include scanning controls, one-touch editing, and even clipping data (more on this later).
The VEGA comes equipped with 32GB of RAM for the computing side of things, and 32GB eMMC + 512GB SSD for storage.
The addition of a 48MP RGB texture camera allows for full color scans, as well as aiding with texture alignment.
We have summarized the specs according to the different scan modes in the table below.
| HD Mode | Fast Mode | |
| Light Source | Infrared MEMS | Infrared VCSEL |
| Point Distance | 0.05mm~3mm | 0.5mm~10mm |
| Capture Frame | Up to 15 fps | Up to 20 fps |
| Working Distance | 100-300mm * | 350-1500mm |
| IR Camera Resolution | 2MP | 1.3MP |
* working distance will be 100-350mm after the latest update V1.3.0
In short, HD Mode is ideal for scanning small and detailed objects, and Fast Mode is suited for medium to large size objects. Naturally, we tried both.
So now we know the numbers, on to the review.
Inside the Box
The VEGA arrived in a main shipping box, containing a carry case and other accessories.
You can see most of the contents in the image below, which include the scanner, tripod, case, and the calibration board.

Powering on the scanner, I set up the WiFi, connected it to its SHINING passport, and calibrated the device with the board. It is recommended to calibrate the scanner every week to maintain accuracy. It’s a painless task, and takes about 5 minutes. Calibration involves lining the scanner up with the board, and following the onscreen instructions to capture the dots on the board.
Scanning Indoors – Fast Mode
With the scanner setup complete, I decided to try some indoors scanning first.
After several failed attempts at scanning my cats (they kept waking up when I approached them with the scanner), I decided to scan something a little less jumpy – my air compressor.
The air compressor has some interesting geometry and a variety of surface finishes and colors, making it ideal to test the geometry scanning and the texture scanning.
For this sized-object, it was best to use the Fast Mode scan, with the scanning distance set to the full range. I also enabled both Feature Alignment and Texture Alignment modes, and the Data Quality Indicator.
The first attempt was just “OK”. I found that overall, it did not lose tracking too much (due to the irregular geometry), and if it did lose tracking, it was easy to recover (much easier than some other brands).
I uploaded the scan to the cloud via WiFi and took a proper look. There were a few holes in the scan, so I decided to try again. This time, I scanned the entire body, then laid the compressor on its back so I could scan beneath it, and fill in some of the holes. Naturally, this resulted in the floor appearing beneath it and also behind it in the final scan, but this was easy to trim off during editing. In fact, the editing can be done within the scanner, and it works pretty well.
I uploaded the scan (via cable) to the StarVision software to inspect it in more detail. The StarVision app has more features than the cloud platform, so this is where any real interactions and work takes place.

You can see the second attempt at scanning the air compressor in the image above. Trimming the excess point cloud bits is more convenient using the computer mouse and the StarVision desktop app, so I tidied the scan up a little more, then converted it into a mesh, with textures.
Overall, it’s not a bad scan, and I was fairly impressed with the experience and the results.
The final 3D model was uploaded to Sketchfab, which you can see below.
Scanning Indoors – HD Mode
HD mode is intended for capturing objects up close and with a higher resolution.
I tried a number of objects with HD mode, and it can be quite tricky when scanning by hand, as the scanning range is much smaller than Fast Mode – it’s quite hard to maintain the sweet spot. For this reason, it is better to use the tripod, and a turntable (if you have one).

I attempted to scan a number of interesting smaller objects with HD mode, but had difficulty as most of the interesting small things that I own are shiny. One such object was a steel vernier caliper. Even with the markers placed on it, the results were not great, and I didn’t want to put spray or talcum powder all over my calipers.
So in the end, I resorted to scanning the small resin figure that was included with the scanner. This was much easier to scan, as it has a dull finish and irregular features. The scan was completed very quickly, and you can see the result below.

Scanning Outdoors
The Einstar VEGA is apparently able to scan outdoors in bright sunlight.
One thing we have plenty of here in the UAE, is sunlight. So I took the VEGA out for a little walk on one sunny day, to see what random items I could scan.
Motorbike
Einstar has already shared a video, showing that it is indeed possible to scan a black motorbike outdoors. You can see that video below.
I do not have a motorbike of my own, but conveniently, there was a white BMW parked up against the wall of my apartment building. Note, it was parked up against the wall, so I could not give it a full scan from both sides, but it was enough for a quick guerilla-style drive-by (or walk-by) scan to see how easy (or difficult) it was.
The BMW had a decent variety of features and textures, as well as different surfaces, both shiny and dull. So I figured this would be a perfect subject to test a Fast Scan, using both the texture and the feature alignment functions.

To my surprise, the VEGA scanned the accessible side of the bike without any problems, and it did so pretty quickly. Due to the irregular, non-repetitive features of the bike, I didn’t lose tracking too many times, and when I did, it was super-easy to regain the tracking by moving back to a part that had been scanned already.
The “data quality” indicator shows the good scan data in green. This was very helpful for indicating which parts needed to be scanned again, which in this case, was not many.
It took maybe 5 minutes to scan one half of the bike, and the sunlight was no problem for the scanner. In fact, the sun was more of an issue for my own eyes, as it was a little difficult to see the screen. Luckily, there is a button on the side of the scanner that switches from night mode, and makes the screen a lighter color. You can also adjust the screen brightness, so I cranked that right up, and that solved the problem somewhat.
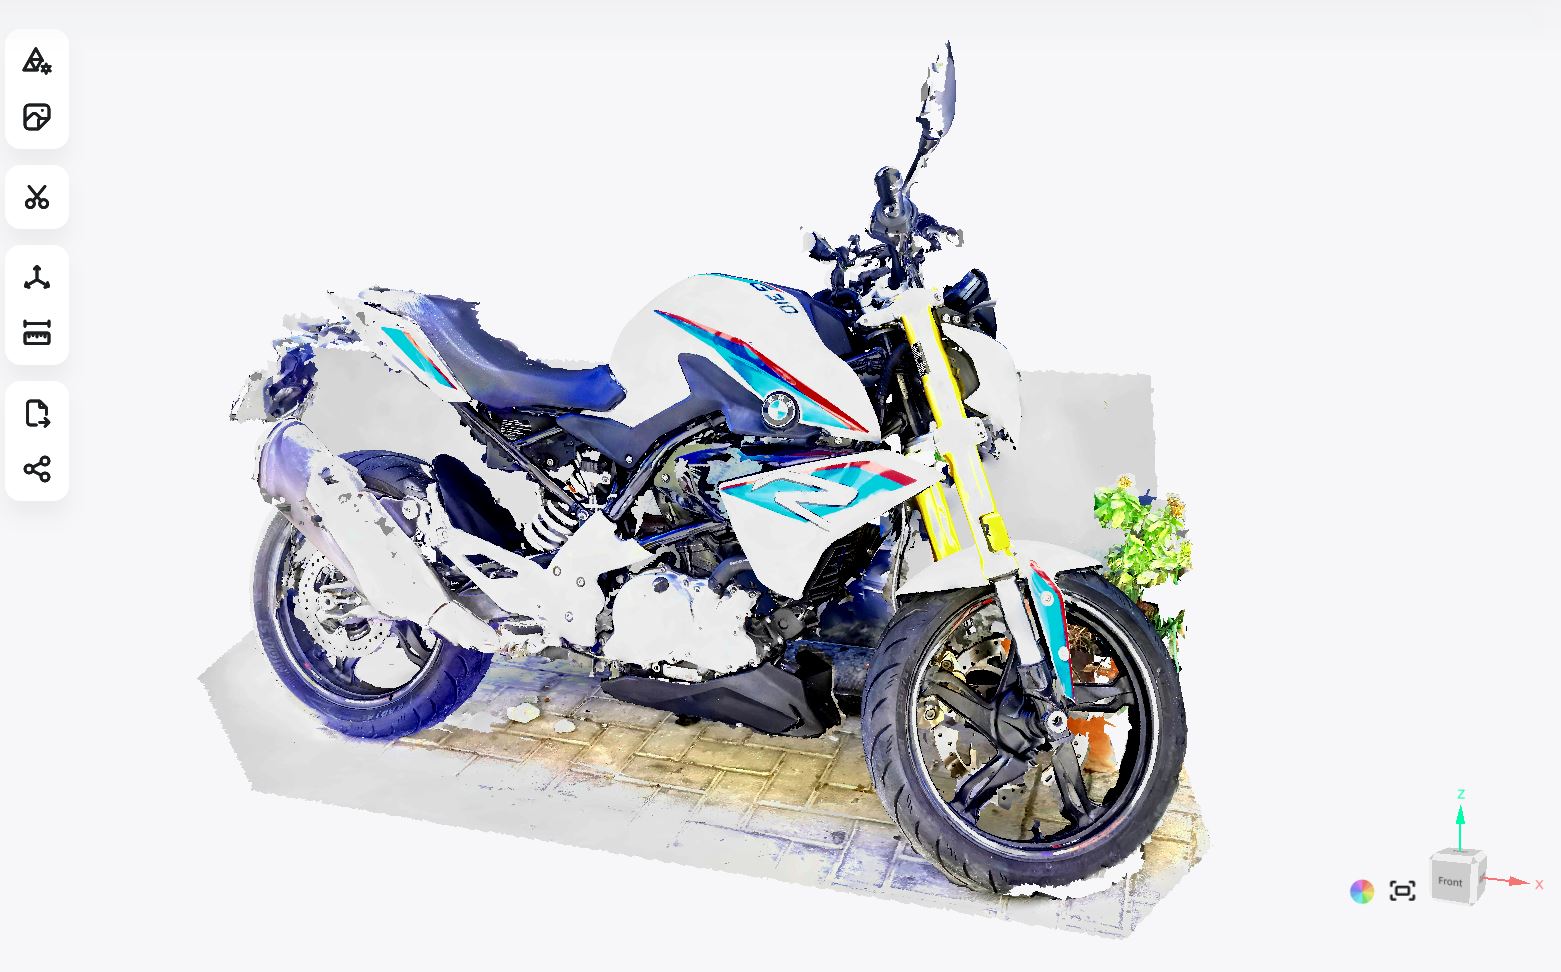
After I was happy with the scan data, I pressed the mesh button (low resolution) and allowed it to mesh while I walked onto my next target. I uploaded the textured bike scan to StarVision when I got home, and you can see the results above. The texture colors do look a little washed out, but I am assuming this was due to the bright sunlight (and the fact that the bike is light colored). Overall, it was a successful first attempt.
Afterwards I learned that the texture effect can be adjusted in StarVision, including exposure, color temperature, saturation, and contrast to make the scanned texture closer to the real object.
I headed over to the park to look for something else to scan.

Park Bench
Arriving at the park, I attempted to do some brief scans of some other random items to see what would be a good subject.
I pointed the VEGA at the floor, where there were patterned, matte/porous tiles on the pavement. The scanner picked up those without problem at all, but they would not make for a very interesting subject.
So I found some steel recycling bins. They were highly reflective structures, and had shiny acrylic-covered signage on them. I would have had difficulty scanning those, if the camera brightness indicator was anything to go by.
Ultimately, I found a park bench, which was a decent size (over 2 metres in length), and had a good combination of features, textures and surface finishes.
So I began the park bench, which turned out to be a little more difficult than the BMW bike.

As it turns out, park benches are pretty featureless (especially on the wooden slats). They are quite repetitive and the scanner lost tracking multiple times. As I had no markers with me, I threw my shoes onto the slats, and used them as markers. This seemed to do the trick.
The scan was a little patchy between the slats, but this is to be expected, as I did not scan every possible angle of the bench to capture between the slats. After about 15 minutes of scanning, the scan reached its memory limit, and the scanner informed me that the battery was dying.
So with that, I decided to head home and process the scans and test the software.
You can see the park bench scan below. It’s a fair indication of what sized objects can be scanned in a single scan. It’s a little over 2 metres in length.

Software
There are two software options for use with the Einstar VEGA. As mentioned previously, they are the StarVision desktop app, and the Shining3D Digital Cloud.
If you want to upload wirelessly, this can only be done to the cloud platform. On the Digital Cloud, users can view, measure, and share their scans.
For more serious work, the StarVision desktop app is better, as it has editing capabilities and other features not found on the Digital Cloud platform. The one downside of StarVision, is that files must be uploaded via USB cable, rather than wirelessly. Additionally, there is no capability to share from Digital Cloud directly to StarVision. This would be a nice feature to have in future.
In order to use the scanner with StarVision, you must allow firewall exceptions to allow the scanner to connect to your PC via cable. If you are using a separate antivirus software, you might need to disable that too. I configured the WIndows firewall as per the instructions, but found that the scanner was still not connecting to the software. It was my AVG antivirus that was the issue, so be sure to disable that each time you want to connect the scanner if you are having issues connecting.
Final Thoughts
Having tested a variety of 3D scanners, I can say that in terms of scanning, the Einstar Vega is one of the easiest to use, largely due to the good tracking, and how quickly it picks up the tracking if it is lost. This results in being able to scan larger objects fairly quickly, in terms of how fast you can physically move the scanner.
I was pleasantly surprised by the outdoor scanning. The motorbike turned out quite well, and if it was my own motorbike, I suspect it would have been possible to scan the entire machine in about 20 minutes. The scanner itself can scan continuously on its battery for around 30 minutes, and it takes about an hour to recharge. So if you are going on an outdoor scanning mission, be sure to take a few power banks with you.
So to summarise, Fast Mode is indeed fast, it works outdoors and indoors, with few tracking losses, and produces good results (as you can see with the air compressor model).
HD Scan is a little more demanding, so if you want to capture small objects, it’s recommended to use the tripod, and a turntable. And if the item you are scanning has sparse features, be sure to scatter a few of the included sticky markers around, and use the Marker Alignment mode (rather than Feature or Texture Alignment).
Overall, this is a pretty great scanner, once you get the hang of it, and it would certainly be well suited to anyone doing automotive body panel scanning, or even occasional architectural work (such as a small room).
If you would like to know more about the Einstar VEGA, you can read all about it at the product page below.