Hands-On Review
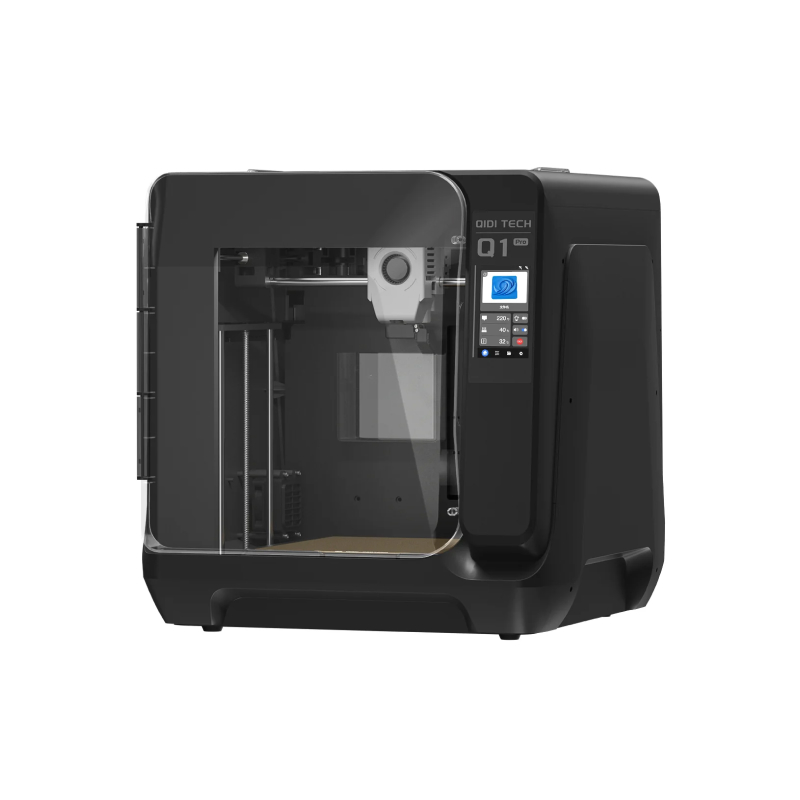
QIDI Tech Q1 Pro
I had a fairly privileged upbringing when it comes to FDM machines. My first exposure to FDM printing was at university, where I did post-graduate research using industrial-grade machines costing several hundred thousands of dollars, capable of printing pretty much any engineering plastic.
When I left university and was forced to continue working with cheap bedslingers at home, I felt somewhat limited by FDM. So much so, after nearly a decade of working with FDM machines, I finally made the switch to resins, because pound for pound, you can print technical resins on a much cheaper machine than you need to print technical filaments.
But now, there is a new filament-extruding machine on the market that has caught my eye, and has reignited my interest in FDM printing once again. Enter the QIDI Q1 Pro, which is apparently the cheapest 3D printer with a heated build chamber that money can buy.
I recently received one for review purposes, and have spent the last few days getting to grips with it. Read on to find out the pros and cons of the QIDI Q1 Pro.


First Impressions of the QIDI Q1 Pro
My absolute first impression of the QIDI Q1 Pro, was formed as soon as the courier wheeled the box up to my apartment on a trolley. And my first thought was “wow, that’s a very big box”.
And for a 3D printer with 245*245*245mm build volume, it was indeed a huge box, measuring over half a meter on each side. Of course, much of that was packing foam anyway, and when removed from the box, the whole printer measures a still substantial 477*467*489 mm (and weighs around 17kg).
I unpacked it and set it up on my Ikea “Lack” table, which seems to be a popular worktop in the 3D printing community.

QIDI claims that users can be printing within 10 minutes of taking the Q1 out of the box.
This seems to be generally true. I plugged the machine in, and after booting up, the LCD screen provides instructions on how to set the machine up. This mostly involves removing a couple of screws and snipping some cable ties that are all used to keep everything in place during transport.
Next, the machine instructs me on how to calibrate and level the machine, and how to add filament for printing. As the machine is powered by Klipper, it also gives the option for Input Shaping, which I did during the setup stage.
All in all it probably took me around 25 minutes to setup, but this was mostly because I was poking around with the machine, and reading documentation online. If you followed the on-screen instructions exactly, and didn’t allow yourself to be distracted, then it’s not hard to believe that this 3D printer could be up and running after just 10 minutes,
First Print on the Q1 Pro
The Q1 pro comes with a small amount of PLA rapid filament, and a USB memory stick containing several STL files for testing (plus a copy of QIDI Slicer).
Eager to see what this machine could do, I ignored QIDI Slicer for the moment, and plugged the USB straight into the printer to get printing ASAP.
I opted for the Benchy model, uninspiring as it is, purely because this is what many companies use to show off the print speed of their new machines.
After the auto-leveling process (which I have on by default before each print) the Benchy took just 17 minutes to print, which is fairly impressive compared to my old bedslinger.

I had noted that there was a bit of a line close to the top of the Benchy, which I assume was a result of the vibrations on the Ikea Lack table. When cranked up to high speeds, this printer shakes a lot. My Ikea Lack had met its match.
For subsequent prints, I removed it from the Lack table and put it on my metal warehouse shelving. But despite the line on the print, and the wobbling table, I can say that I was fairly impressed with how quick the machine was to set up, and how fast the printhead moves. It’s even quicker than the eye can follow.
Printing Composite Materials on the QIDI Q1 Pro
I rarely use PLA material, and my interest in FDM lies in more advanced materials. So for my next test, I wanted to see how easy it would be to drop some composite material in there and get it printing with minimal fuss. WIth my old cheap bedslinger, if I wanted to print with a chopped fiber filament, I would need to purchase an entire new hotend, and possibly a new extruder also. Then between filament swaps, I would have to go through the headache of relevelling and calibrating the printer to optimize it for the new filament.
Did the Q1 Pro make the process easier? Absolutely.
I had in my possession a roll of PPGF-30 from Italian company TreeD Filaments. Polypropylene can be challenging to print sometimes, and the added 30% chopped glass fiber makes it a lot more abrasive. But with a 60°C build chamber, 350°C hotend, 120°C print bed and hardened steel nozzle, the QIDI Q1 Pro should have no issues printing such a filament. In principle, at least.

In order to dial the settings in with ease, I installed the QIDI Slicer software and familiarized myself with the GUI. It has a representation of the build plate, filament and print settings, as well as device settings. As it is a Klipper-based 3D printer, it also has the FLUIDD interface to connect with the machine. The FLUIDD interface also allows you to record timelapses with the QIDI Q1 Pro’s 1080p camera. More on that later.
I dialed in the filament settings, and sent the file over WiFi to the printer. After the first layer, the print was a bust as the PPGF failed to adhere to the steel build plate.
I tried again, but I added a brim to the Benchy model before printing. It failed again.
On the third attempt, I stuck some packing tape onto the build plate and added a brim to the model. By this time, I had figured out how to get the timelapse working as well (mostly).
You can see the results in the video below.
What did I conclude from this little test? Well, the QIDI Q1 Pro prints chopped fiber filaments no problem, although PP might need a bed adhesive to work properly. And while the timelapse works well enough, it does need a couple of parameters changing to keep the printhead parked, so the video looks a little nicer.
You can see the gray PPGF-30 Benchy versus the black PLA Benchy in the image below. There is a bit of stringing on the PPGF-30 version, but for a first attempt, it’s not bad at all (and the stringing was easily removed anyway).

For printing with the TreeD PPGF-30 filament, I changed the nozzle temp to 270°C, the chamber temp to 55°C and the bed temp to 60°C. Most importantly, I reduced the print speed right down to 45mm/s for everything. This increased the print time for the Benchy from 17 minutes (for the PLA rapid filament) to 1 hour for the PPGF-30.
This is absolutely fine. Speed is not as important to my projects as the ability to print composite filaments at a reasonable quality.
How to Setup Timelapse on the QIDI Q1 Pro
AS mentioned, the QIDI Q1 Pro comes with a camera inside for monitoring prints, and for making timelapses.
The camera becomes active and can be viewed in FLUIDD as soon as the printer is connected over WiFi, although getting the timelapse feature is not exactly obvious at first.
Typically when using the FLUIDD interface, there must be several configuration changes made and some APIs need to be added. However, in the QIDI Slicer, the timelapse and Moonraker components are already added. This makes life a lot easier, however, you do need to add one simple line in the Printer Settings in QIDI Slicer in order to get the timelapse working.
If you are expecting the Q1 to do timelapses right out of the box (as I did) you will notice that it doesn’t work like that.
So in order to activate the timelapse in QIDI Slicer, simply go to the Printer Settings, and add the line of custom G-code, as you can see in the screenshot below.
Now, as long as your timelapse option is active in QIDI Slicer, it will work properly.

Final Thoughts
So what can I say about the QIDI Q1 Pro, having had it for a few days?
Well, it’s easy to set up and easy to use, and Klipper gives a whole lot more depth in terms of options for those who need them. I have not been a big fan of Klipper, mostly because lower-priced machines would require the purchase of a Raspberry Pi, and all the configuration required to get that working. But now that it is available in an easy-to-use package, I think I could get used to it.
While I have not yet tested the full range of filaments that can in principle be used with a heated chamber, the Q1 does seem promising, and I am looking forward to trying a few more challenging materials on this machine. The 600mm/s top speed is nice, but I doubt I will be using the full speed for most of the time.
As mentioned previously, the ability to print with a wider range of filaments is more important to me than a high speed. But it’s good to know that if I ever needed to print a Benchy in under 20 minutes, I could do so easily.
One more positive side of this machine is the fact that it looks great. Aesthetics are not super important, but when you consider that the early QIDI machines looked like art deco toaster ovens, the Q1 Pro is a huge step up in terms of appearance. This printer looks and feels a lot more than the price would suggest. It has an air of quality about it.

In terms of the downsides, I would have preferred a slightly bigger build volume than the Q1 offers, and perhaps QIDI will release a Q1 Pro MAX in future.
Another downside, which will not affect the majority of people, is that the plastic door becomes statically charged very easily, and attracts a lot of cat hairs. But this is a minor gripe, and has been resolved by moving the printer up to a higher shelf.
One last minor annoyance is the door handle. It does not protrude enough from the main body of the machine, so it can be a little hard to grip sometimes. No doubt someone will print a mod for it soon and put it on Thingiverse or whatever, so that’s not an unsolvable issue.
Overall, this printer has a lot to offer and for a very low price. I had considered purchasing another “smart” printer from another well-known brand, but the idea of paying over $1000 just for the ability to print in different colors simply does not appeal to me.
If you want a fancy printer that can print colorful articulated dragon trinkets for $1000, then more power to you. But from an engineering standpoint, and for those interested in unlocking a wider range of filaments, the Q1 Pro is the superior option as far as I am concerned.
The QIDI Q1 Pro is available for the ridiculously cheap early bird price of $469 USD until the 10th April, and will cost $599 USD after that.
You can order yours at the link below.
QIDI Tech Q1 Pro
The most budget-friendly actively heated 3D printer than money can buy comes with internal camera, dual z-axis, all-metal frame, Klipper firmware, and a lot more.
- - Print size: 245 x 245 x 245 mm
- - 600mm/s max speed
- - full-auto leveling
- - Dual z-axis
- - ringing compensation
- - 60°C chamber temperature
- - 120°C hotbed
- - 350°C hot end
- - all-metal dual gear extruder
- - QIDI Slicer.