For all of our BigRep filament reviews we used the Ultimaker S5 with mostly default print profiles in Cura in order to generate results that the typical user can expect. We also promised a review of the printer itself. By printing an array of different objects in a range of materials for the filament reviews, I got a good sense of the S5. So hopefully this review provides you with something more useful than a spec sheet with max build dimensions and extruder temperatures.
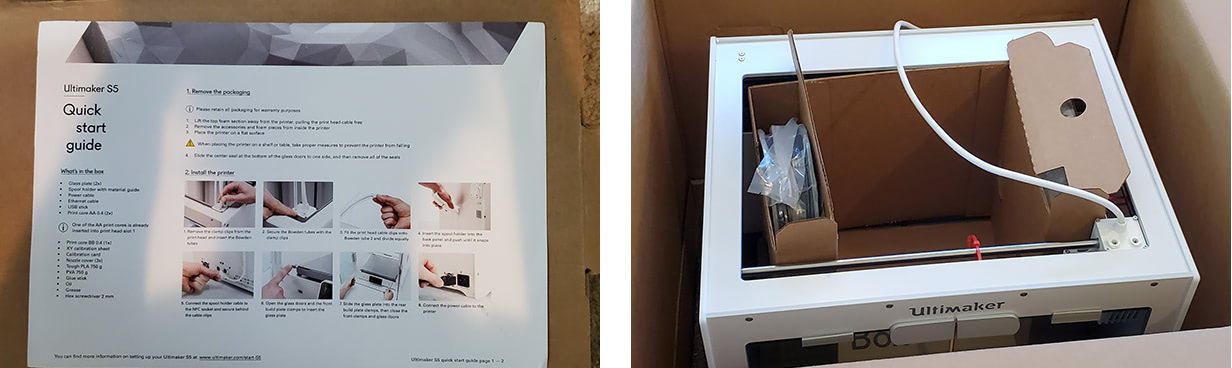
The S5 arrived in a large box and was very well packaged. There are plastic tabs on the outside of the box that have to be popped out to open the box, and several custom inserts keep everything in place during shipping.
A thorough and clear Quick start guide is accessible upon opening the box so points to Ultimaker on that.
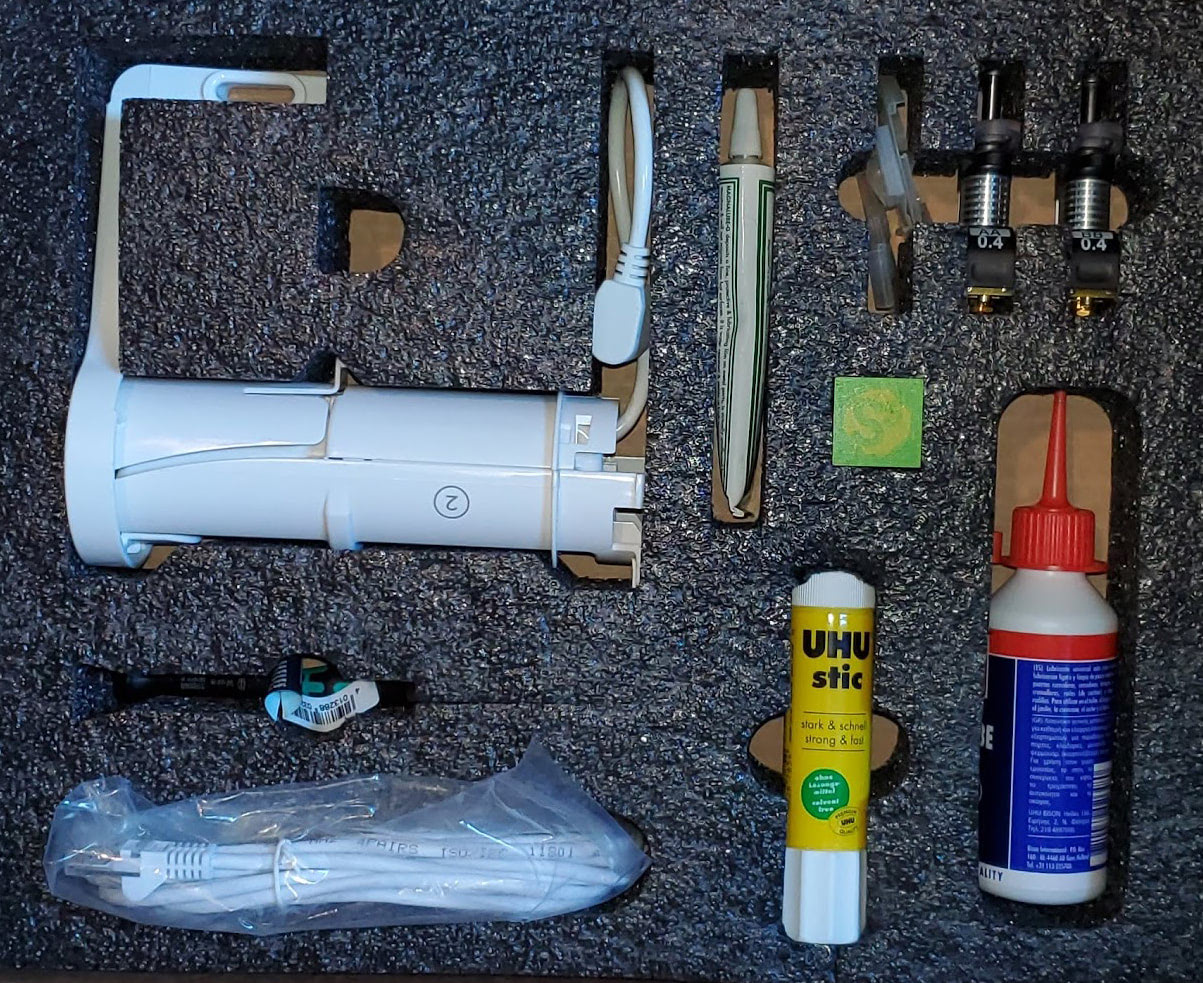
The accessories pack included with the S5 is the most thoughtful of such a pack that I’ve encountered. Most come with some cheap Allen wrenches for printer maintenance and a paint scraper for removing parts from the build plate but the S5 comes with hex drivers, a build plate glue stick, grease AND oil, and a few more odds and ends.
The Quick start guide is straightforward so setup took only about 20 minutes. Though there’s minimal assembly required, I was a little surprised by how much of it relied on snap-fittings, one of which on the Bowden guide tube gave me a bit of trouble.
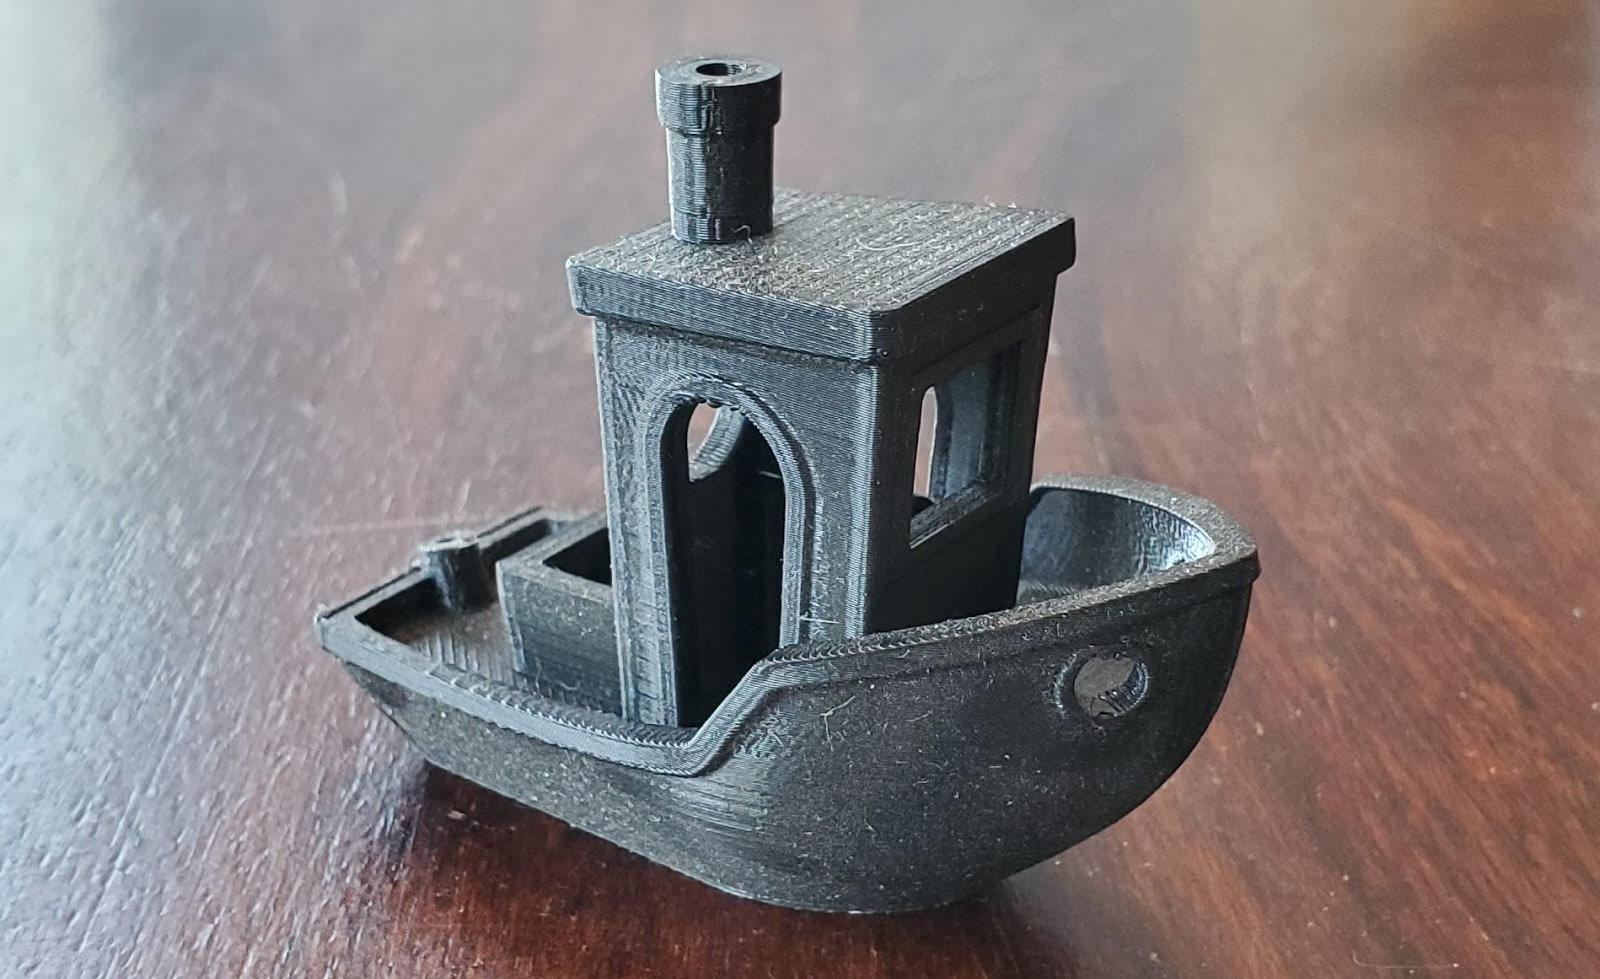
Two 750g spools are included so users can start printing right away, some Tough PLA and some dissolvable PVA. I loaded up the PLA, which the printer automatically recognized through an embedded NFC chip in the spool, and immediately printed a Benchy, which came out beautifully.
Loading material into the S5 is easier than any printer I’ve worked with. The touchscreen is used to select the material being loaded and then filament is fed into the Bowden extruder on the back. The printer does the rest by pushing the filament to the hotend, which heats up very quickly, and extruding a bit to purge the previous material. It sounds like a tiny jet engine spinning up when it pushes the filament to the hotend, a nice bonus.
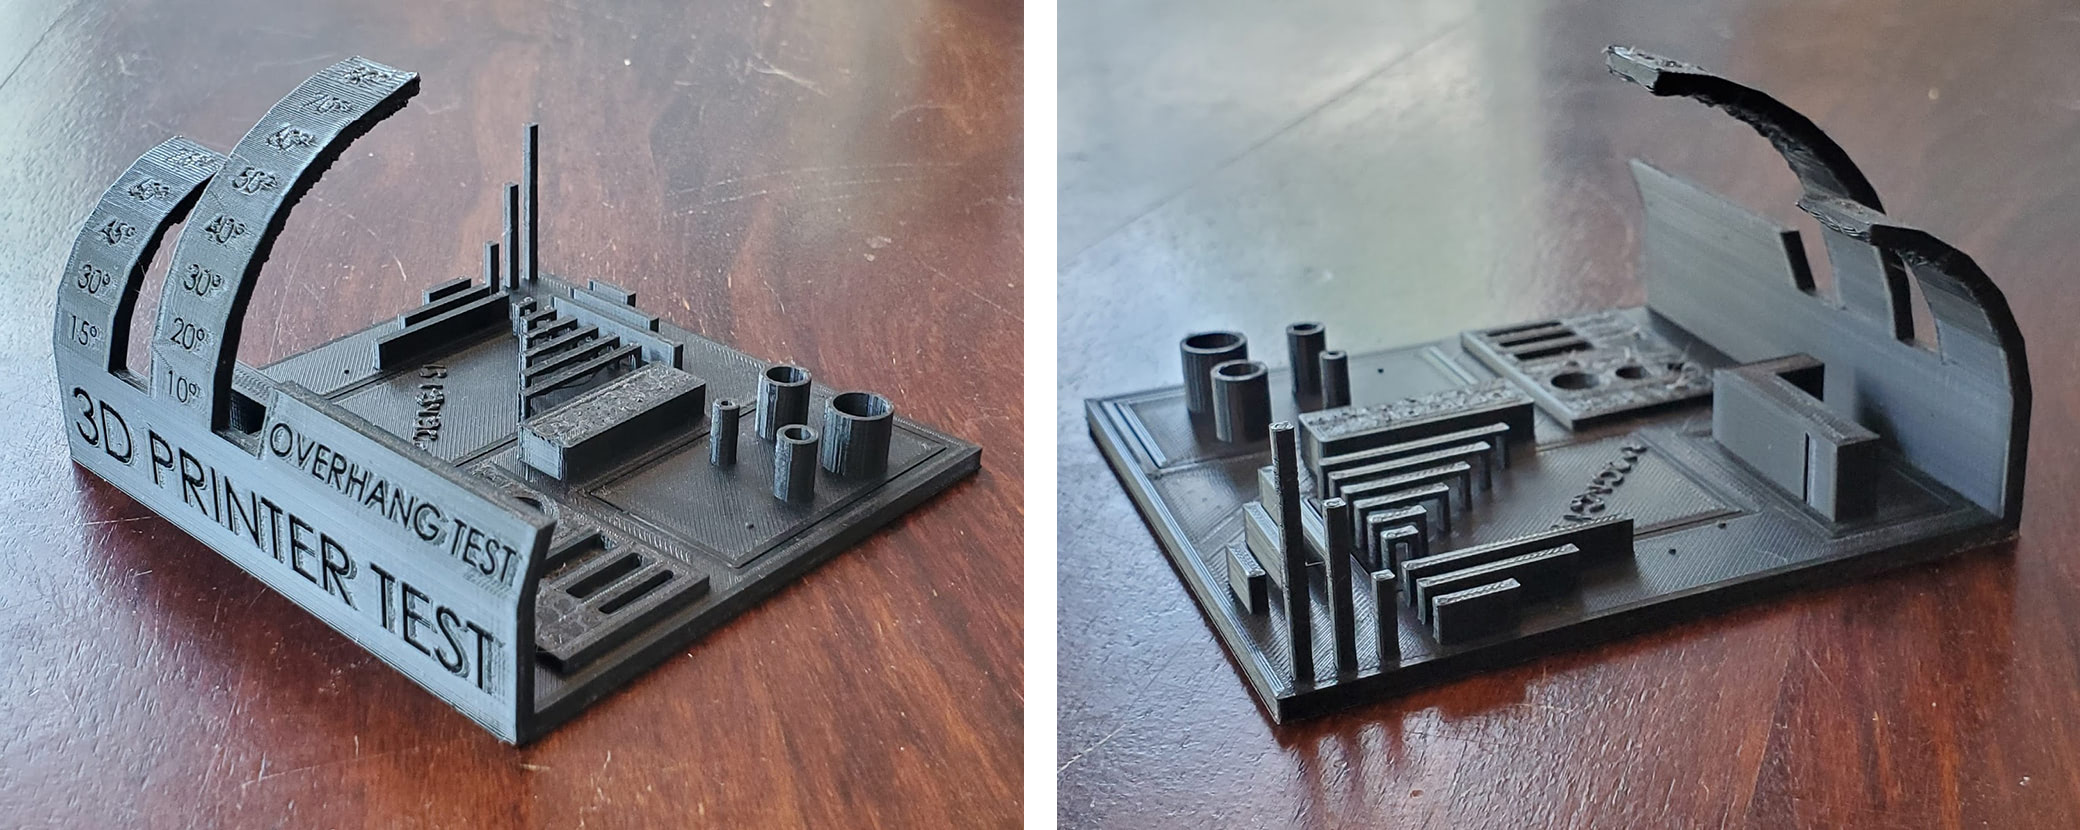
I’m not actually reviewing this filament but since I printed Benchy, I continued with the rest of the three usual suspects. The Bridging Test came out nicely.
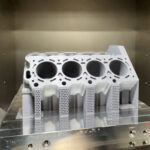
The All In One 3D Printer Test also turned out well, though the overhangs didn’t perform as well on this material. The corners, pillars, top surfaces, and everything else are all great.
To get a better idea of how well the printer itself can handle overhangs, we can look to the same print in a different material. Here’s a close-up of that same overhang printed in BigRep’s Hi-Temp material.
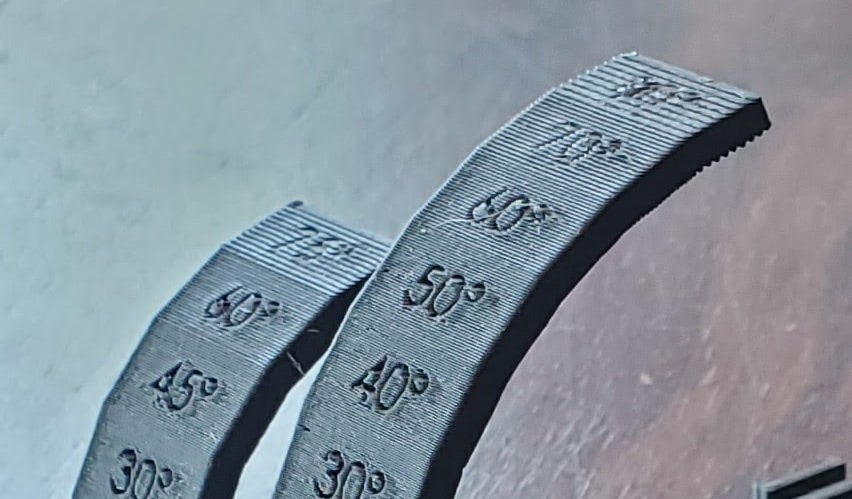
That distinct stair-step effect is what a perfectly-printed overhang looks like.
But we’ve seen plenty of Benchies and overhangs lately. Let’s see the S5 do something really special. The S5 is equipped with two print heads but it works a bit differently than most dual-extrusion printers. It has two types of “print cores,” an AA and a BB. The BB is used only for PVA and the AA is used for everything else. In order to print a two-color PLA part, I had to first swap the BB core with the second included AA core, which was extremely easy and quick to do. The engineers at Ultimaker really put some time into the design of these print cores and how they connect to the printer. The connections are contact-based so there’s no unplugging and plugging in of cables to change print cores. Automatic filament detection works only on Ultimaker materials but the printer accepts any brand of filament, so I loaded some purple PLA and printed this Two Color Gyroid.
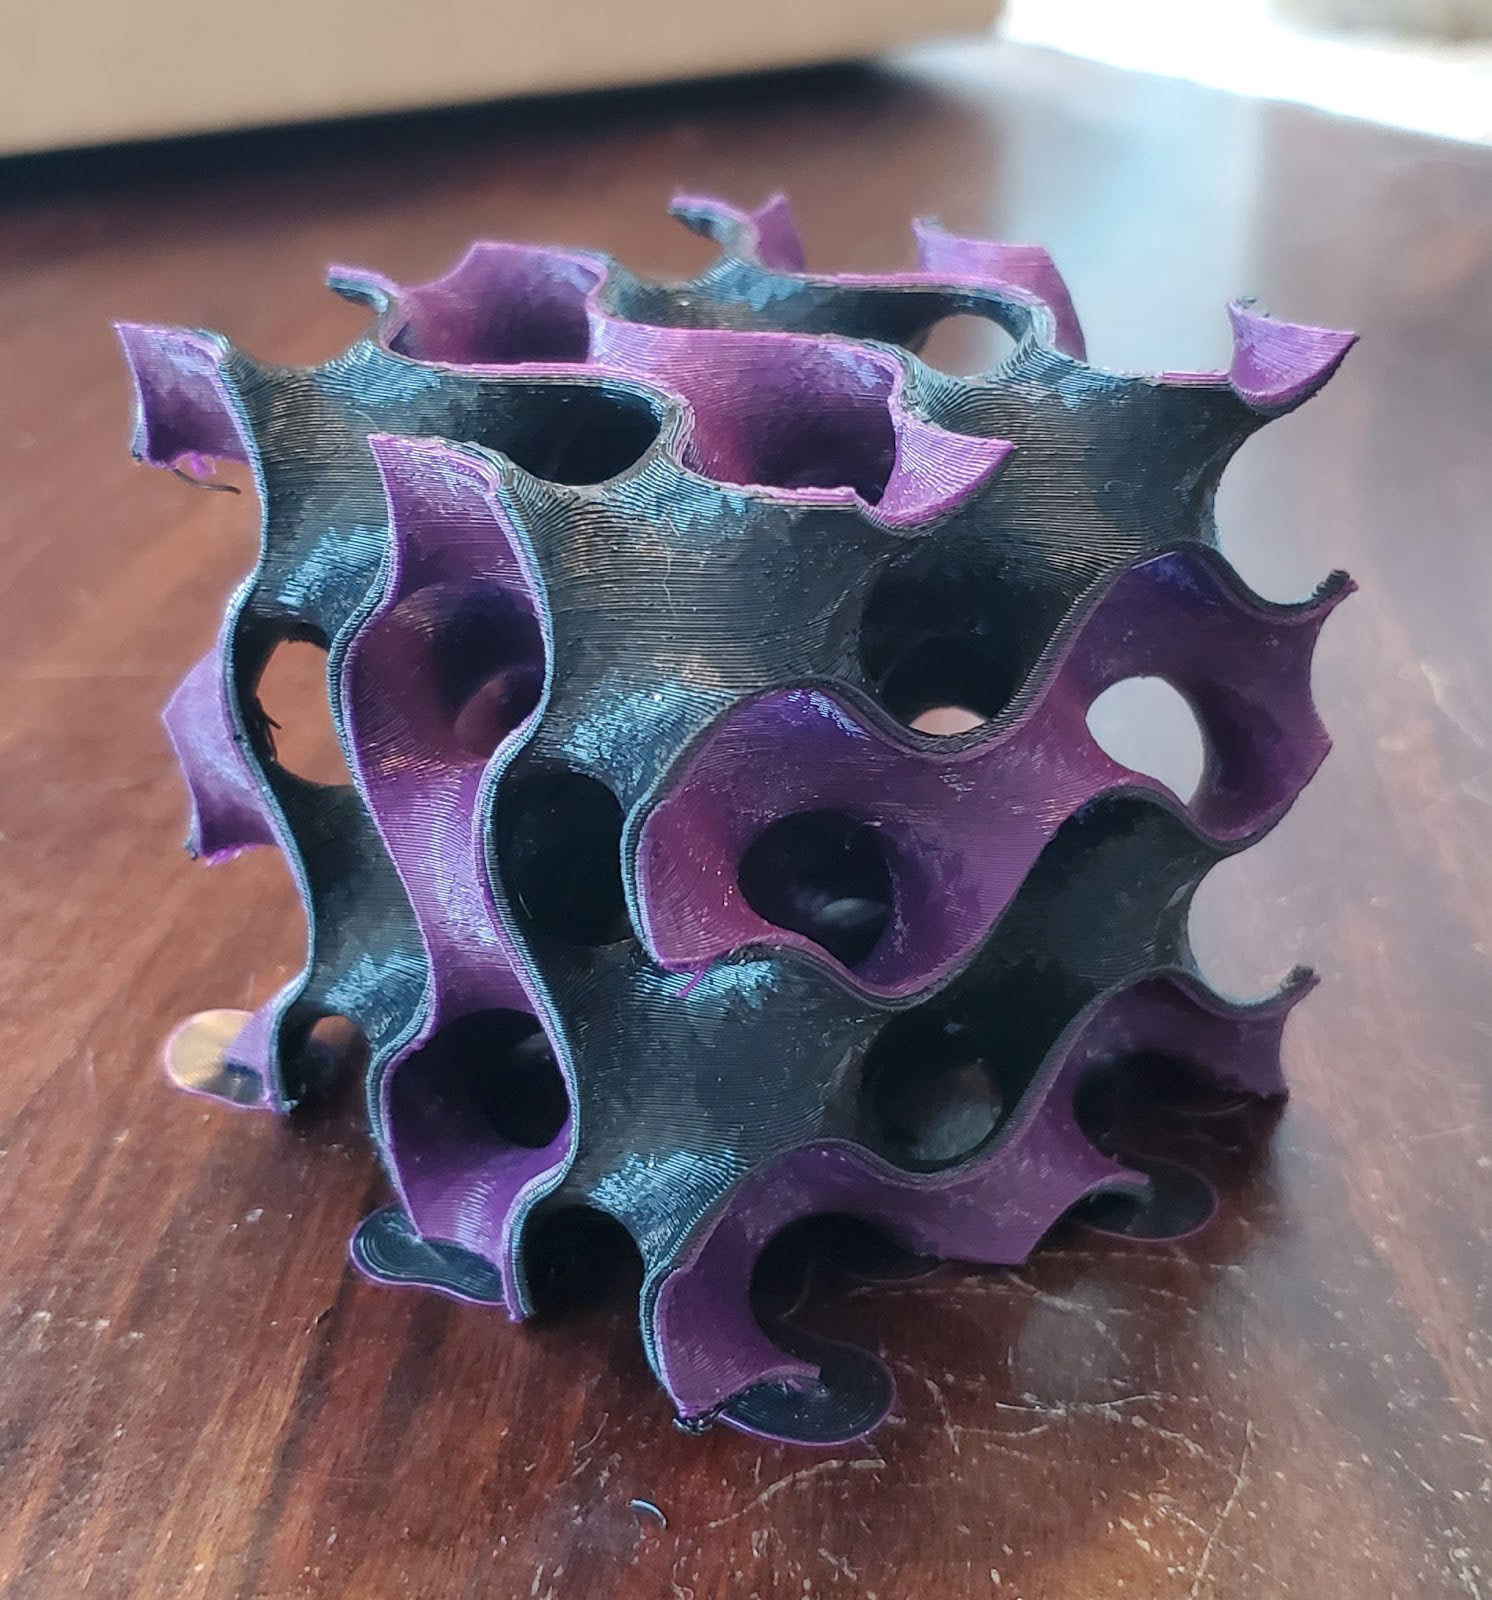
This is a very complex print and the S5 nailed it. If the calibration is off even the slightest bit then a print like this wouldn’t be possible. Speaking of calibration, the S5 prompts you to calibrate the print cores the first time that a dual-core print is initiated for any given pair of cores; it maintains calibration when switching back and forth between print cores so you only have to do it once per pair. It’s a painless process: the machine prints some horizontal and vertical lines with each print head and then you input which lines of each set are best aligned. After calibrating, I printed some Dual Color Dice to go with this Cthulhu Idol Dice Tower.
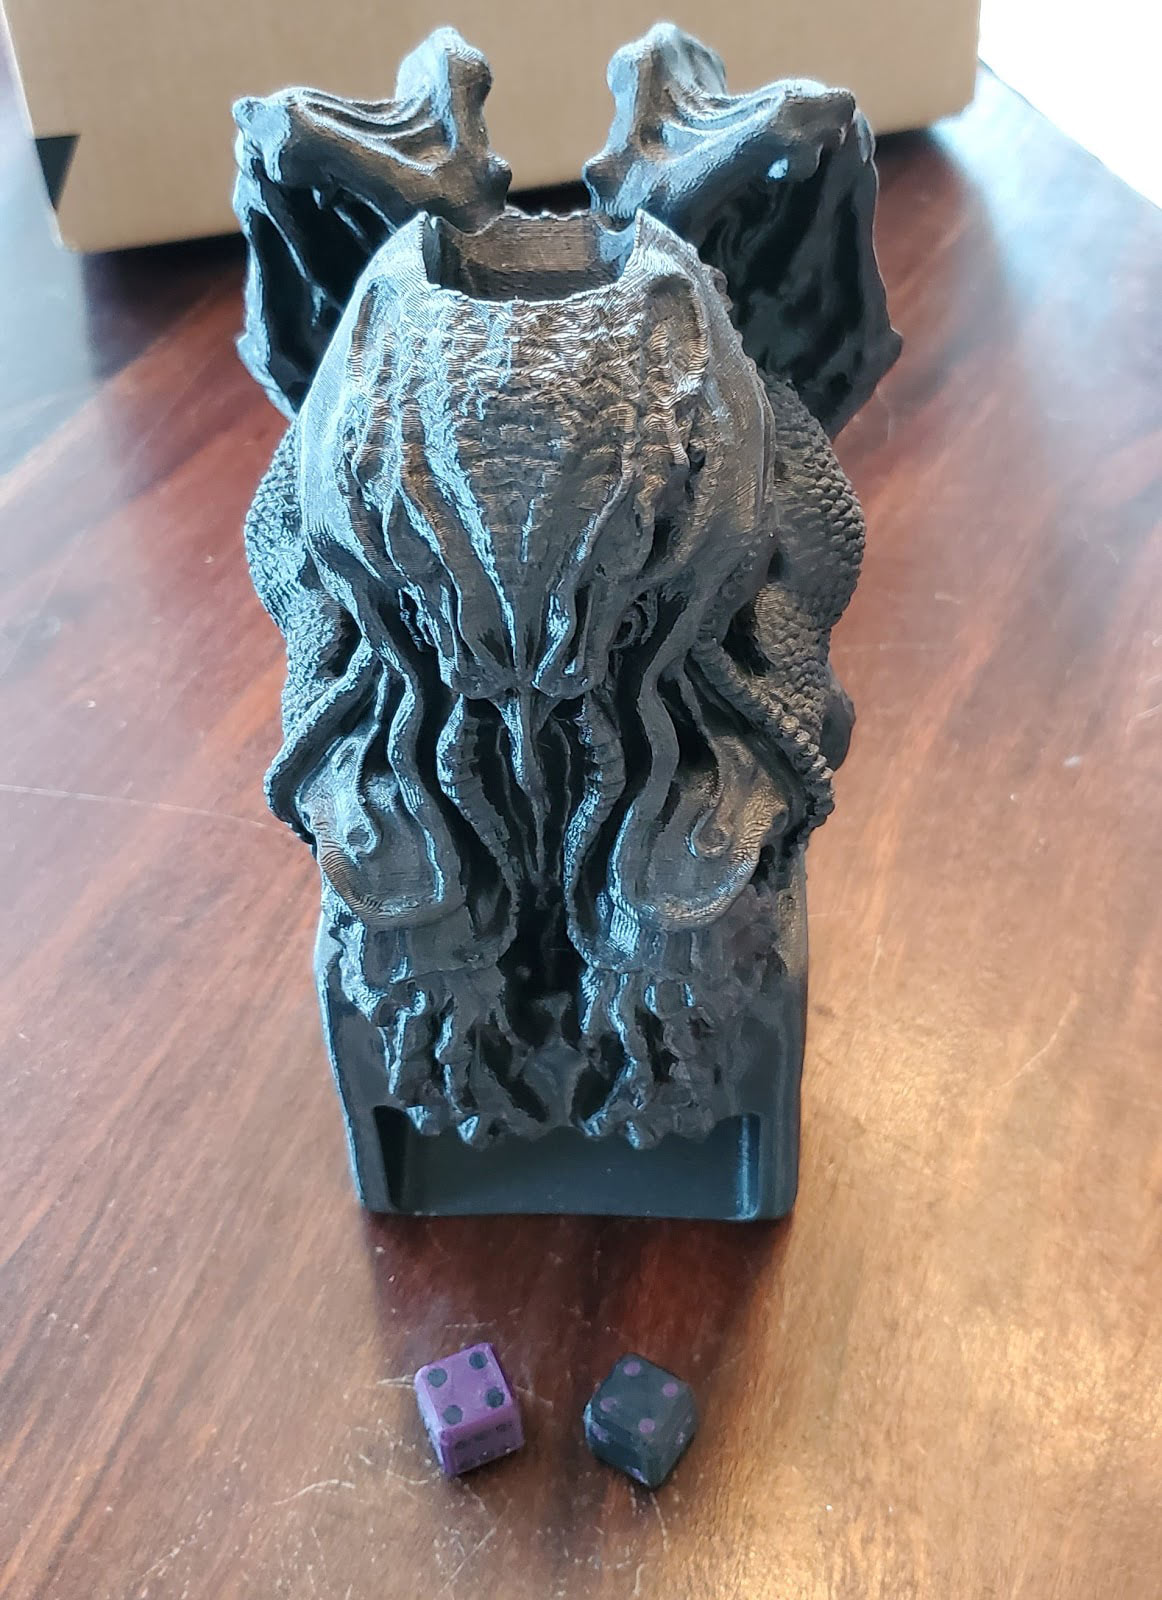
What’s impressive about the dice tower is that it looks amazing, is 200 mm tall, and was printed in a mere 14 hours. It was printed as a speed test in PLX material and it’s a testament to the build quality of the S5 because it takes a solid, well-tuned machine to print something so quickly without any significant loss in quality.
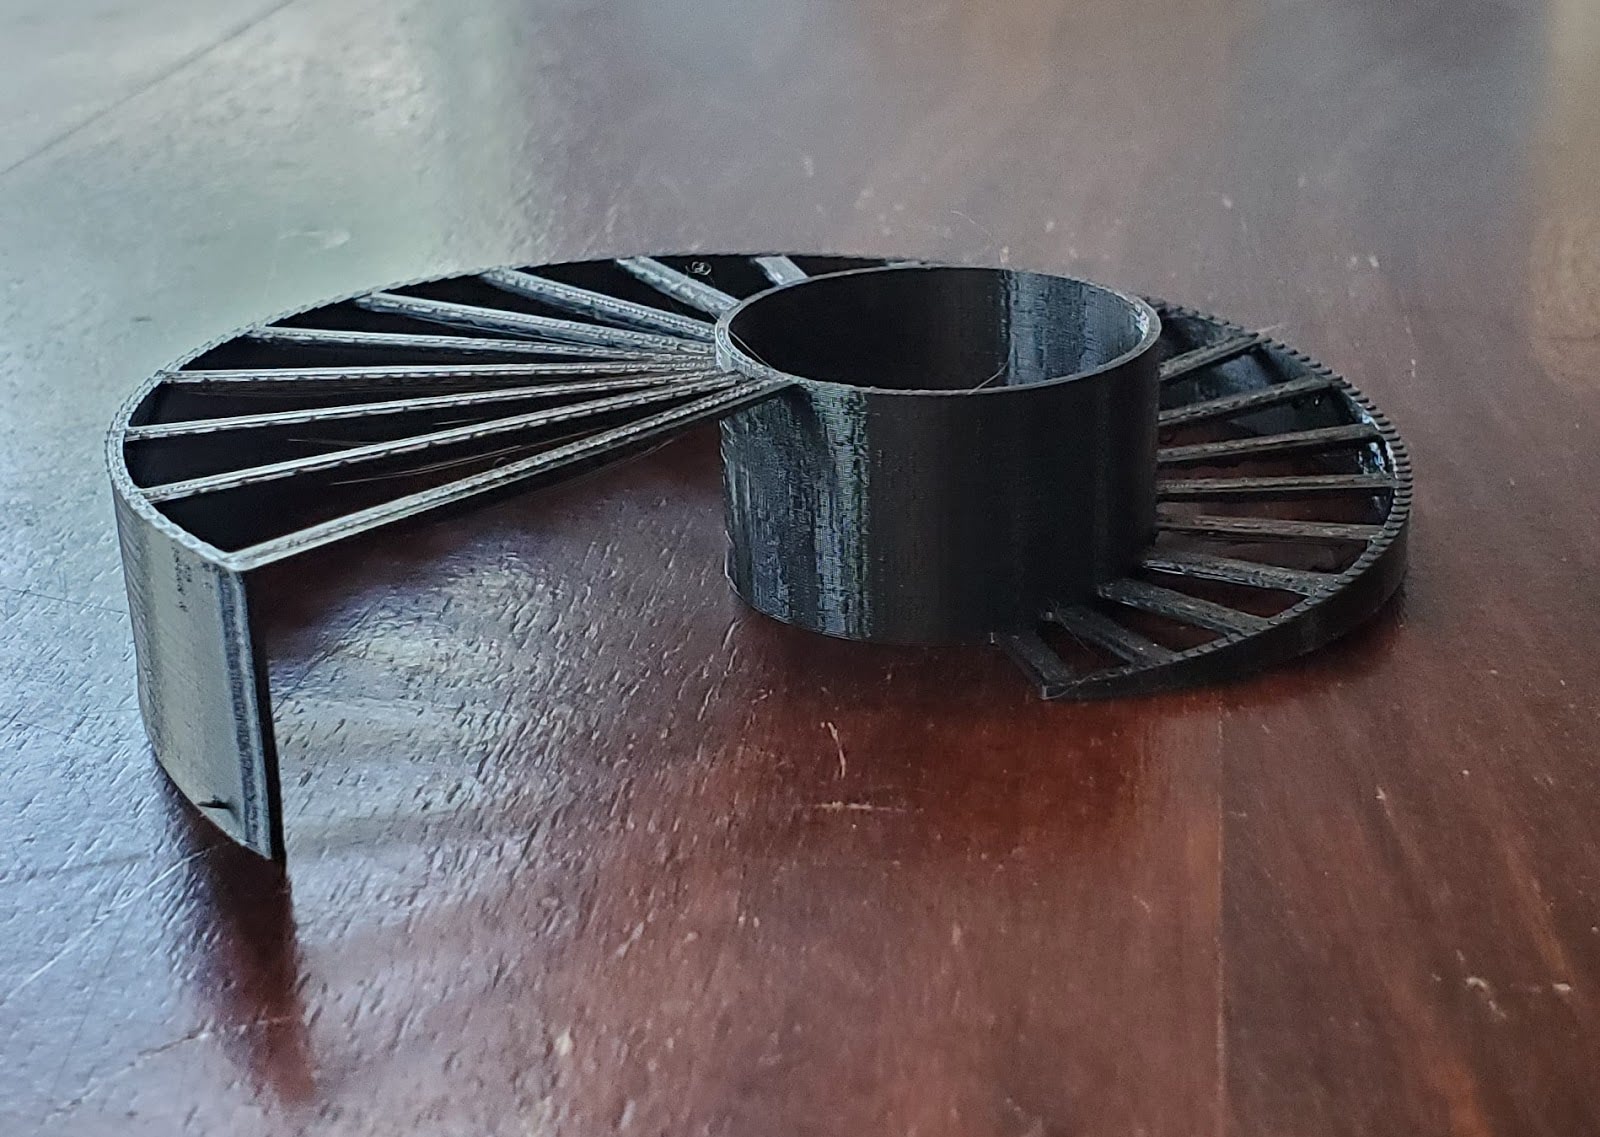
Besides two-color printing, the other benefit of having two extruders is the ability to print dissolvable support structures. The BB core was swapped back in, loaded up with PVA, and out came these three objects that can be printed only through the use of dissolvable supports. They all have overhangs in inaccessible places so normal supports would be impossible to remove.
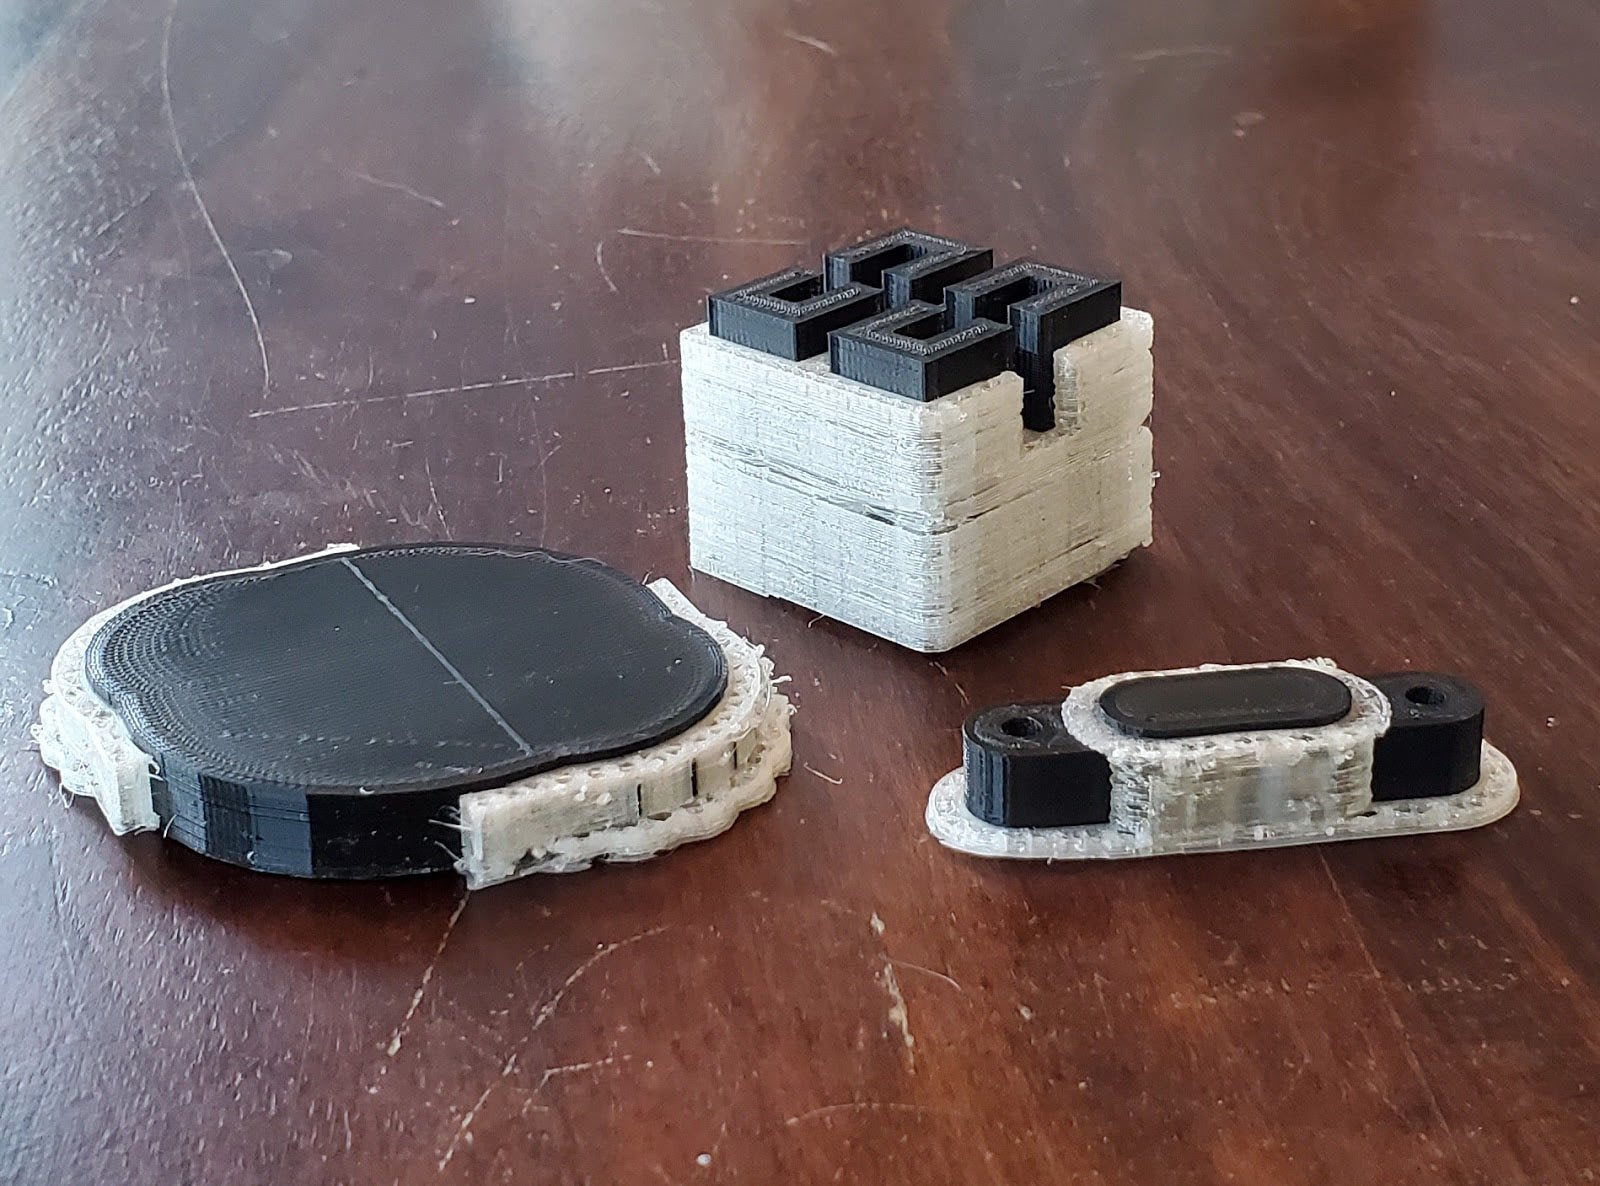
Only after printing did I learn that the chain link on the right isn’t modeled in the best way to test dissolvable supports, but the Blank Dissolvable Support Gearbox and Hilbert Cube worked out fantastically.
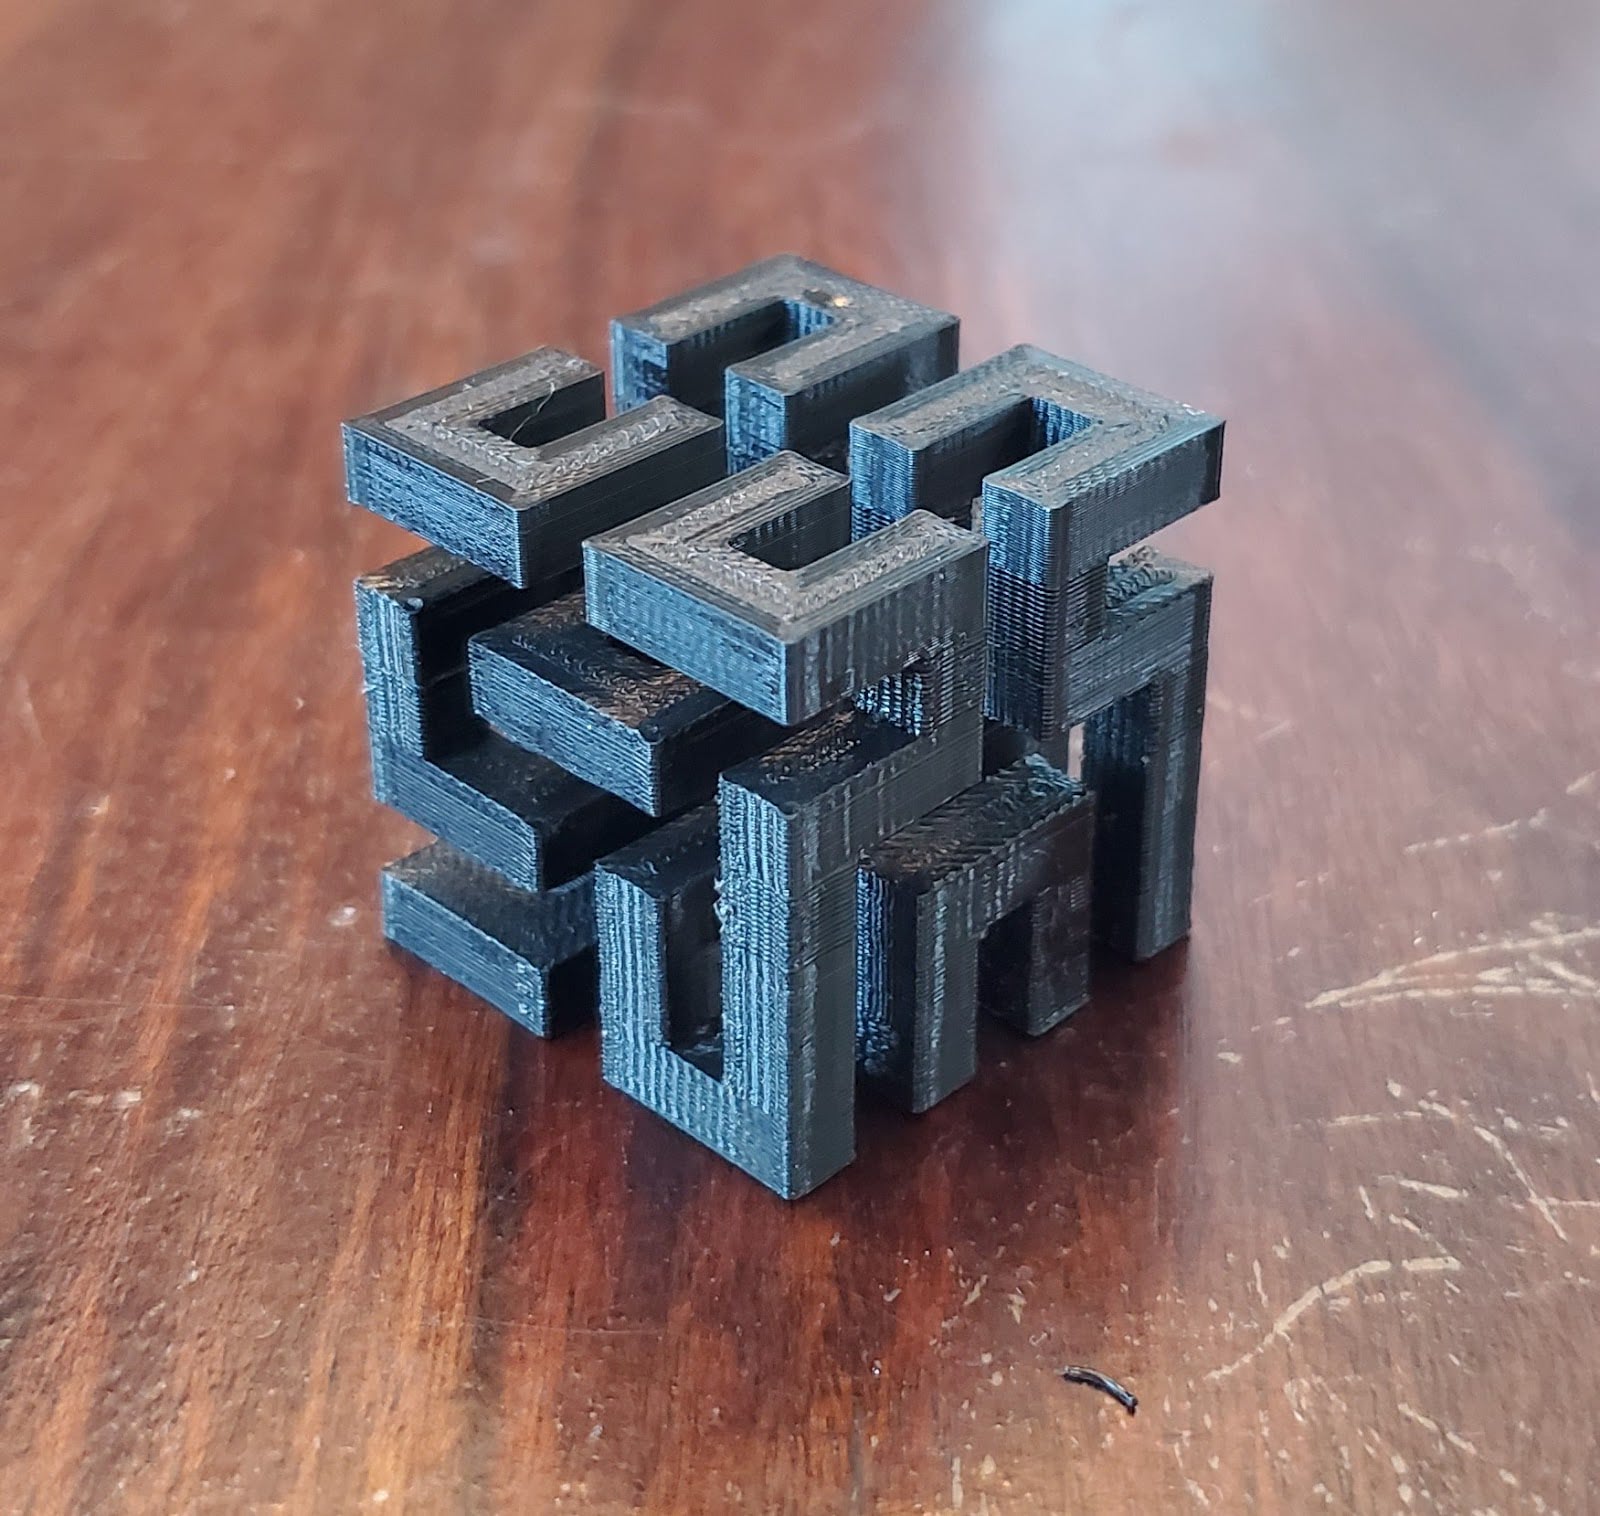
Like the gyroid, this is not a simple object to print. Several pillars must be bridged and connected at multiple heights, so it’s important that the support material hold everything at just the right height for everything to line up correctly. That’s doubly true for the gearbox that has moving parts that were suspended in a sandwich of support material. Check it out after soaking in water for a few hours:
Ultimaker printers work with the slicer Cura because Ultimaker is the creator of Cura, and their integration is seamless. The S5 can print with a range of materials and I was able to use the default material profiles for every material that I tried, and all of the profiles resulted in good prints.
Every material printed well with the profiles available in Cura. That’s a big deal and one of the many features that separate the S5 from DIY desktop 3D printers. Searching for good print profiles online and then having to spend hours printing with them and tweaking them just to get decent prints is a common endeavor among makers out there. Print profiles that work right out of the box are a true blessing.
I’d confirmed that the S5 can make great looking prints in a range of materials, that it can print quickly, can handle two-color printing, dissolvable support printing, and even dissolvable support printing with moving parts, so the only thing left to test was endurance. Sure, the dice tower took 14 hours to complete but that’s small potatoes compared to this highly scaled up Crinkle Lamp.
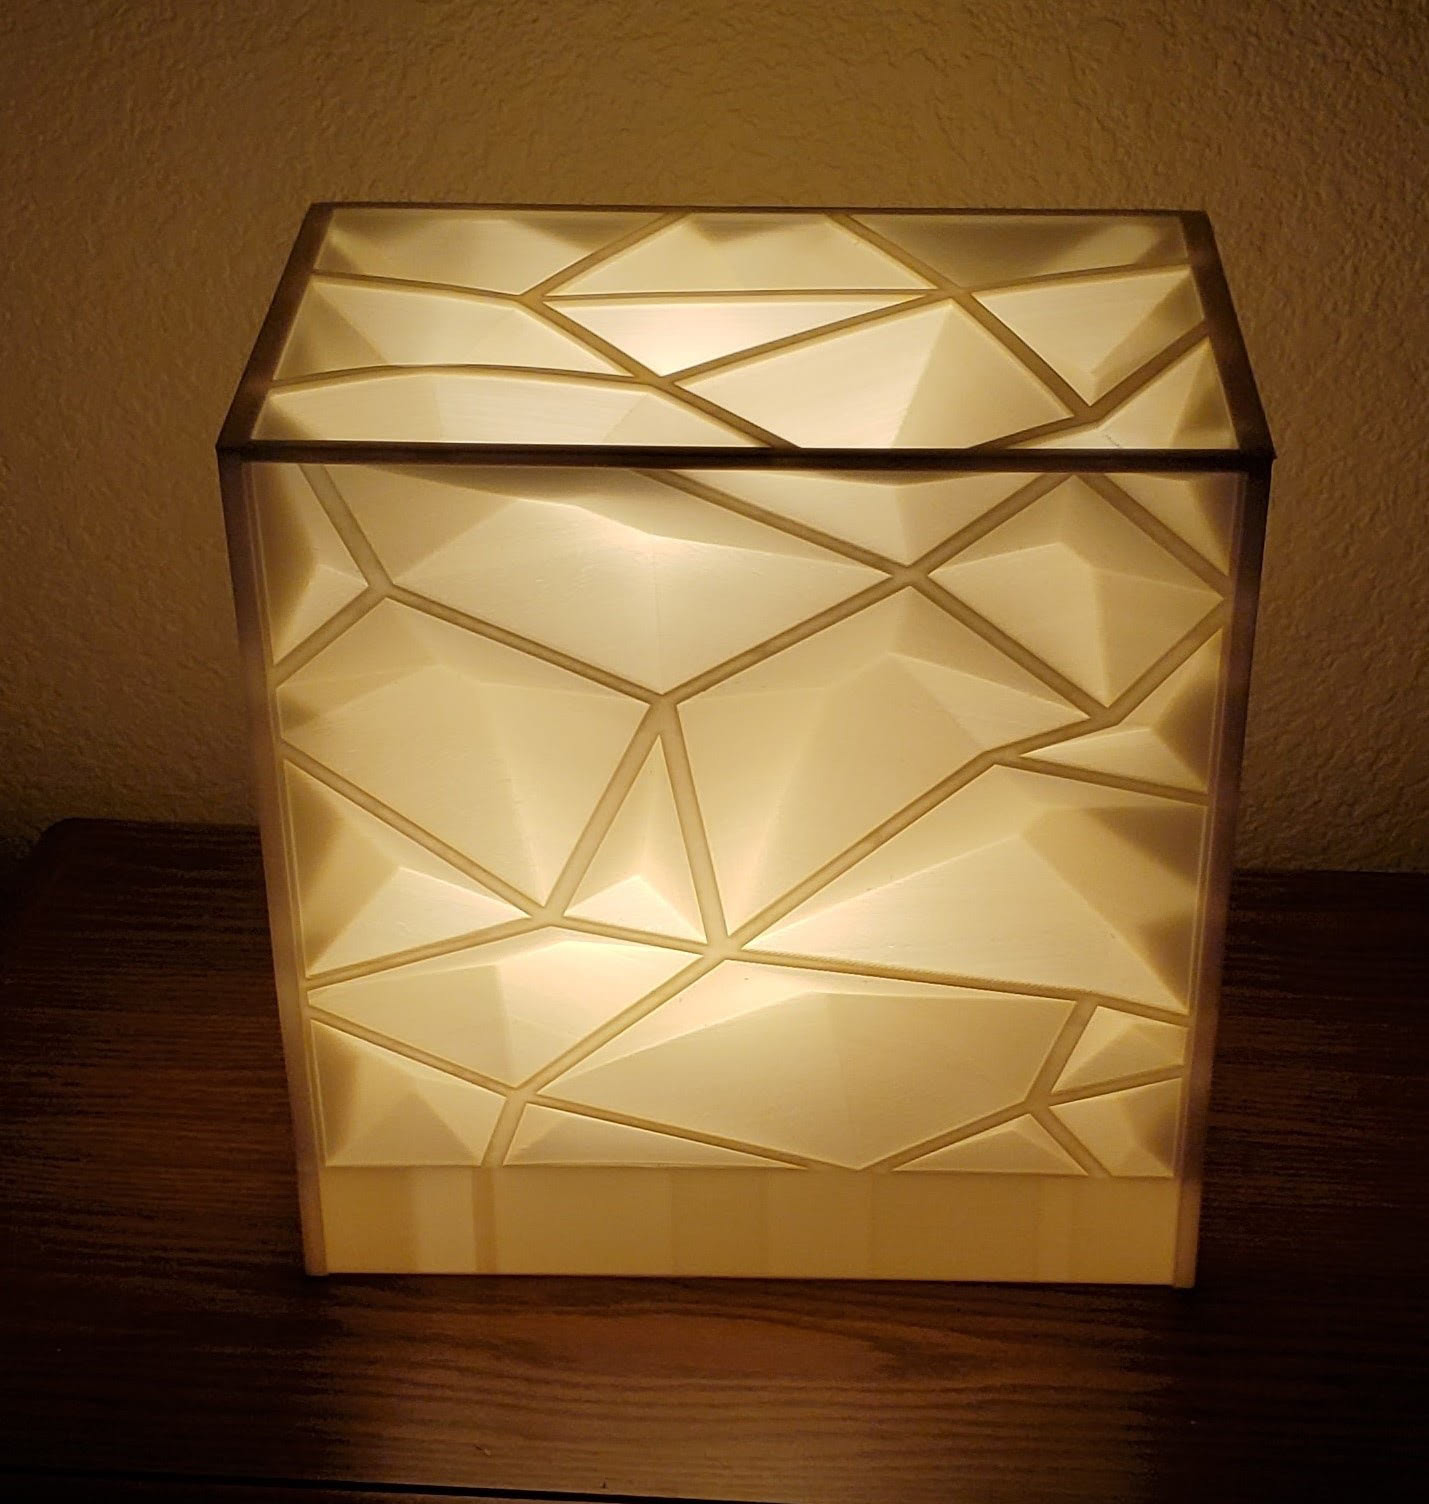
That’s the result of 53 hours of printing. I know there’s not a lot to infer scale but I didn’t want to ruin the aesthetic, which I think we can all agree is wonderful. I scaled it to essentially fill the 330 x 240 x 300mm build volume of the S5 so it is massive. It fits perfectly over an IKEA lamp base I have and somehow fits the IKEA style even better than the original lamp shade.
My Verdict
So that’s it for the print tests, where it performed remarkably well, but what about the user experience? I already mentioned that it’s incredibly easy to load material, and unloading is just as easy. Actually, the S5 retracts the material out of the hotend after every print, making it even faster to swap out to another material as the previous filament can be removed without having to wait for the hotend to heat up. It also eliminates filament breakages that occur to filament that’s loaded into a printer that’s idle for extended periods.
The multi-point probe automatic bed levelling works like a charm. Not once did I have to level the bed and the first layer of every print went down flat and smooth. Of all the new features that a professional 3D printer should have, this is my favorite. It saves so much time and prevents so many failed prints.
The noise level of the printer is not bad. It would be quieter if it were completely enclosed but the glass doors do certainly cut some decibels off. As with most 3D printers, it’s louder when it’s printing quickly, and even then it’s still possible to have a conversation in the same room. I have it in the office where I write and it hasn’t bothered me. If you keep it clean and lubed up, it won’t make as much noise. As a nice touch, the online portal has maintenance reminders that tell you when it’s time to perform various tasks like applying oil and tightening belts.
Connectivity is good, for the most part. The Wifi allows local network printing as well as cloud printing through their network and I had some issues with the hardware/software not being on the same page at times. When I did print over Wifi, it was rather convenient. Their browser-based interface is intuitive and displays a print queue where prints can be reordered, copied, or removed. Their cloud system allows admins to set up teams that can submit print jobs to the printer, and admins can decide the priority of the jobs. It’s a great feature for colleagues spread across an office building but for my purposes I found it simpler to just move files to the printer with the USB stick the old fashioned way. The Wifi camera is definitely helpful for checking up on longer prints.
The removable glass bed simplifies part removal a lot. Being able to work with the parts outside of the printer is just so much easier, though none of the parts I printed were overly adhered to the bed after they had cooled as the included glue stick seems to release as it cools. They include a second build plate so that another print can be started while the previous one is cooling. That’s nice except that the bed has to cool off before it can be safely removed, at least without wearing gloves.
Overall, the Ultimaker S5 is a workhorse for professional and creative environments. It produces quality prints and is incredibly reliable, easy to use, and versatile. It will fit in just as well at design studios, prototyping companies, and architectural firms.