If you do as much 3D printing as I do then you probably have a bunch of scrap pieces of filament lying around in your workshop. You know, the last meter or so that is too short to actually print anything with but too long to throw away without feeling guilty.
Why not make use of that filament by fusing it together and making awesome multi-colored prints?
The new Filament Fuser Block enables high quality splices of any 3D printing material in around 10 seconds. You can use it to extend the length of filament spools for super long prints and to add horizontal color changes to your projects!
It is built using 3D printed parts and best of all, you can download the parts for FREE here.

How does it work?
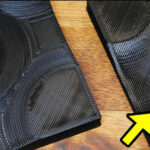
I’ve seen folks try to fuse filament with soldering irons, lighters, and the like with very unpredictable results. The bond is weak, uneven, unclean, or the filament itself is burned leaving you with a good chance the filament will break during a print.
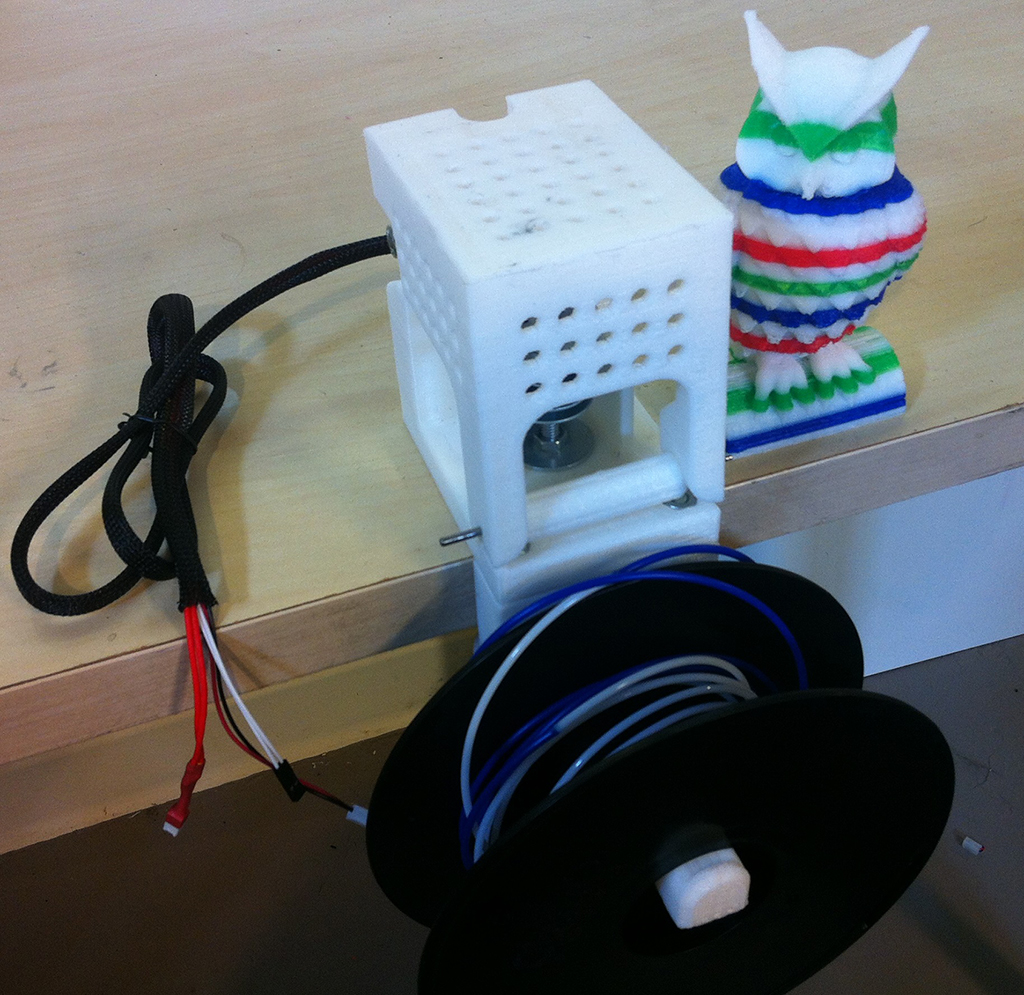
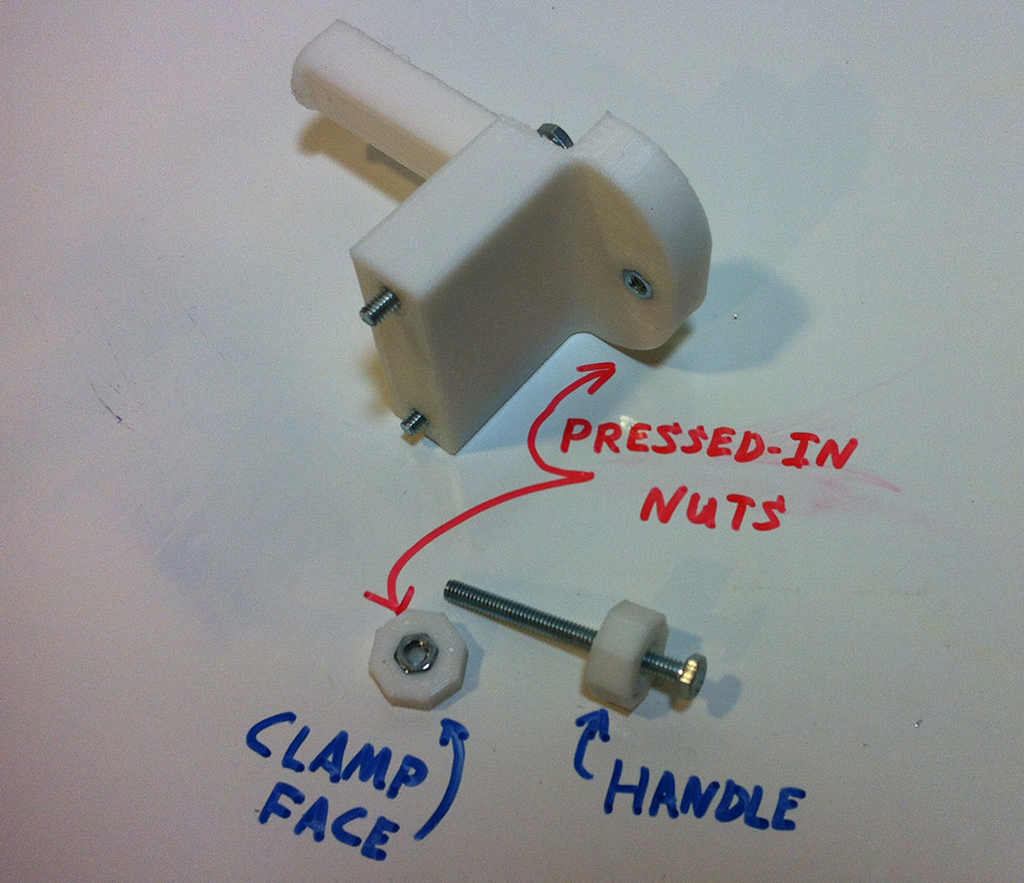
The Filament Fuser Block is a precision temperature controlled heated block that clamps to the edge of a table. The hot block has grooves that provide a guide for pushing the filament together.
The 3D printed plastic parts create a complete guard to surround the hot block and prevent anything touching it on accident. There is also a fan to help you cool the filament after a fuse to speed up the process. The protruding rod in the front of the device gives you a place to set a filament spool.
The device is controlled via standard 3D printer electronic controllers such as the Printrboard or an Arduino with RAMPs, which means that you can control the temperature and fan speed on your computer with your existing 3D printing software!

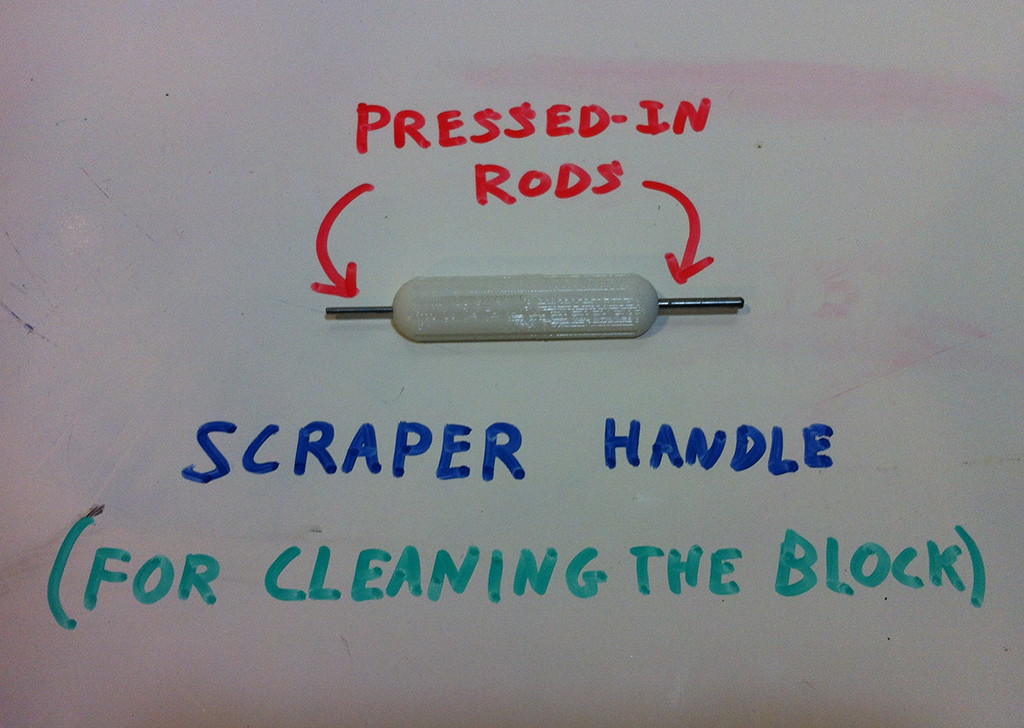
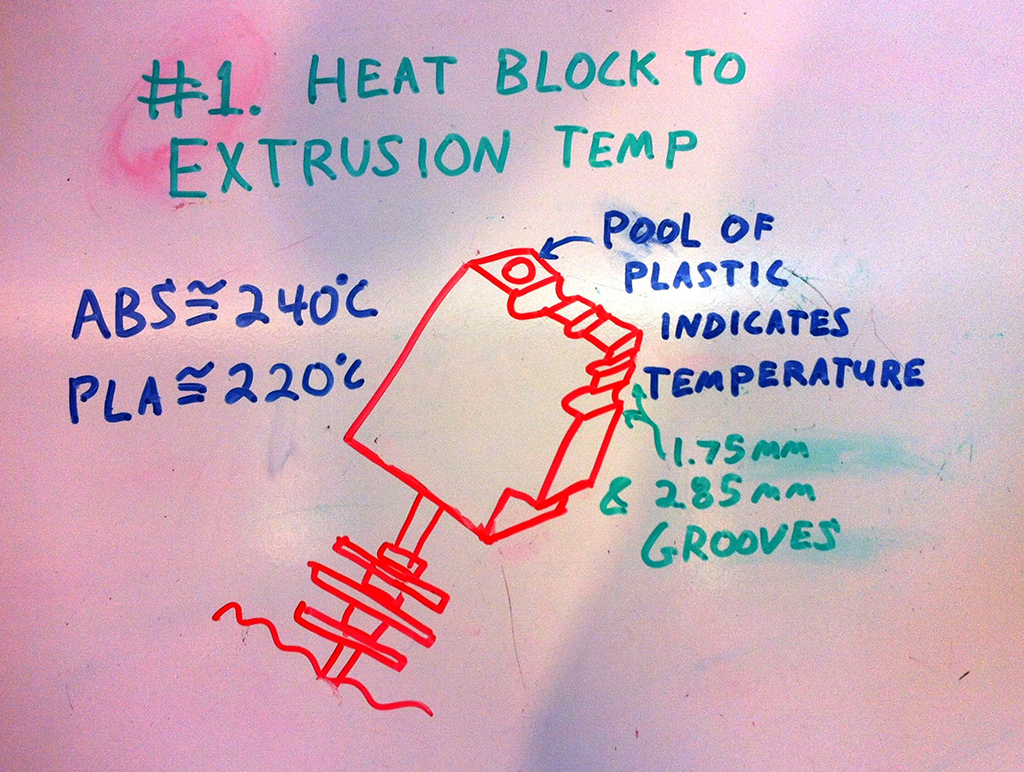
The standard kit can be used for 1.75 and 3mm filaments and even includes precision steel rods for cleaning the grooves. The heated block also has a hole in the top for making a filament pool to give you a visual indication of the block temperature. This pool can also be borrowed from for gluing printed parts together too!

Assembling the kit
For the purposes of the demo shown below, please excuse the 3D print quality. Parts were printed in fast mode with my favourite machine the MakerGear M2.
Now let’s take a look at what is involved with assembling the kit.
First print the parts.

Open up your hardware kit:

Get your tools ready

And follow these directions:
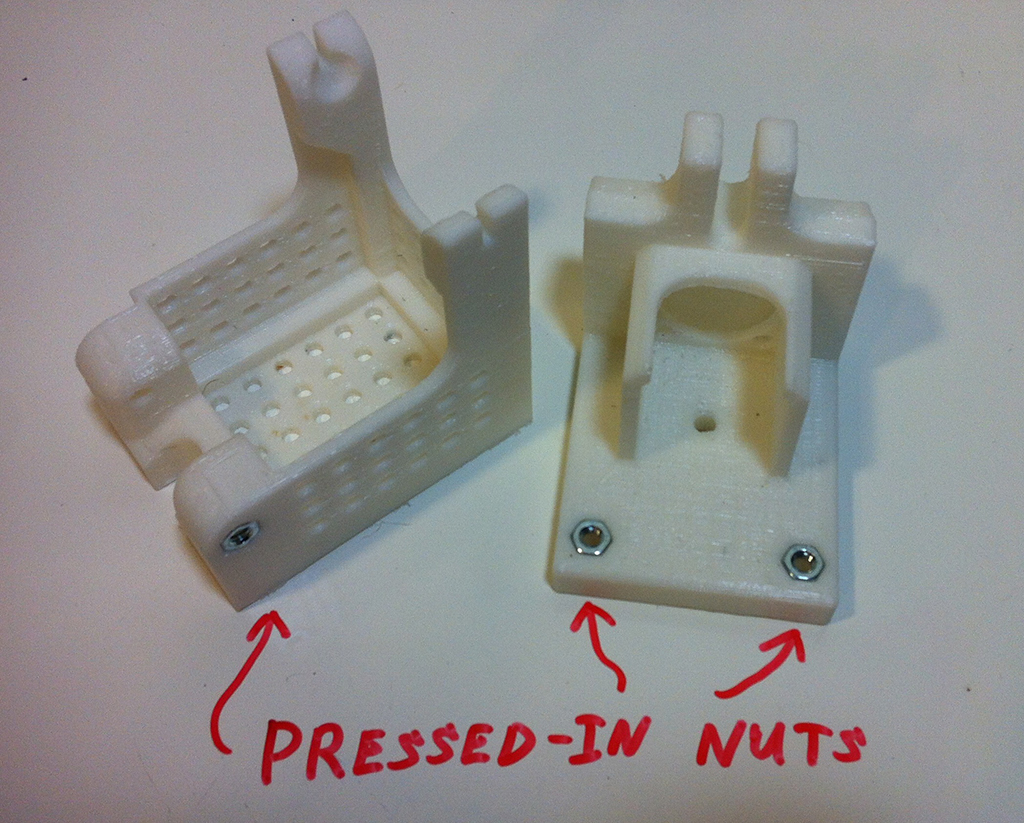
Step 1
Step 2
Step 3
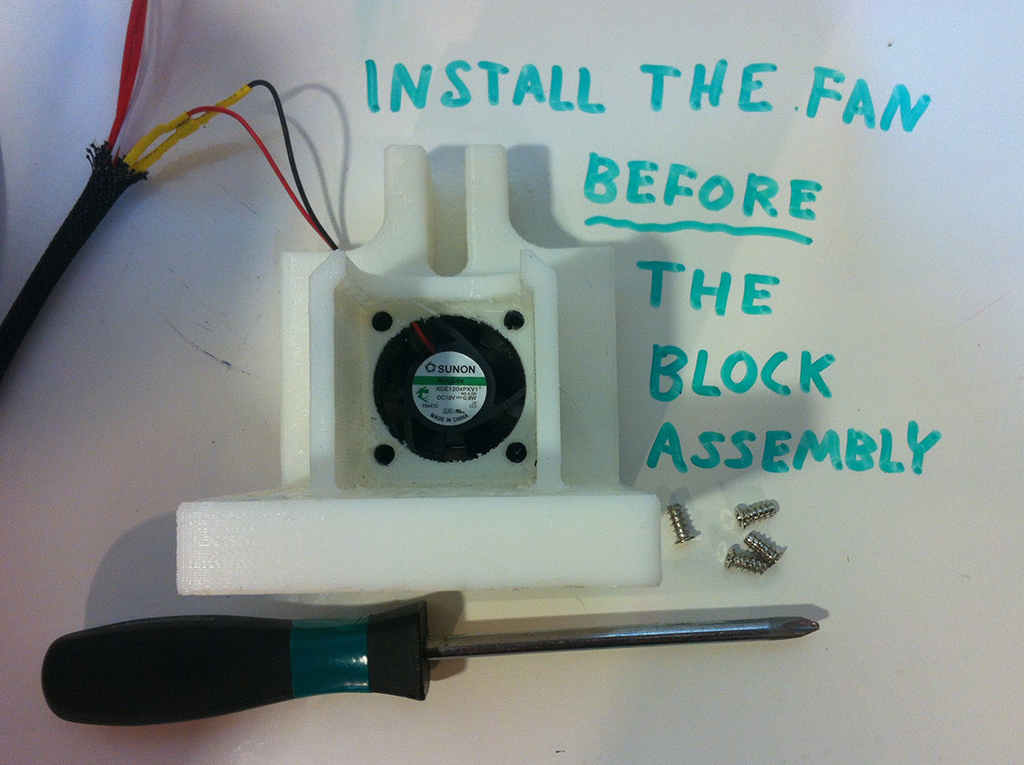
Step 4

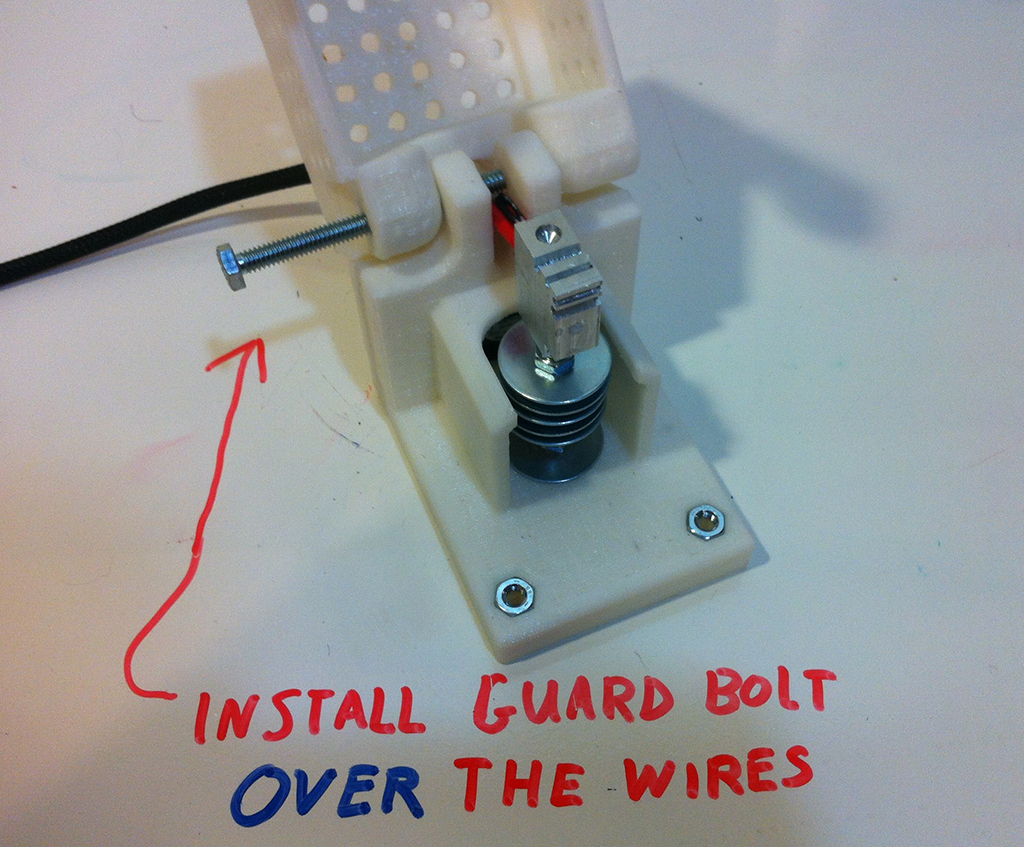
Step 5

Step 6
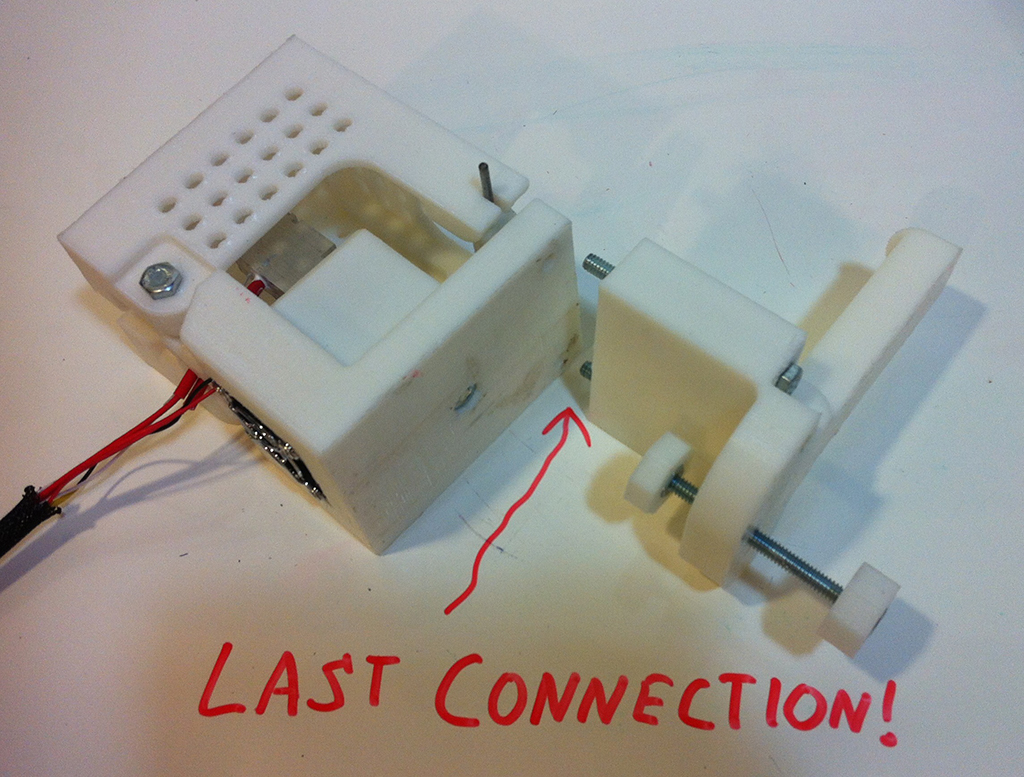
Step 7
Step 8

Step 9
How to fuse filament
The secret to getting a good bond is a combination of good tool and the right technique. First warm up your Block by plugging it into your 3D printer controller. Just borrow the same set of pins that your extruder uses.
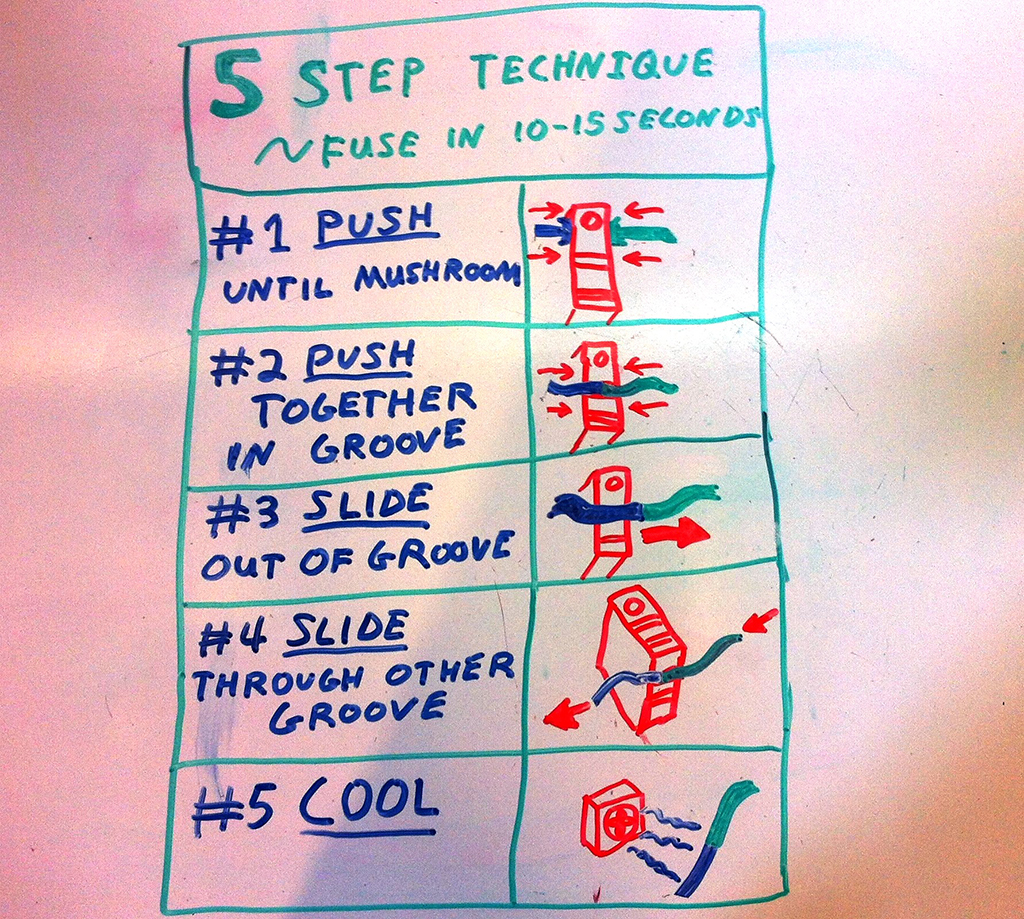
Then take about 1” of filament in each hand and follow this quick procedure.
- Push the filament into the side of the block for a couple seconds until it starts to mushroom out. (so you know it’s hot)
- Push the separate pieces together using the top groove as a guide.
- Slide the fused filament from the guide so that you scrape off the mushroomed material, leaving a smooth side.
- Side the fused filament through the side groove to remove the rest of the mushroom.
- Hold the bond in front of the fan until it cools.
- If necessary use the various edges of the block to scrape off any excess material or re-smooth the bond.
Let your slicing software to tell you how much filament the print needs and divide that length into segments to choose where certain colors will show up.

Conclusion
I hope you enjoyed this tutorial. If you have any questions, feel free to ask in the comments section below.