How to prevent warping
Today I’d like to talk to you about warping and how to minimize the effects that shrinkage can have on our work, especially for long prints. We should keep it to PLA and ABS as those are still the most commonly used. I will share some tactics that I find help resolve this. This article will be more based on tips and theory and how to improve your printing results but no firm 100% solution.
DIY Enclosure
Perhaps printing is like cooking. Factors such as barometric pressure, humidity, temperature etc play a part in it. Or its just chaos at work! I will say I get much better results with a near air tight enclosure to trap in the heat and reduce turbulent air flow. I also insulated the top with bubble wrap sandwiched with mylar, added an exhaust fan to vent fumes and lights for show. The hot enclosure should allow the the print to adjust a little better with smaller variations in temperature.
Rafts
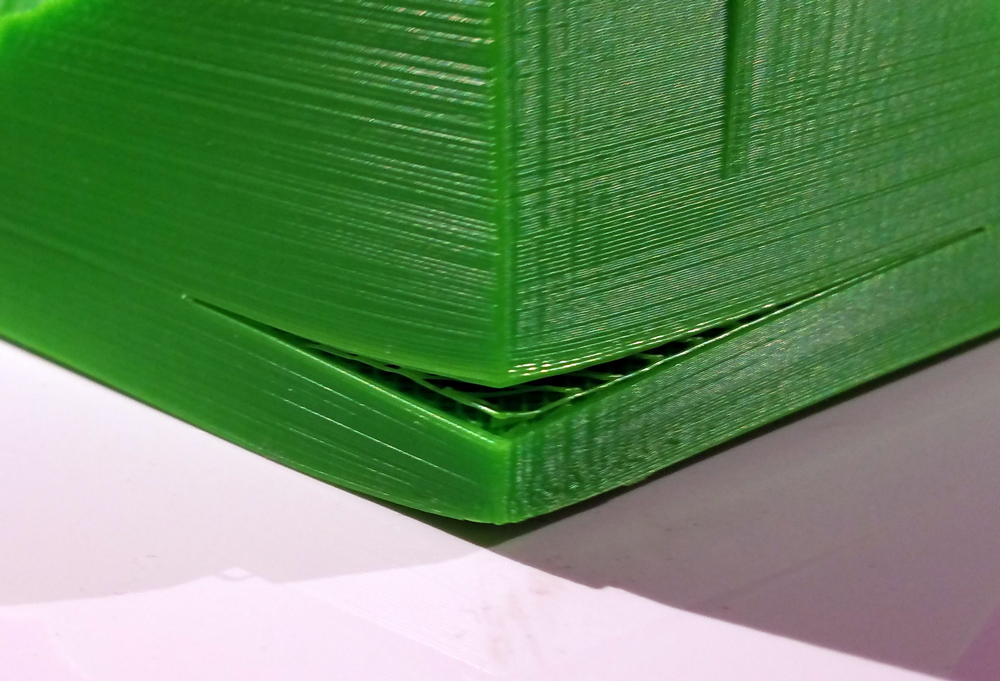
Rafts are essential, they really help hold your print down and minimize shrinking. Caution though if it sticks too well then your part can split. This happened to me before when I clamped my raft down with metal clips. Little to no shrinking but sometimes somethings gonna give.
Infill
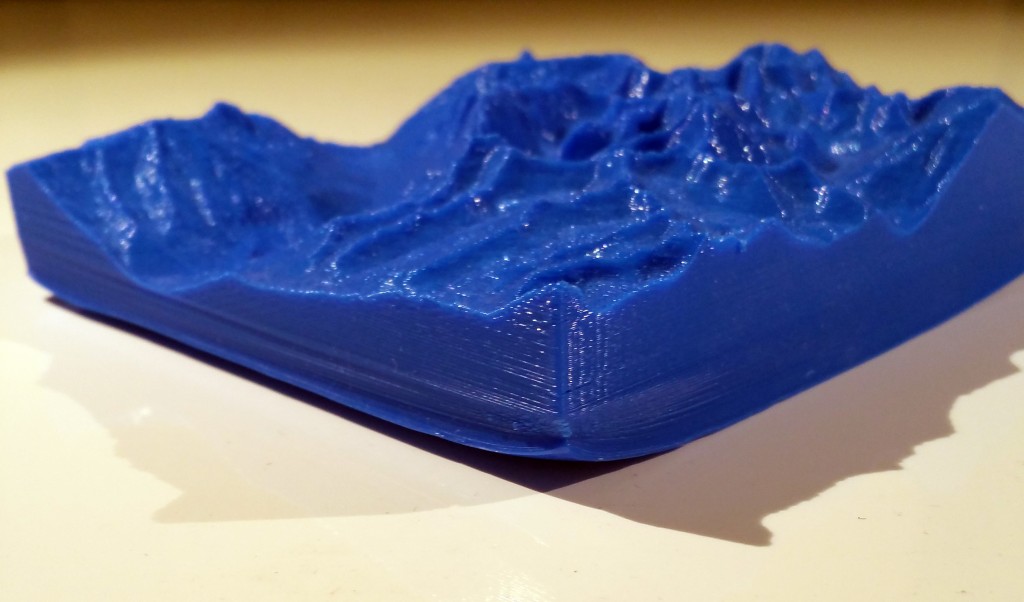
For large and long prints I have noticed that printing with 20-25% percent infills help since there is less plastic and less shrinking force exerted on your print but just enough to hold the structure and the outer walls from distorting. If at all possible try to print with no bottom layers and see what happens, this seems to also reduce the curling. There are near an infinite amounts of shapes to print so it’s subjective but large prints like a map or something that take a large surface area on the build plate this seems to work well.
Collaborate
Please share your experiences in the comments section, what do you find works best?
toz says
hi,
what printer is in the housing? would be nice, if you had linked it…or send me one. thanks…
ps.: no copyright for this image?
regards,
toz
Steve Henshaw says
Hello Toz
The printer in the housing is a MakerGear M2. There’s no copyright on the photo, feel free to use it or re-post it.
Steve Henshaw says
Hello Toz
The printer in the housing is a MakerGear M2. There’s no copyright on the photo, feel free to use it or re-post it as you like.
Thanks Toz
Jorge says
Hi, I have worked extensively with ABS. I tried variety of tricks to solve the problem of warping. Many times the problem isn´t the print temperatures. For me, the most important is the correct level of the hot bed. Regards.
Jason Steinberger says
Just wanted to put my 2 cents in, tho this wont be practical for everyone, I’m currently using my 2 person camping tent to house my 3D printer and it is working great! It keeps in the heat, keeps drafts out, spent less than $30 bux on it, brand really isn’t important.
I worked with what I had, but I bet a smaller childrens tent would work even better with a smaller footprint.
Anyhow, great article thank you!
Yuriy says
1. Make sure your extruder is extruding perfectly, without any jams.
2. Make sure your build plate is perfectly leveled. Keep in mind, plastic plates have a tendency of warping over time, causing one of the sides to peel.
2.1 Make sure your nozzle is close enough to your build plate. Your nozzle extrusion line needs to be short and fat, rather than tall and narrow (that’s when you’re too far off the plate, which will cause warping).
3. For non-heated beds, be sure you choose the right tape – basic blue tape works the best, others might not have the same adhesion between the model and the tape itself.
oklok says
Avoiding warp is quite easy for abs and pla if you know the setting of it. Usually the main reason are in fact that the temp setting is wrong, either on bed or extrusion. You should test it out with the material before going 100%
Angela Toma says
I have an ‘at home’ 3D printer using PLA filament. It is fabulous. The kids get personalized door hooks. I have made mini models of castles and houses, personalized gifts and more. And I used to have the warping issue. My deck is 5.9 in X 5.9in so it isn’t really big. But something that has worked really well for me are 2 things. Rafts, like it says above, super helpful. And the second is a glue stick. When I replace my tape and are just about to print a new project I put down a fresh layer of glue with a regular store bought glue stick. Haven’t had a problem since!
ejth says
Designing with material in mind seems to work best for me, avoid long straight lines and sharp edges and corners when designing stuff for ABS. In my experience its best to make things as rounded and dull edged as possible.
Oh and a nice layer of ABS+acetone and a brim helps also
I print on a prusa and sometimes ABS can be a pain because its not in an enclosure.
M98Ranger says
Hey, so one thing that I am going to be trying has been around for a long time in the welding industry to combat warpage that I don’t see applied in 3D Printing yet, but it will be soon is what is known as BACKSTEPPING a Weld in Welding….
The exception is that we are not welding exactly but the same principles can be applied for lengthy surface areas that are 3D printed.
The idea is this, start in one are ….print a short line on the long run direction run several layers then run another set of beads of the same length the same distance (in the direction of the long run, then move farther down the length and do it again……keep this up until you run a certain SHORT portion of the long length…..then move the to one of the opposite corners and start the same process…..keep this up until all of the layers meet in the middle. (Just look at backstepping a weld to understand the concept. Essentially you are allowing each of the sections to cool, so that as you lay down layers of ABS or PLC or whatever the layers have more time to shrink before adding a new hot layer. You could also obviously incorporate the other technologies in tandum (like a hot box) and also building up material around the edges….also, if ABS and PLS had good standardized manufacture, I would assume that one could apply the expansion coefficient…(or develop one for each batch of material that you order (worsecase scenario), so that you can develop an algorythm to encorporate most of the ideas here along with backstepping in order to add the correct amount of material to a 3D Printed objects bottom layer in order to reduce stress WARPAGE and create a functional amount of adhesion of the part to the print bed…..and or also what about developing ‘tits’ to stick into female slots created as a preparation for parts. Then just before the actual part is printed you ‘clamp it down’ with a clamp that has a female slot for those ‘tits’….so as to hold the part down mechanically while at the same time starting it out with the proper calculated amount of material…..
Also, the above might be benefited by just using something like a fluid…(WATER? ) bath at 100 Celsius ?? by making the clamp housing water proof and having the container housing the part being prototype fill with water as the part is being built…(up to the height of where the ABS is being injected from…ie right below the surface that is being created).
Paul says
That’s very insightful about the cooling rates in welding. We do something similar in dentistry with white fillings (they shrink as they cure), although I hadn’t heard the term backstepping. But for a material that shrinks and warps with temperature changes—yes, it’s got to be addressed, and I think backstepping is a great way to do it.
Josh says
One thing I have noted about ABS is the fact that it warps the longer it stays warm. Not to say you should use a cooling fan on it, but you should avoid making your heat bed too hot.
If you heat bed is over 100C, you will very likely get some warping. It’s fine to start the print at 100+, but make sure you drop the temp after the first or second layer down to something around 80c. This has helped me with almost all my warping issues.
The reason here is because the cooler bed temp helps the ABS cool enough that it solidifies. The warping won’t happen because it doesn’t have enough time to slowly warp before it cools.
Also as far as sticking it to the bed, I only use glass with a glue stick. I have used hair spray before too and that works well.
Nick says
I have been trying to print some slugs for a marble machine. They need to be heavy since they are gravity actuated. I had been printing on blue tape on a Monoprice Select Mini. The object was well adhered to the blue tape, but the warpage was pulling the tape up off of the beds at the corners.
I just abandoned a print at 3.9mm thickness. The corners were a full millimeter thinner. An earlier run where I let the parts go to full 9.2mm thickness, the edges, supposed to be square, were 2mm thinner because of warping.
I am using 25% infill, again, for weight.
I am printing in PLA. My first layer looks beautiful, flat extrusion, no lifting or curling.
The instructions I got were not to heat the bed for PLA with blue tape. What I did was to turn the bed heat up to 60c, the max for this machine. It seems to have stopped the warping. The part is up to about 8mm and all corners are well adhered. I’ll
Pierre says
I started 3D printing a year ago, building my own machine with ABS. In the beginning I couldn’t understand the warping problems.
I realized early on that this had to be cooling too fast. I tried everything from closing windows and doors, to heating the room to 23-25 degrees only to have parts fail.
About two weeks in I got an idea, raised my hotend just enough to pass my hand between the nozzle and bed.
I wet the top of my hand and moved it around the bed. I could feel air from the hotend cooling fan inlet as it sucked air in, so I designed a new cooler. Angled at 45 degrees. With the exit at 45 degrees. Better but I could still feel wind. From the ramps board cooling fan. I moved it to under the bed. I have an aluminum print surface with only kapton tape. Before I print I clean it with acetone. 100 degrees bed temperature, no cooling fan and print. Depending on the size of the part surface I struggle to get it off after printing. No warping. There should be no breeze whatsoever, and it will work. I have since built 3 prusa replicas and 2 kossel Minnie’s with no problems.
A hotend cooling fan with the inlet and outlet too close to the surface can cause problems. PLA and even less so,PETG aren’t as critical, but ABS must not have the slightest draft.
Hunter says
Hi,
For bed adheasion I use little bars at the outer ends of my print. These little bars are 10mmx2mm with rounded corners on top. The adhere to my print only at the bottom 2 layers. The warping of the main object stops at the border of the object. and does not continu into the bars. This prevents peeling while your printed object is warping. This way you can print sharp corners and long flat objects that are prone to warping.
Jamy says
For a good print, it start with a good level of nozzle and a good bed adhesion. I have read and try to solve the warping issue with ABS. I found that PEI is best solution for me. It work good, no need to maintaining or reapplying every print, all it need is clean sometime and give it little sanding when it show some age. I found a good seller on ebay through facebook group. Check them out if anyone want to try https://www.amazon.com
D. Clark says
Sigh.
When printing ABS I have fine luck with small pieces. With large pieces, that ALWAYS lift the corners I have tried:
Raising bed temp to 105C
Lowering bed temp to 90 after three layers
Raising nozzle temp to 250 (good layer adhesion, I’ll stay here)
Lowering nozzle temp (and got delamination at 230C).
Using bare glass with glue stick
Using bare glass with Aquanet
Using Kapton tape with gluestick
Using Kapton tape with Aquanet
Using “mouse ears” on sharp corners
Using 10 rings of brim on parts
Raising interior fill to 50%
Dropping interior fill to 25%
Increasing first layer “squish” by lowering layer height
Increasing first layer “squish” by increasing flow volume
Increasing BOTH on first layer
Every one of these things has been recommended as the “perfect” fix by someone. Not one of them has worked to print a large model with sharp corners. By large, I mean about 20cm tall and more-or-less 25cm square.
I have three things left to try:
Rafts, ABS slurry, PEI, Wolfbite.
People have complained that they can’t chisel parts off of PEI or ABS slurry, and using Wolfbite they have torn chunks of glass off of their bed! So these are not perfect, and I am leary of them since they are also either messy or expensive. I dislike rafts because they make the first layer really ugly. But the raft is my next attempt, then the ABS slurry (ick).
D. Clark says
Oh yes, added to my above notes, I have:
Very carefully leveled the bed and “zero’d” the nozzle.
I also use the auto-level function. my first layer is quite consistently well squished to the bed.
DLC
George says
Hi,
We came up with a new solution for bed adhesion, it still produces a smooth clean finish like that of kapton, but it is stronger (please see video of wrapminator printed using DnP) and easy to apply, hence reduced setup time, and at a very low price. Furthermore, the printed part will pop up by itself once the bed cools down, you will not have to exert any force on your bed to remove your printed part. Please visit http://www.dustnprint.com.
Alex Mercier says
I found a solution that works really fine for me. Its a printing bed made of powder and water. Dustnprint.com. Haven’t had any problem since then.