FDM 3D printers excel at quickly getting objects in hand. But often those objects aren’t the right color or they’re a bit rough. Sometimes that’s okay because it’s a very early-stage prototype. Other times, the part needs to look good, such as when seeking funding from investors. That’s where post-processing comes in.
There are many cases where post-processing is necessary or helpful:
- – Reducing/hiding layer lines
- – Smoothing away bumps and rough areas from printing issues and support removal
- – Changing the color of a part
- – Improving mechanical properties
- – Fixing discolorations
- – Joining parts
Here are some of the most common ways of finishing FDM 3D prints:
Sanding
Sanding is perhaps the simplest means of smoothing a print. All you need is sandpaper (400 to 1,000 grit depending on the roughness of the print). It’s not uncommon to have some blobs and zits on prints, especially if the print settings aren’t correctly dialed in. Likewise, areas where supports were removed usually have small bits of material that didn’t come off entirely. Sandpaper does a good job of clearing away most of these imperfections and can also reduce the visibility of layer lines. It’s advised to do wet sanding of printed objects for three reasons:
- – Sanding relies on friction, which generates heat that can warp and discolor prints; a bit of water or oil will prevent this.
- – It’s rather easy to scratch plastic and wet sanding will help to minimize the risk.
- – A lot of particulates are created when sanding and they’re dangerous to breathe; much of the particulates will bind with the liquid when wet sanding, keeping them out of the air.
Painting
When you really want to make a 3D printed part look professional, painting is the way to go. Painting can completely hide layer lines and make printed parts look injection molded. The process is simple, though a bit repetitive. There are five basic steps:
- – Smooth any apparent blemishes with sanding.
- – Clean the parts with rubbing alcohol then, if applicable, glue parts together.
- – Use a product like Bondo to fill gaps and seams, then sand smooth.
- – Spray with an aerosol primer filler and then sand; repeat this step a couple of times to get the best result.
- – Spray with whatever color aerosol paint you prefer; two or three coats are recommended.
A layer of clear coat can be added to protect the paint job and add a polished shine. This makes it easier to do actual polishing with buffing tools, too.
Fire-Based Touch Ups
Fire-based post-processing is one of the simpler methods of spot fixing prints, though caution should always be taken around an open flame, which can cause plastics to liquify and drip so wear gloves and long sleeves. Since 3D printers use heat to sculpt thermoplastics, a lighter (or match) can be used to selectively fix some imperfections.
This technique works best with ABS as it suffers from discoloration more easily than other plastics. Post processing in this form is especially good at erasing discolorations, as shown in the video above. It can also aid in erasing blobs. It’s less useful for holes and dents because it ends up removing more material from the area. A light touch is necessary with this technique and it certainly takes some practice.
Acetone Cold Welding
Acetone breaks down ABS in a consistent way so cold welding refers to the use of acetone to merge ABS prints. If you have a small print area, you can print separate pieces and combine them using acetone. Additionally, breaking up parts to print them in a better orientation is a good trick to minimize the use of supports.
The method involves using a brush or a cotton swab to lightly coat the surface of the print. When the plastic begins to decompose the external layer, it can be attached to another piece to combine both parts. Applying acetone to both parts will give stronger bonds. Acetone has certain benefits over glues. For one, it does not alter the color of the print. It also doesn’t add thickness between parts because they become chemically bonded together.
However, there are downsides as well. Acetone is toxic and flammable. Over-exposure is not good for the skin. It also dissolves the plastic it is used on, which can alter the shape of the print if not done correctly.
Epoxy Coating
Another option for making parts smoother is coating them with an epoxy resin. Epoxy very effectively hides layer lines and imperfections. There are a few options, one of which is XTC-3D that was specifically designed for use with 3D prints. It not only makes parts smoother and shinier but also makes certain translucent materials more transparent.
Epoxies are easy to sand and paint. Thus, they work best in combination with other post-processes. While most epoxies don’t cause discoloration, certain types like polyester and auto-body fillers can. Keep in mind that coating with epoxy does add thickness to the part.
Vapor Smoothing
Vapor smoothing is more complex than most other methods and requires a few safety checks along the way. It’s also amazingly effective and quick. The vapor used depends on the type of material used for the print. THF (tetrahydrofuran) is most commonly used on PLA prints while acetone and MEK (methyl ethyl ketone) can be applied to ABS.
Here’s the process:
- – Find a workspace with good ventilation.
- – Choose a container that is resistant to whatever solvent will be used; otherwise, the container may dissolve or warp. Glass or metal are generally safe bets.
- – Line the walls and floor of the container with paper towels.
- – Apply solvent to the paper towels; the solvents have low boiling temperatures so they slowly vaporize at room temperature and the paper towels ensure an even dispersal of the vapor particles.
- – Place a stand on the floor of the container for the print to sit on during the process. The print should not come in contact with the towels.
- – Place the print within and close the lid. Check the progress every few minutes. It’s easy to go too long and cause details to disappear. You can speed up the process by applying heat to the container but that’s a riskier method.
This is probably the most automated method of removing layer lines and increasing the shine on printed parts. One drawback is that it can reduce the strength of parts.
If you (understandably) don’t want to build a DIY vapor smoothing station, there are some engineered solutions on the market. One such solution is the Polymaker Polysher, which works with their PolySmooth PVB filament. What’s great about the Polymaker system is that it avoids the use of acetone, which is toxic, and ABS, which is a pain to print with. PVB prints much like PLA and the solvent used in the Polysher is isopropyl alcohol, a much safer solvent. The Polysher uses a nebulizer to create a fine vapor from the isopropyl alcohol that evenly coats the part to smooth it.
Polishing with Tumbler
For parts printed in materials that have a high percentage of metal powder mixed in, tumbling is a fantastic method of polishing. Using an inexpensive or DIY rock tumbler loaded with small brass screws, metallic prints can be polished for as little as one hour to dramatically increase their smoothness and luster; longer periods will produce better results. The abrasive screws knock away the non-metal materials on the outside of the print, leaving a thin shell of only metal on the outside.
Annealing
Annealing is a post-process where prints are heated near their glass transition temperature; this causes the amorphous molecular structure of printed objects to rearrange into crystalline structures, which increases strength and thermal resistance. PLA and PETG happen to have more amorphous molecular structures so they benefit the most from annealing. Annealing can increase the thermal deflection of PLA to the point of being able to use the material in outdoor applications. The strength gain has little effect on the Z axis, and the process does cause some dimensional shrinkage and expansion so it’s not recommended for parts that require exact dimensions. To reduce the shrinkage, anneal at lower temperatures for longer.
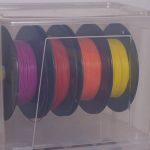
Dry Filament
This article is about post-processing but there’s one pre-process that’s worth mentioning here. When it comes to print quality, a lot of sanding and smoothing efforts can be avoided by ensuring that the filament is dry before printing. All polymers can absorb water, some more so than others. One of the reasons that 3D printer operators unanimously report better results with PLA is that it’s much less hygroscopic than most other filaments, meaning it absorbs little moisture. That allows PLA to sit on a shelf for years and still print fine. Materials that are more sensitive to moisture like PETG, TPU, and nylon can become nearly unprintable if not stored correctly or dried before use. Thankfully, standard food dehydrators work amazingly well for drying filaments. If you can hear little pops when printing, that’s a clear sign that the filament is wet as that popping noise is the water boiling in the hotend. Other indicators of wet filament include blobs, stringing, and poor layer adhesion. If you don’t want to build a filament dryer, there are also products available, like the PrintDry.