Filament Counter
Remember that old mechanical ball PS/2 mouse that’s been gathering dust in your drawer/attic for the last ten years? It might be time to wipe off that dust because there’s actually a really practical use for your vintage mouse if you like to 3D print. A project over at Hackaday has described how one can convert a PS/2 mouse into a filament counter for 3D printing.

Finding out how much filament you’ve used up on a particular print can be quite an eye-opening experience. But it can also be quite economical to keep accurate track of how much filament you use per print, even if the initial results might depress you slightly. Knowing the quantity of filament expended on your prints has the inevitable effect of improving these prints because you’ll put more emphasis on getting it spot-on. This means less wasted filament and smarter printing.

The Process
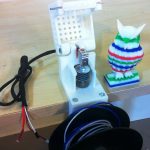
So how exactly do you make a filament counter using a PS/2 mouse? The process begins by stripping down the mouse to its bare essentials and mounting it on a bracket, as per the above image. An Arduino microcontroller is used to communicate with the mouse, displaying the filament count on a small LCD screen.
The filament counter works by connecting the mouse’s encoder wheels to a filament roller. As the filament makes its way to the extruder, the mouse’s electronics process the movement of the encoder. The Arduino unit keeps track of this movement and cumulatively adds up the total filament used. The counter works in both directions, making it extremely practical. When the filament is retracted, this is subtracted from the total figure displayed on the LCD.
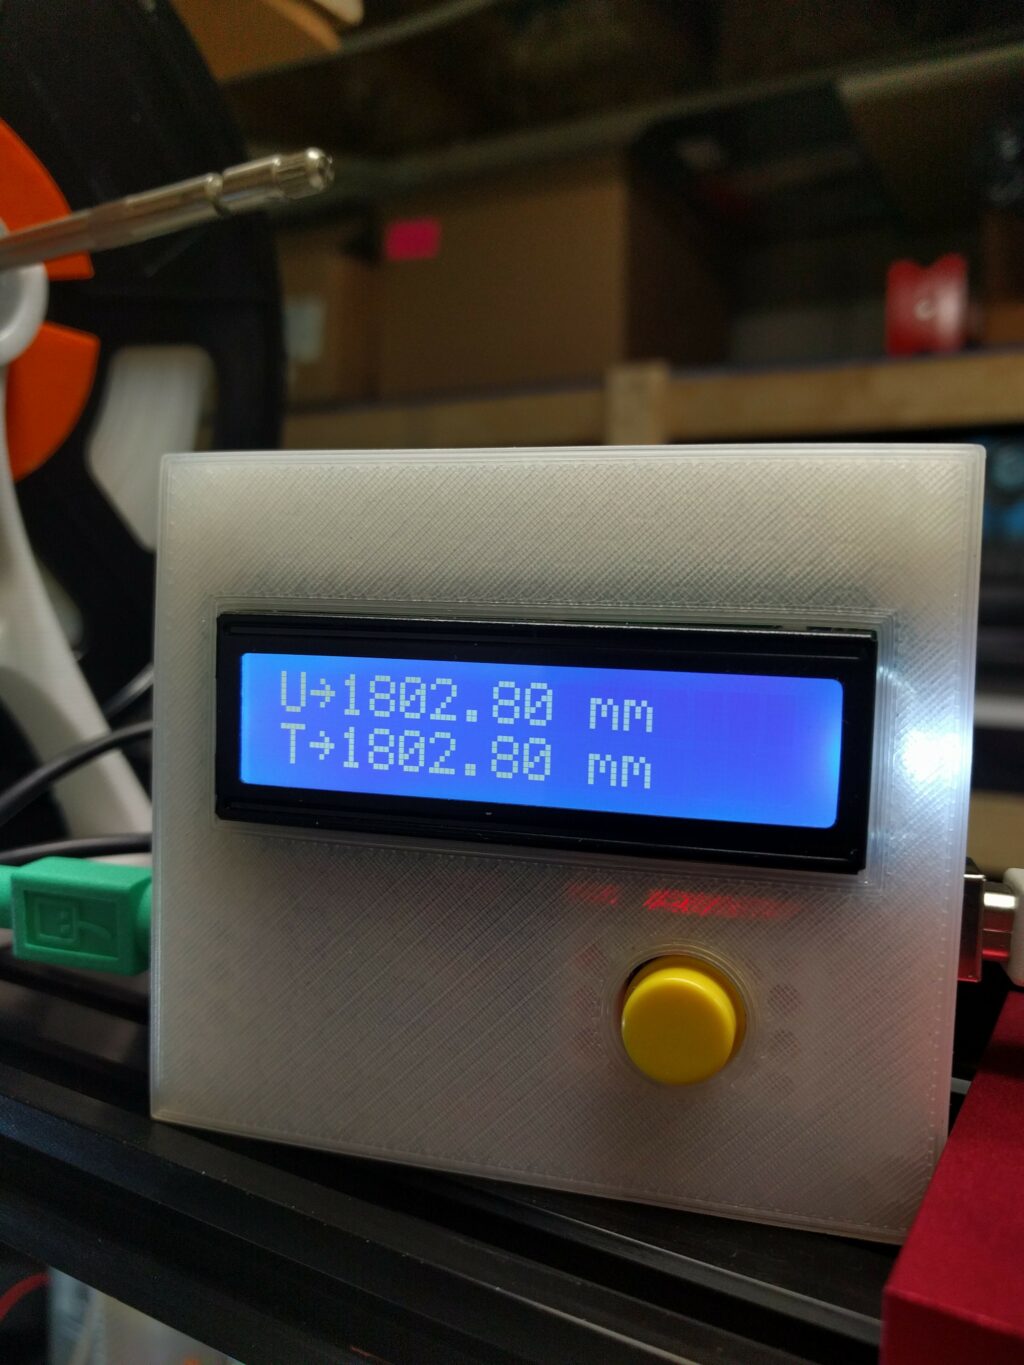
There are two distinct rows on the LCD display. The “U” row measures current filament usage in millimeters. The “T” row represents the total filament usage since you began counting. There is also a nifty reset button. One click lets you start the current usage row from zero, which is useful for each new print. A double-click lets you reset the total row for when you’ve moved on to a new roll of filament.
As a result of this quick and easy hack, you can now accurately record how much filament you use when 3d printing. Dedicated filament counters tend to be quite pricey, and they aren’t always accurate. Converting your old PS/2 mouse into a tool for keeping track of filaments is not only practical, but it’s cheap and arguably more accurate. If you’d like to take a look at the process in motion, check out the below video.