
3D Printing
News Back to school deals Contact us
Home / News / Color Your 3D Prints With Hydro Dipping
qidi

Color Your 3D Prints With Hydro Dipping

July 11, 2017

Hydro dipping is a method to imprint complex colors and patterns onto a surface. Whereas most dipping methods that involve coloring will add only simpler patterns or single colors, hydro dipping enables quick and easy multi-shade patterns with dynamic aesthetics.

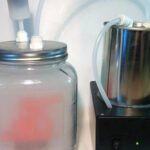
Coloring prints using this method involves (at minimum) getting a hydrographic film, some activator, a heated container and some finish. The process mainly involves setting up the film to be dissolvable and then submerging the item to color it. One disadvantage of hydro dipping is that it generally does one side at a time and thus may require re-dipping.

It is a home-friendly method and also very safe. All items can easily be obtained via the internet, hardware and hobby shops. It is also worth noting that while the dipping process is quite easy, however setting up the apparatus can be quite complex.

Palette 2 Showcases Multiple Material Color FFF Printing
Related Story
Palette 2 Showcases Multiple Material Color FFF Printing

What do you need to get started with hydro dipping?

Necessary items

Item requirements include:

  1. Primer
  2. Hydrographic film
  3. Base Coat
  4. Painter’s Tape
  5. Container (typically, acrylic or thick plastic box)
  6. Water heating device
  7. Activator
  8. High gloss finish
  9. Gloves

Method

Start off by scrubbing and cleaning the object you want to hydro dip. While there are no guidelines for what to use, it’s important to take off any grease. This allows for a smoother primer application process. Apply tape to any areas of the item you want to keep paint free. Also, remember to wear gloves.

Then, apply primer to the object. Do this using successive coats on the areas that you want to coat. Similarly, apply the base coats lightly. Too much coating will cause runs and spillage into the desired design. The base coat will serve as the background to most of the design, so choose the color wisely.

As the coat dries, fill the container with water and heat it up to about 70°-80°F. This is the ideal temperature for hydro dipping. This is the best time to use more tape to create some borders on both the film and the area of the water you will dip prints into. The borders will help keep the film in place and prevents drifting as it expands in the water.

Then, shake up the activator can to get it ready. Some cans have a secondary tab at the bottom that readies it. Now you need to find which side of the film goes on the water surface. If you wet your fingers and touch the film, you’ll notice one side dissolves. The side that gets erased should be on top. It’s important to hold the film by the corners as you put it on the water surface. Put the hydro film in the water and let it float. Keep the corners up as the middle touches the water and slowly lower the sides. Make sure to reduce the bubbles and wrinkles for an optimal finish.

Let the film soak for a bit and retain some water (typically about 60 seconds). Apply the activator in light strokes. The film will start to expand and after 15 seconds you will be ready to dip the object. While dipping, push the object down at a 30 – 45 degree angle and swirl it just a bit. Quickly lift the object and check your color coat.

To finish up the process, apply (medium to hot) water to take off the adhesive residue. Try this until all the shiny residue bits are gone. Finally, you can apply the high gloss finish and consider the print recolored.
Related Story
Post-Processing FDM 3D Prints
Share:
WhatsApp Twitter Facebook LinkedIn Buffer Reddit E-mail
Join our newsletter

Our newsletter is free & you can unsubscribe any time.

Latest posts

Elegoo Day Sale 2026: The Four Best Prices, And How The Rest Compare

Elegoo Day runs to September 29 with up to 54% off. Four prices are the lowest we have on record, the material tiers... read more »

News

FibreSeek Opens Pre-Sale of FibreSeeker 3 Continuous Carbon Fibre Printer

FibreSeek has opened a limited global pre-sale of 500 FibreSeeker 3 printers, a desktop machine that lays continuous carbon fibre into plastic parts.

3D Printers
FibreSeek Opens Pre-Sale of FibreSeeker 3 Continuous Carbon Fibre Printer

Reverse Engineering Without CAD Data: How the MetroY Ultra Turns Physical Parts into Digital Designs

A custom seat tray for a 1984 Honda CB400, a hard-to-find grille for a VW Golf Mk1 Convertible, and a black throttle body... read more »

News

University of Amsterdam 3D Prints Ice Structures Without Supports

University of Amsterdam physicists have developed a way to 3D print structures out of ice that need no extra supports and melt back... read more »

News
University of Amsterdam 3D Prints Ice Structures Without Supports

RMIT 3D Prints Titanium That Floats

RMIT engineers have created a 3D-printed titanium material that floats in water even after severe damage, a candidate for jetties, buoys and marine... read more »

3D Printing Metal
RMIT 3D Prints Titanium That Floats

University of Waterloo 3D Prints Diamond-Shaped Electrodes for Flow Batteries

University of Waterloo researchers 3D printed a diamond-geometry electrode that improved redox flow battery performance by 52 percent in lab tests.

News

University of Maine Launches 30-Foot 3D-Printed Offshore Boat

The University of Maine launched a 30-foot 3D-printed boat designed for offshore speeds near 40 knots, skipping a new mold for every hull.

News
University of Maine Launches 30-Foot 3D-Printed Offshore Boat

SUNLU FilaDC i10: 10-spool filament dehumidifying cabinet

A co-branded storage cabinet that SUNLU rates to hold up to ten 1 kg spools at 10 to 55 percent RH without heating... read more »

News

ORNL Combines 3D Printing and Electroforming for Leak-Free Nuclear Parts

Oak Ridge National Laboratory and A.J. Tuck combined 3D printing and electroforming to make leak-free HIP cans for nuclear and energy components.

News
ORNL Combines 3D Printing and Electroforming for Leak-Free Nuclear Parts

MIT Researchers 3D Print Modular Blocks for Shape-Changing Smart Devices

MIT researchers have 3D printed a set of modular building blocks that stay electrically connected no matter how you compress, stretch, rotate, or... read more »

Materials
MIT Team 3D-Prints Modular Blocks That Stay Wired When They Change Shape

Social

  • Facebook Facebook 3D Printing
  • Linkedin Linkedin 3D Printing
Join our newsletter

Our newsletter is free & you can unsubscribe any time.

banner
  • Anycubic Kobra S1 Combo

    • - Print size: 250 x 250 x 250 mm
    • - budget multicolor printing
    More details »
    $429.00 Anycubic
    Buy Now
  • Snapmaker U1

    • - Print size: 270 x 270 x 270 mm
    • - multi-color printing with SnapSwap
    More details »
    $849.00 Snapmaker
    Buy Now
  • Anycubic Photon Mono M7

    • - Print size: 223 x 126 x 230 mm
    • - 10.1 inch 14K screen
    More details »
    $279.00 Anycubic
    Buy Now
  • Qidi Q2

    • - Print size: 270 x 270 x 256 mm
    • - enclosed heated chamber up to 65°C
    More details »
    $580.00 Qidi
    Buy Now
  • Creality Hi Combo

    • - Print size: 260 x 260 x 300 mm
    • - up to 16-color printing
    More details »
    $399.00 Creality
    Buy Now
  • Flashforge Guider 3 Ultra

    • - Print size: 330 x 330 x 600 mm
    • - dual extruder system
    More details »
    $2,999.00 Flashforge
    Buy Now
  • Flashforge AD5X

    • - Print size: 220 x 220 x 220 mm
    • - dual extrusion system
    More details »
    $399.00 Flashforge
    Buy Now
  • Creality K2 Plus

    • - Print size: 350 x 350 x 350 mm
    • - multi-color printing
    More details »
    $1,199.00 Creality
    Buy Now
  • Qidi Max 4

    • - Print size: 390 x 390 x 340 mm
    • - active cooling air control
    More details »
    $1,219.00 Qidi
    Buy Now
  • Flashforge Adventurer 5M

    • - Print size: 220 x 220 x 220 mm
    • - 600mm/s travel speed
    More details »
    $299.00 Flashforge
    Buy Now

Company Information

  • What is 3D Printing?
  • Contact us
  • Join our mailing list
  • Advertise with us
  • Media Kit
  • Nederland 3D Printing

Blog

  • Latest News
  • Use Cases
  • Reviews
  • 3D Printers
  • 3D Printing Metal

Featured Reviews

  • Anycubic Photon Mono M5s
  • Creality Ender 5 S1
  • The Mole 3D Scanner
  • Flashforge Creator 3 Pro

Featured Industries

  • Automotive
  • Aerospace
  • Construction
  • Dental
  • Environmental
  • Electronics
  • Medical
  • Military
  • Fashion
  • Art
2026 — Strikwerda en Dehue
  • Home
  • Join our mailing list
  • Contact us
Blog
  • Latest News
  • Use Cases
  • Reviews
  • 3D Printers
  • 3D Printing Metal
Featured Industries
  • Automotive
  • Aerospace
  • Construction
  • Dental
  • Environmental
  • Electronics
  • Medical
  • Military
  • Fashion
  • Art
Company Information
  • What is 3D Printing?
  • Contact us
  • Join our mailing list
  • Advertise with us
  • Media Kit
  • Nederland 3D Printing