
3D Printing
News Back to school deals Contact us
Home / Tips and Tricks / Bed Adhesion and Squish
qidi

Bed Adhesion and Squish

Your 3D printer is all fired up, filament loaded and ready to go, you think you have it all under control and press print. Everything seems ok at first but you leave the room for 5 minutes only to come back to a mess of filament and a dislodged print. Your print is ruined, you have to start over and this time with the constant worry if the print will fail or not. Bed adhesion and getting those first layers to stick are critical to your success at printing. Everything starts with the first layer, the foundation if you will of your printing.

PEI print surface

PEI (polyetherimide) is a surface that makes your 3D prints stick better to the print platform. It makes the use of rafts (see below) redundant. It mostly comes in the form of a sheet that you attach on for instance a glass bed. PEI sheets are available on Amazon, Aliexpress et cetera.

BuildTak

I have been using BuildTak for a few months now and thus far it sticks extremely well, almost too well. After contacting support they recommended me to find ‘the sweet spot’. It is crucial that you discover the optimal nozzle height for your 3D printer and settings. Here are some tips:

  • Start leveling at a safe nozzle height of about .25mm (or the thickness of a typical business card) and run a test print, paying close attention to the first layer. To find the sweet spot, it is always better to start with the nozzle height higher than what you might be used to with other solutions.
  • Changing your nozzle temp, material used, print speed, et cetera may require re-discovery of the optimal nozzle height.

If after reading this post and you still have adhesive problems, BuildTak will fix it. Just explicitly follow their setup instructions with little to no first layer squish otherwise your print will become part of your printer. BuildTak sheets are available in different sizes on Amazon, Aliexpress et cetera.

Related Story
BuildTak Launches New FlexPlate System For Easy Removal of 3D Prints

Print bed additives (tape, glue stick and hairspray)

A lot of people are using a variety of things applied to their print bed to get better adhesion. We are seeing things like painters tape, hairspray, glue sticks etc applied to the bed in hopes the print will stick. I don’t use any of these as I feel it’s not consistent or reliable and typically just makes a mess to clean up.
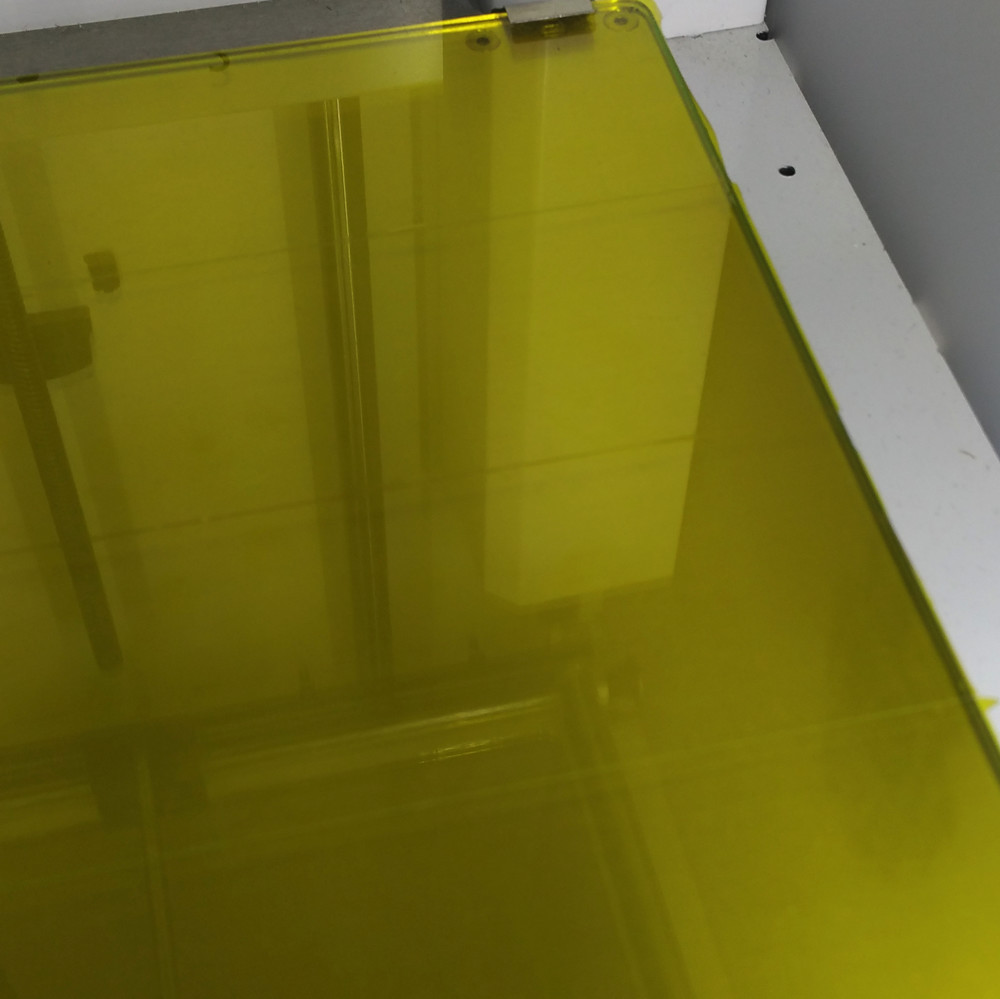
Bed_kapton

I only use Kapton tape and sometimes a self made acetone/ABS mixture. Kapton tape has many uses in the lab. It’s functional between −269 to +400 °C, is used in space and also adheres very well under water among several other attributes.

To apply the tape you’ll need to remove the glass from the build plate and apply the tape underwater or with a spray bottle and water. Get a plastic tub big enough to accommodate the glass build plate, fill with water and cut some lengths of Kapton tape and apply under the water. Be sure that there are no bubbles under the tape before applying and carefully line up the lengths of tape against each other and press down.
It’s also recommended to use a plastic scraper to press the tape down against the glass to get a bubble free layer. Hold the scraper at a diagonal and run gently along the the length of the tape. If you mess up you can just peel off and try again with little worries.

Most times I only use the Kapton tape but for some ABS builds that have little surface contact with the build plate I use ABS juice. Unfortunately this ABS/acetone mix is highly flammable, noxious off-gases, corrosive and very sticky.

warping example 3d printing
Related Story
How to Prevent Warping

I built a ventilated, thermally regulated enclosure for ABS printing. So if your clumsy and don’t have a well ventilated area, maybe hold off on the ABS/acetone for now. If you still want to make the mix it’s just a matter of dissolving ABS plastic in acetone until it gets creamy, viola you have ABS juice.

Getting proper Squish and bed Calibration
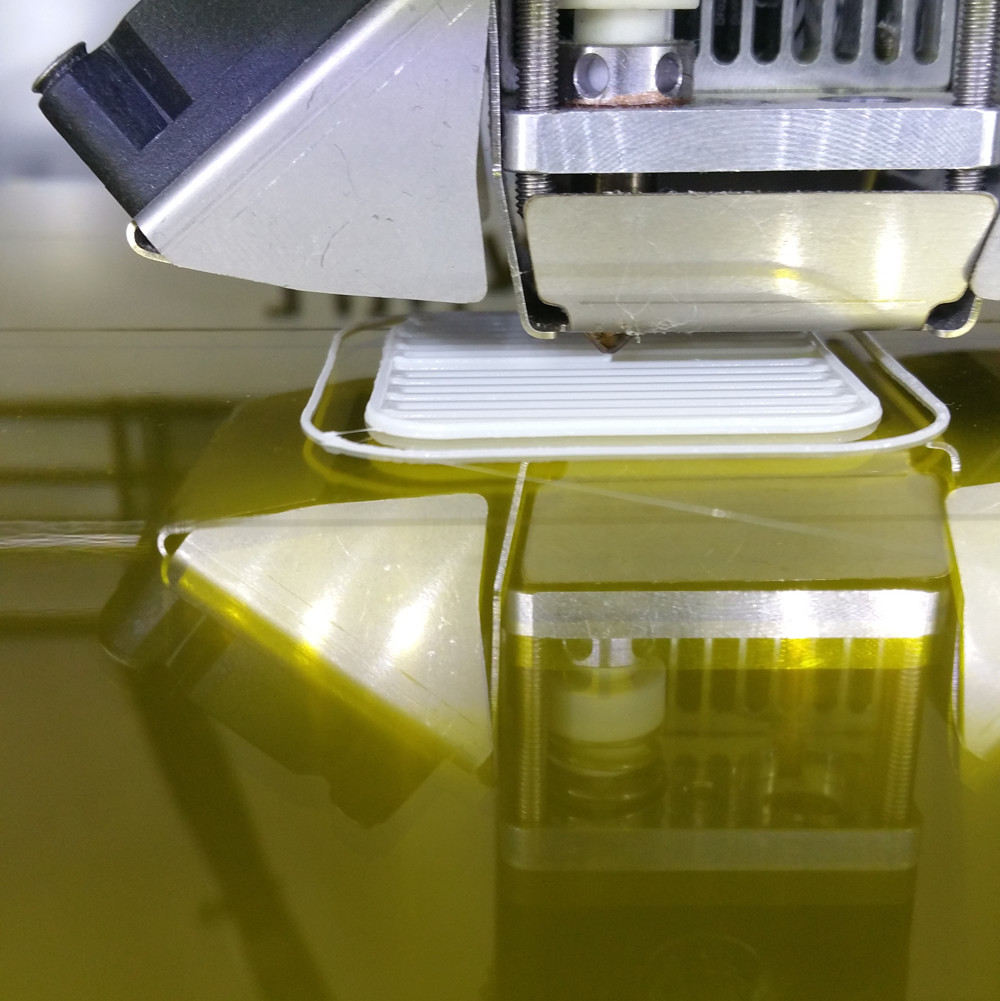
Layer_printing

Depending on your printer you will need to learn how to level the print bed for that particular printer first. Don’t cut corners on this, take the time to get each corner perfect and locked in.
Some people use a sheet a paper and many printer manufactures recommend it this way however I use a business card. The business card which is .35mm-.36mm in thickness should be of smooth finish and a non-inked surface facing up to make contact with the hot-end.  Also a business card is far easier to handle and more rigid then a sliver of paper.
Now heat up your build plate and extruder hot-end to calibrate and fine tune the printer. Obviously differing materials contract and expand differently at different temperatures. You want to replicate your actual printing environment to get really accurate results.
Furthermore the business card needs to be of non-inked surface because the hot-end will melt and pull of the finish or ink of the card. After you finish levelling it’s time to test print and adjust your G-code or Z axis off-set accordingly to get good squish on the first layer. The first layer of plastic should be flattened in appearance but not so thin to become transparent.
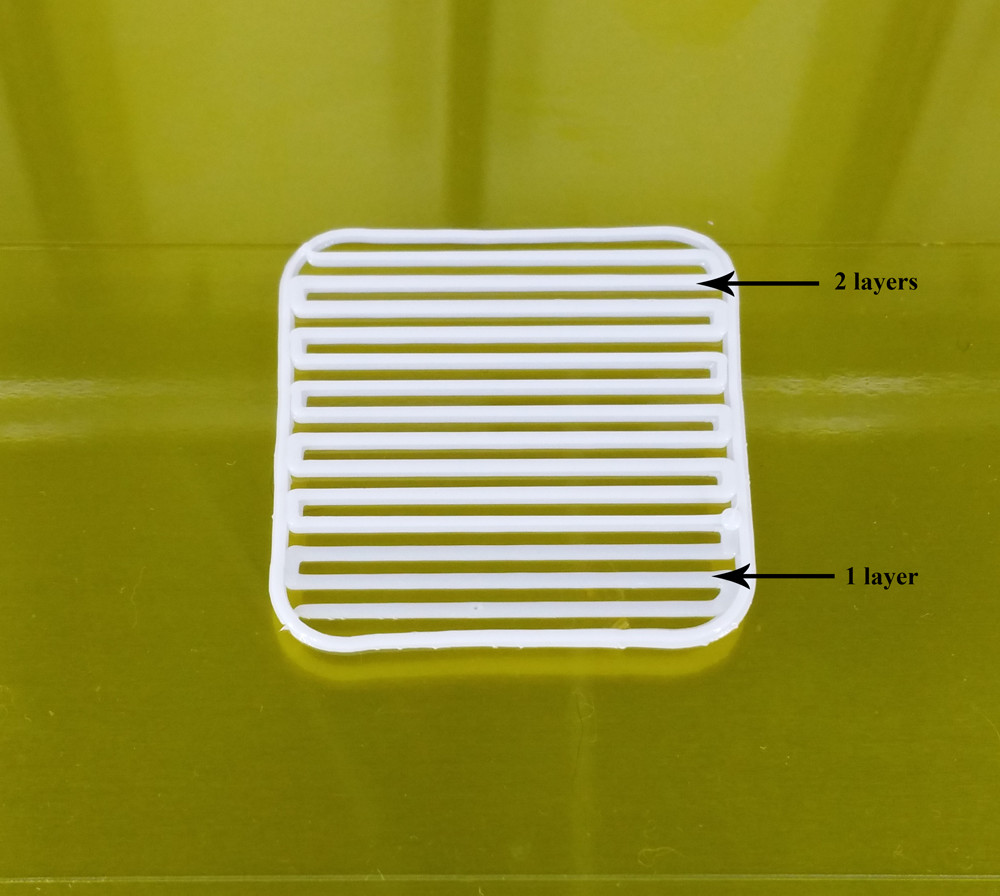
layers

Now we are printing reliably with some good quality filament and good bed adhesion. You should be able to print 30-40 hour prints with little worry provided you have enough filament on the spool of course.

How 3D Printing Enhances the VR and AR Gaming Experience
Related Story
Best 3D Printers for Beginners 2026
Related Story
Best 3D Printers 2026: Buyer’s Guide
Share:
WhatsApp Twitter Facebook LinkedIn Buffer Reddit E-mail
About the author | Steve Henshaw
Steve is the founder of SolidXYZ 3D printing based in Canada. He has a past in oil and gas operations, dental, pharma, military and more recently an entrepreneur in the 3D printing space. Steve is very passionate about science with particular interests in the cosmos, Ai, robotics and cybernetics.
Join our newsletter

Our newsletter is free & you can unsubscribe any time.

Latest posts

USC Team Prints Stretchable MRI Coils in Under 10 Minutes

A USC team 3D-printed conductive silver ink onto a thermoplastic elastomer to make patient-specific MRI coils in less than 10 minutes for about... read more »

Medical
USC Team Prints Stretchable MRI Coils in Under 10 Minutes

Kansas State Tests Off-Site 3D-Printed Concrete Storm Shelter Modules

A Kansas State researcher is printing full-size 4-by-4-foot concrete modules off-site, then assembling them as storm-shelter blocks meant to take tornado winds and... read more »

Construction
Reese Greenlee

LLNL Team Prints Ceramic Waveguide Lasers By Direct Ink Writing

A Livermore team 3D-printed an all-ceramic waveguide by extruding ytterbium-doped yttrium aluminum garnet filaments within an undoped garnet matrix and then drying, sintering,... read more »

News
LLNL Team Prints Ceramic Waveguide Lasers By Direct Ink Writing

Heidelberg Team Designs Recyclable Polymer for Light-Based 3D Printing

A Heidelberg University team has designed a light-curable 3D printing polymer that a chemical trigger can take apart at room temperature. Printed parts... read more »

Materials

Best Budget 3D Printers 2026: What $169 to $399 Actually Buys

The best budget 3D printer conversation changed character in the last three years. Auto bed leveling, direct-drive extruders, and 250 to 600 mm/s... read more »

3D Printers

MIT turns pine-cone mechanics into 3D-printable adaptive materials

An MIT team used category theory to break a pine cone's humidity response into independently validated building blocks, mixed some of those blocks... read more »

Materials
MIT turns pine-cone mechanics into 3D-printable adaptive materials

Only 1 in 25 3D Print Buyers Trust AI Generated 3D Models

CGTrader's 2026 market report shows a booming print market, a brutal quality premium, and one number the AI industry will not be quoting:... read more »

News

Tel Aviv Team Creates Bioactive Ink for Precise 3D Printing

Researchers at Tel Aviv University have developed a bioactive 3D-printing ink that pairs high printing precision with enhanced cell adhesion and antibacterial activity.... read more »

Bioprinting
Tel Aviv Team Creates Bioactive Ink for Precise 3D Printing

EPFL 3D-prints tiny drones that fly on sound alone

Engineers in EPFL's MICROBS Lab have 3D-printed hollow cavities that convert sound waves into thrust. The cavities power miniature boats and ultralight drones... read more »

News
EPFL 3D-prints tiny drones that fly on sound alone

Social

  • Facebook Facebook 3D Printing
  • Linkedin Linkedin 3D Printing
Join our newsletter

Our newsletter is free & you can unsubscribe any time.

Featured Industries

  • Automotive
  • Aerospace
  • Construction
  • Dental
  • Environmental
  • Electronics
  • Fashion
  • Medical
  • Military
  • Flashforge Guider 3 Ultra

    • - Print size: 330 x 330 x 600 mm
    • - dual extruder system
    More details »
    $2,999.00 Flashforge
    Buy Now
  • Flashforge AD5X

    • - Print size: 220 x 220 x 220 mm
    • - dual extrusion system
    More details »
    $399.00 Flashforge
    Buy Now
  • Flashforge Adventurer 5M

    • - Print size: 220 x 220 x 220 mm
    • - 600mm/s travel speed
    More details »
    $299.00 Flashforge
    Buy Now
  • Anycubic Kobra S1 Combo

    • - Print size: 250 x 250 x 250 mm
    • - budget multicolor printing
    More details »
    $429.00 Anycubic
    Buy Now
  • Qidi Max 4

    • - Print size: 390 x 390 x 340 mm
    • - active cooling air control
    More details »
    $1,219.00 Qidi
    Buy Now
  • Anycubic Photon Mono M7

    • - Print size: 223 x 126 x 230 mm
    • - 10.1 inch 14K screen
    More details »
    $279.00 Anycubic
    Buy Now
  • Creality Hi Combo

    • - Print size: 260 x 260 x 300 mm
    • - up to 16-color printing
    More details »
    $399.00 Creality
    Buy Now
  • Creality K2 Plus

    • - Print size: 350 x 350 x 350 mm
    • - multi-color printing
    More details »
    $1,199.00 Creality
    Buy Now
  • Qidi Q2

    • - Print size: 270 x 270 x 256 mm
    • - enclosed heated chamber up to 65°C
    More details »
    $580.00 Qidi
    Buy Now
  • Snapmaker U1

    • - Print size: 270 x 270 x 270 mm
    • - multi-color printing with SnapSwap
    More details »
    $849.00 Snapmaker
    Buy Now

Company Information

  • What is 3D Printing?
  • Contact us
  • Join our mailing list
  • Advertise with us
  • Media Kit
  • Nederland 3D Printing

Blog

  • Latest News
  • Use Cases
  • Reviews
  • 3D Printers
  • 3D Printing Metal

Featured Reviews

  • Anycubic Photon Mono M5s
  • Creality Ender 5 S1
  • The Mole 3D Scanner
  • Flashforge Creator 3 Pro

Featured Industries

  • Automotive
  • Aerospace
  • Construction
  • Dental
  • Environmental
  • Electronics
  • Medical
  • Military
  • Fashion
  • Art
2026 — Strikwerda en Dehue
  • Home
  • Join our mailing list
  • Contact us
Blog
  • Latest News
  • Use Cases
  • Reviews
  • 3D Printers
  • 3D Printing Metal
Featured Industries
  • Automotive
  • Aerospace
  • Construction
  • Dental
  • Environmental
  • Electronics
  • Medical
  • Military
  • Fashion
  • Art
Company Information
  • What is 3D Printing?
  • Contact us
  • Join our mailing list
  • Advertise with us
  • Media Kit
  • Nederland 3D Printing