
Yes, you can 3D scan with your phone, and the results are better than the price of admission suggests, which is zero. A free app turns the camera you already carry into a working 3D scanner: not a match for dedicated hardware on accuracy, but good enough to produce meshes you can print or drop into a game engine, and the capture instincts you build transfer directly to real scanning gear later.
Below: how the technology works, which apps deserve the install, a capture routine that produces clean meshes on the first afternoon, the limits no app store listing mentions, and the point where dedicated hardware starts earning its price.
Jump to menu
How phone 3D scanning works
Almost every 3D scanning app on a phone leans on photogrammetry. You photograph an object from every angle, the software finds features shared between shots, works out where the camera stood for each one, and triangulates those features into a point cloud. The cloud gets stitched into a mesh and the photos are projected back onto it as texture. No special sensor is required, just a sharp camera, which is why the technique runs as well on a modest Android as on the latest flagship. The method predates phones by decades; Cultural Heritage Imaging, the nonprofit that trains museums in it, keeps a clear primer if you want the theory.
Apple adds a shortcut. Pro model iPads and iPhones have carried a LiDAR sensor since 2020 (the iPad Pro first, then the iPhone 12 Pro); it fires a grid of infrared dots and measures depth directly, so apps get true scale and instant geometry without inferring it from photos. It shines on rooms, furniture, and anything chair-sized or larger. On small objects it is coarser than photogrammetry, because the depth grid resolves detail in centimetres rather than fractions of a millimetre.
Android has no LiDAR line, and the few phones with time-of-flight depth sensors rarely expose them to scanning apps. In practice this matters less than it sounds. Photogrammetry carries the whole workflow, and every app below runs it on Android.
You will also see apps advertise Gaussian splatting. Splats are for looking, not printing; until converted to a mesh they have no solid surface, so for a scan-to-print workflow they are a scenic detour.
The apps that actually work
The app stores are crowded with 3D scanning apps that promise more than they deliver; only a few earn a permanent spot. These three do, and they are the same three our 3D scanner software guide endorses for phone capture. Each has a free way in.

Polycam Free tier; ~$150/yr
The most widely used phone scanning app in 2026, with photogrammetry, LiDAR capture on Pro iPhones, and Gaussian splat capture in one place. The default choice for rooms and outdoor scenes. One catch for printers: capturing is free, but the free tier exports only GLTF; printable formats such as STL and OBJ need the Basic plan at $150 a year, or $30 month to month.

Scaniverse Free
Free from Niantic Spatial, with LiDAR-driven capture on Pro iPhones and photogrammetry everywhere else. Processing happens on the device, so results appear in moments without a cloud queue. Niantic has since added paid cloud processing, but the classic on-device mode, exports included, stays fully free, which is why scanning communities keep pointing beginners here first.

KIRI Engine Free; Pro ~$80/yr
The most experimental of the three: cloud photogrammetry plus Gaussian splatting and neural reconstruction modes that cope with surfaces classic photogrammetry hates. Widely rated the strongest object scanner on Android. Since version 4.0 the free tier exports without a weekly cap; the remaining limit is 150 photos per scan, which Pro lifts.
Two more are worth knowing. RealityScan, free from Epic Games, has a strong following for photo captures headed to game engines, and Luma keeps its fans for cinematic splat scenes. Start with the three above, and when you want the app-by-app depth alongside desktop cleanup and scan-to-CAD tools, the phone section of the software guide carries it.
The capture routine that gets clean results
Technique decides more than the app does. The routine below is what the scanning community has settled on through thousands of shared failures, and it applies to every photogrammetry app above. Follow it in order for your first few scans; after a dozen it becomes muscle memory.
1. Start with a forgiving object
Pick something matte and rigid with plenty of surface detail: a hiking boot, a weathered garden ornament. Between fist-sized and breadbox-sized is the sweet spot. Save the hard cases for later, because anything shiny, transparent, very dark, fuzzy, or thin (glassware, chrome, black electronics, houseplants) will fight you, and a first failure teaches the wrong lesson: that the tool is broken, rather than the object badly chosen.
2. Get the light soft and even
Bright overcast daylight is the best free studio on earth. Shadows dissolve and every surface reads clearly. Indoors, bounce two lamps off a white wall or ceiling rather than aiming them at the object. What you are avoiding is contrast: hard shadows get baked into the texture and confuse feature matching, and a shadow that moves between shots is worse. Never use flash, which repaints the lighting in every frame. The advanced move you see praised constantly in scanning forums is cross polarization, a polarizing film over the light and a polarizing filter on the lens, which strips reflections at the source. Overkill for a first scan, but it comes into its own once shiny objects start mattering to you.
3. Move around the object, not the object around you
Orbit slowly with the object filling about two thirds of the frame. Work in three rings: one low and looking slightly up, one level with the object, one high and looking down. Aim for 60 to 70 percent overlap between neighbouring shots, which in practice means a photo every few degrees and 60 to 100 photos for a typical object. Photogrammetry reconstructs the camera positions from the whole scene, so the scene must hold still. If you rotate the object by hand in a normal room, the background contradicts the object and the geometry falls apart.
4. The turntable trick, done properly
A lazy susan lets you sit still while the object rotates, but only if you strip the background of features first: a plain sheet of paper or cloth behind and beneath, nothing patterned anywhere in frame. With nothing to anchor on, the software believes the camera orbited and reconstructs happily. KIRI Engine’s auto object masking isolates the subject for exactly this, and Polycam offers a similar crop, which makes turntable captures far more reliable. A turntable in a cluttered room feeds the software two contradictory stories at once.
5. Keep the camera honest
Lock exposure and focus if your app allows it. Do not zoom, do not switch lenses mid-capture, and keep your distance to the object roughly constant. Move, stop, let it focus, shoot, move again; walking while shooting adds motion blur that quietly ruins feature matching. Shoot stills rather than video where the app gives you the choice; frames pulled from video carry compression and blur the software has to fight, and the minutes saved cost you at the mesh. For the underside, finish the first orbit, flip the object onto its side, and run a second capture. Several apps can align the two passes, or you can merge the meshes on the desktop afterwards.
6. Read the failure, fix the cause
Every bad scan is a diagnosis, and the fixes are mechanical once you can read the symptoms:
- Melted or blobby detail: too few photos or motion blur. Reshoot with more overlap and a slower orbit.
- Doubled or ghosted surfaces: the object shifted mid-capture. Fix it in place, or go full turntable with a clean background.
- Holes in the mesh: angles you never photographed, usually undersides and cavities. Add a low ring and a second pass.
- A model that bends like a banana: drift accumulating along an open path. Close the loop by ending the orbit exactly where it began.
- Shiny patches turned to craters: reflections moved between shots. Dull the surface with a light dusting of chalk or dry shampoo, or a dedicated scanning spray.
- The scan is the wrong size: photogrammetry has no sense of scale. Keep a ruler or any known-length object in frame and rescale against it afterwards.
What your phone cannot do
Accuracy is the widest gap, and it deserves real numbers. Published tests of smartphone photogrammetry land a careful capture of a shoebox-sized object somewhere between one and five millimetres of dimensional error, and the error is not evenly spread; scale drift can stretch one end of a model more than the other. Dedicated structured-light and laser scanners measure at 0.03 to 0.1 mm. That difference is irrelevant for a display piece and disqualifying for parts that must fit other parts, reverse engineering, or anything carrying a tolerance.
The surface blacklist never fully goes away either. Shiny, transparent, and very dark objects starve the camera of stable features, thin edges vanish below the resolution floor, and hair or fur comes back as a lumpy suggestion. Dedicated scanners fight some of the same physics, but their projected patterns cope far better, especially with plain surfaces that give photogrammetry nothing to grab.
And every phone scan needs cleanup before it prints: holes, floating debris, and geometry that is not watertight. None of it is difficult to fix. Our STL repair software guide walks through the free tools that handle all of it in minutes.
When your phone is not enough
Every phone scanning habit reaches the same moment: the scans keep working, and you start wishing they were sharper. Fine detail on objects under a hundred millimetres, mechanical parts, the surfaces the camera hates. Crossing that line used to cost four figures. In 2026 it costs less than a mid-range phone.
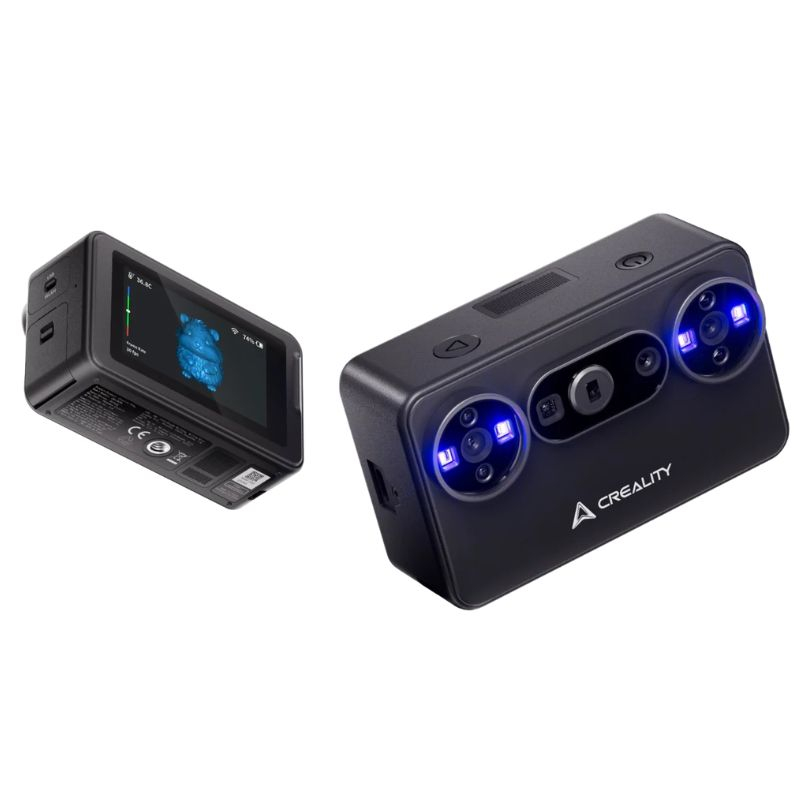
Creality Pika
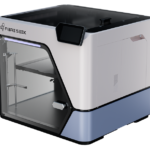
Creality's Pika, launched in July 2026, is a pocket scanner aimed at exactly this crossover. At 260 g with a 3-inch touchscreen and no PC required, the capture experience stays phone-like while the measurement stops being guesswork: a 7-line blue laser mode resolves 0.03 mm for small precise work, an infrared mode at 0.1 mm suits heads and larger objects and handles dark surfaces better than a camera does (very dark, matte objects can still want a dusting of powder), and onboard AI fills holes before you ever reach the desktop. Wi-Fi 6 moves the data; swappable batteries keep it off the mains. Two caveats from the first reviews: calibration only runs over USB, not Wi-Fi, and software has long been Creality's weak spot in scanning, so budget a learning hour before judging it.
We have a Pika on the test bench. Our hands-on review is in progress, and this card will link to it when it publishes.
Price: ~$699 (approximate; varies by bundle, sale period and region, click through for current pricing)
- 0.03 mm blue laser mode plus 0.1 mm infrared mode in one device
- Fully standalone: touchscreen, Wi-Fi 6, swappable batteries
- Phone scans still win on cost; the Pika wins on accuracy and the surfaces a camera hates
The Pika is the door we happen to be testing, not the only one. The entries below map the rest of the step-up bracket by budget, and they are deliberately not a ranking; the full ranking lives in our small format 3D scanners guide. These notes answer one question: what does each price buy you over your phone?
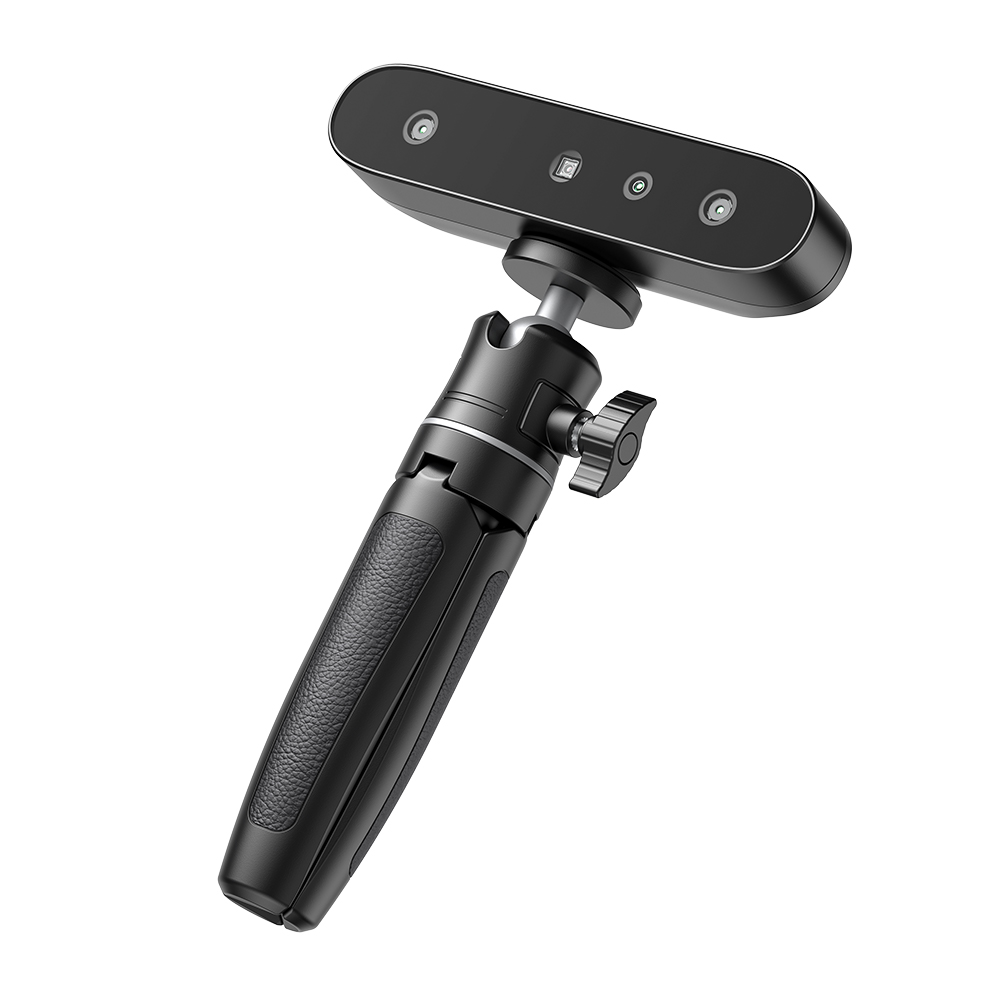
Creality CR-Scan Ferret SE Cheapest gateway
Its 0.1 mm accuracy will not catch engraved detail on tiny parts, but it captures dark and metallic surfaces without spray, and the anti-shake one-shot imaging makes handheld technique forgiving to learn. It is happiest on objects from shoe size upward: busts, props, household parts rather than jewellery.
Price: ~$299 (approximate; varies by bundle, sale period and region, click through for current pricing)

3DMakerpro Seal Lite Budget detail pick
Blue structured light resolves 0.02 mm accuracy on parts from 10 to 300 mm, which is the detail class phone photogrammetry cannot reach at any photo count. Budget some setup patience alongside the money; the documentation is thin and the first session runs longer than it should.
Price: ~$359 (approximate; varies by bundle, sale period and region, click through for current pricing)
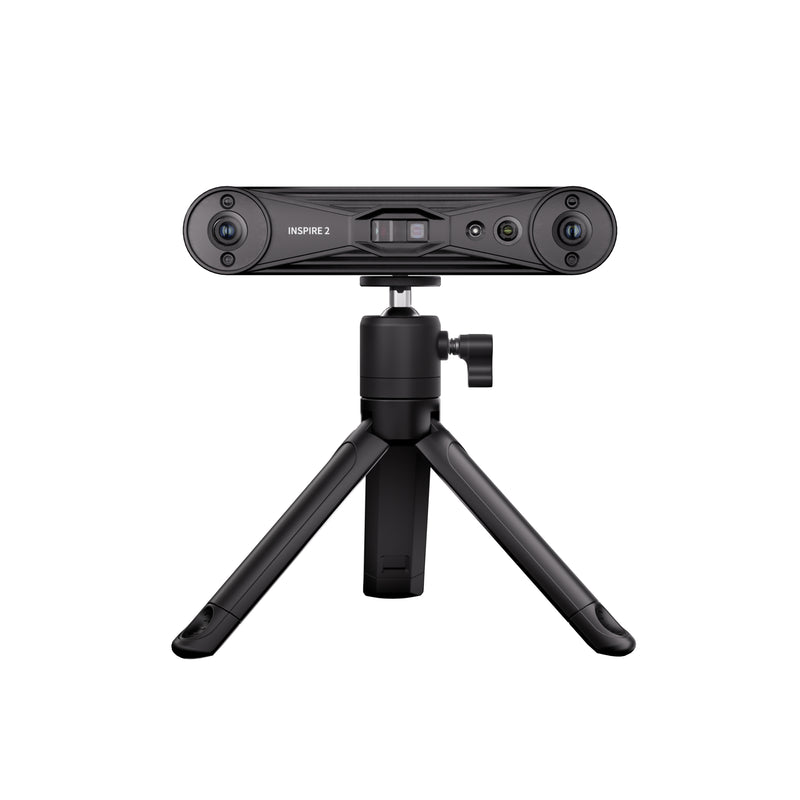
Revopoint INSPIRE 2 Balanced first serious scanner
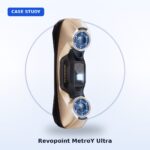
It pairs full-field structured light with an 11-line infrared laser mode, weighs 190 g, and keeps tracking in bright light up to 20,000 lux where most consumer scanners give up. For a phone scanner it is the most natural next step of the four: with the mobile kit it runs from your phone through the Revo Scan app, so the screen in your hand stays the same and only the sensor changes. We put one through a full hands-on review if you want the long version.
Price: ~$549 (approximate; varies by bundle, sale period and region, click through for current pricing)
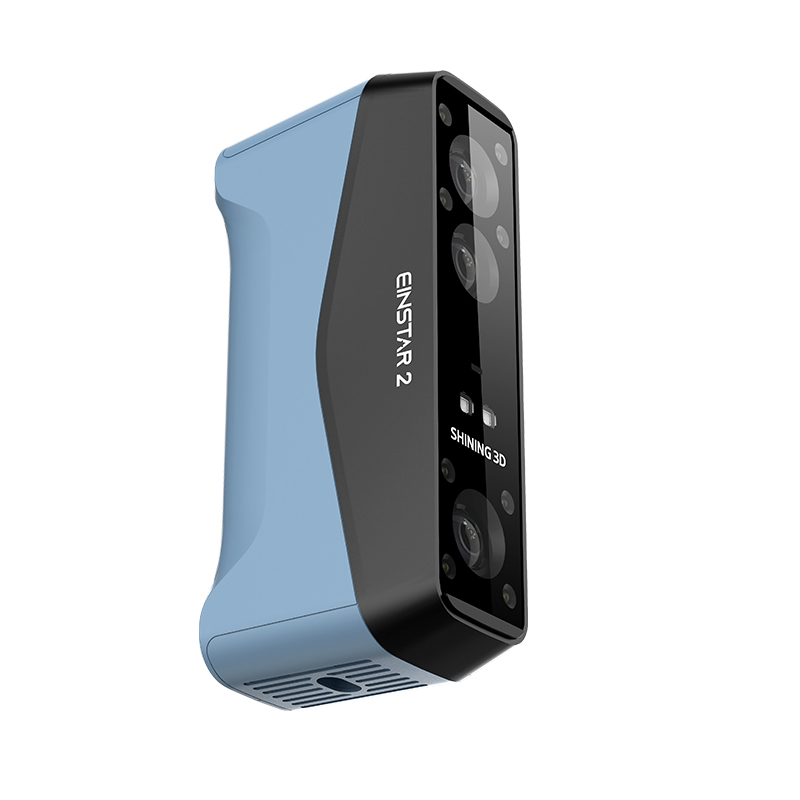
Shining3D Einstar 2 People and detail in one
The one card here that covers both ends of what a phone upgrader wants. Infrared mode handles people, furniture and other large subjects at 0.1 mm class accuracy, and a 17-line blue laser mode adds fine detail on small parts and reflective surfaces without spray, with built-in Wi-Fi and mature software from a company whose main business is professional metrology. The hidden cost is the computer: Shining3D specifies Windows 11 with an RTX 3060 and 32 GB RAM, which is a bigger step than the price difference if you have been scanning on a phone and a laptop. If you only ever scan large subjects, the original Einstar does that job for ~$759.
Price: ~$899 (approximate; varies by bundle, sale period and region, click through for current pricing)
None of these cards is the whole market. If small objects and fine detail are the point, our small format 3D scanners guide ranks that bracket properly, and the 3D scanners hub maps every tier from pocket devices to industrial metrology. Still unsure whether to buy at all? We also weigh scanning services against owning a scanner.
Print your scan
The loop closes at the printer, and it is shorter than it looks. Export as STL or OBJ (skip splat formats; slicers cannot read them) and give the mesh three checks before slicing. Scale first: photogrammetry guesses size, so measure one dimension of the real object with calipers and scale the model to match. Watertightness second: run the repair pass from our STL repair guide so the slicer sees a closed solid. Thickness third: a scan is a hollow skin, so let the repair tool make it solid, then hollow it deliberately in the slicer if you print resin.
From there it is an ordinary print job. Any current slicer handles a repaired scan, and closing the loop does not take an expensive machine; the picks in our best budget 3D printers guide print scanned pieces as happily as downloaded ones.
FAQ: 3D scanning with your phone
Is 3D scanning with your phone free?
Yes, though watch the export step. Scaniverse is free outright, exports included. KIRI Engine captures, processes and exports for free, with a 150-photo cap per scan on the free tier. Polycam captures and processes for free but exports only GLTF on the free tier; printable formats such as STL need its Basic plan. The phone in your pocket is the only hardware required, so the total cost of finding out whether you enjoy 3D scanning is still one afternoon.
Do I need LiDAR on my iPhone to 3D scan?
No. LiDAR ships only on the Pro line, every Pro and Pro Max since the iPhone 12 Pro plus iPad Pro models since 2020, and it mainly accelerates large captures such as rooms and furniture. Photogrammetry runs on any phone with a decent camera and resolves finer detail on small objects than LiDAR does. Treat it as a convenience, not an entry ticket.
How accurate is a phone 3D scan?
Expect one to five millimetres of error on a shoebox-sized object from a careful photogrammetry capture, with scale drift on top unless you calibrate against a known measurement. Dedicated scanners measure at 0.03 to 0.1 mm. Phone scans are fine for display pieces and rough duplicates; they are not fit for parts with tolerances.
Can I 3D scan with an Android phone?
Yes. A phone 3D scanner needs nothing more exotic than the camera, since photogrammetry does the work, and Polycam, Scaniverse, KIRI Engine, and RealityScan all run on Android. What Android lacks is a LiDAR equivalent in everyday handsets, which mostly affects room-scale capture speed rather than object scanning quality.
Can I 3D print a scan made with my phone?
Yes, after cleanup. Export STL or OBJ, repair the mesh so it is watertight, scale it against a real measurement, and slice as normal. The repair step is not optional; raw phone scans almost always contain holes and stray geometry that would confuse a slicer.
When should I buy a real 3D scanner?
When accuracy, small detail, or difficult surfaces start deciding your projects. If you need features under about half a millimetre, dimensions you can trust, or dependable capture of dark and reflective objects, dedicated hardware earns its price, and it no longer costs several thousand: entry scanners now start around $300, with capable dual-mode devices such as the Revopoint INSPIRE 2 and the Creality Pika in the $500 to $700 class.
Keep exploring the scanner guides
- The 3D scanners hub: the full market, mapped by budget and use case
- Best small format 3D scanners: the bracket to graduate into for fine detail
- The 3D scanner software guide: every capture, cleanup, and scan-to-CAD tool we rate
- Scanning service vs buying a scanner: for one-off jobs, hiring can beat both